Introduction
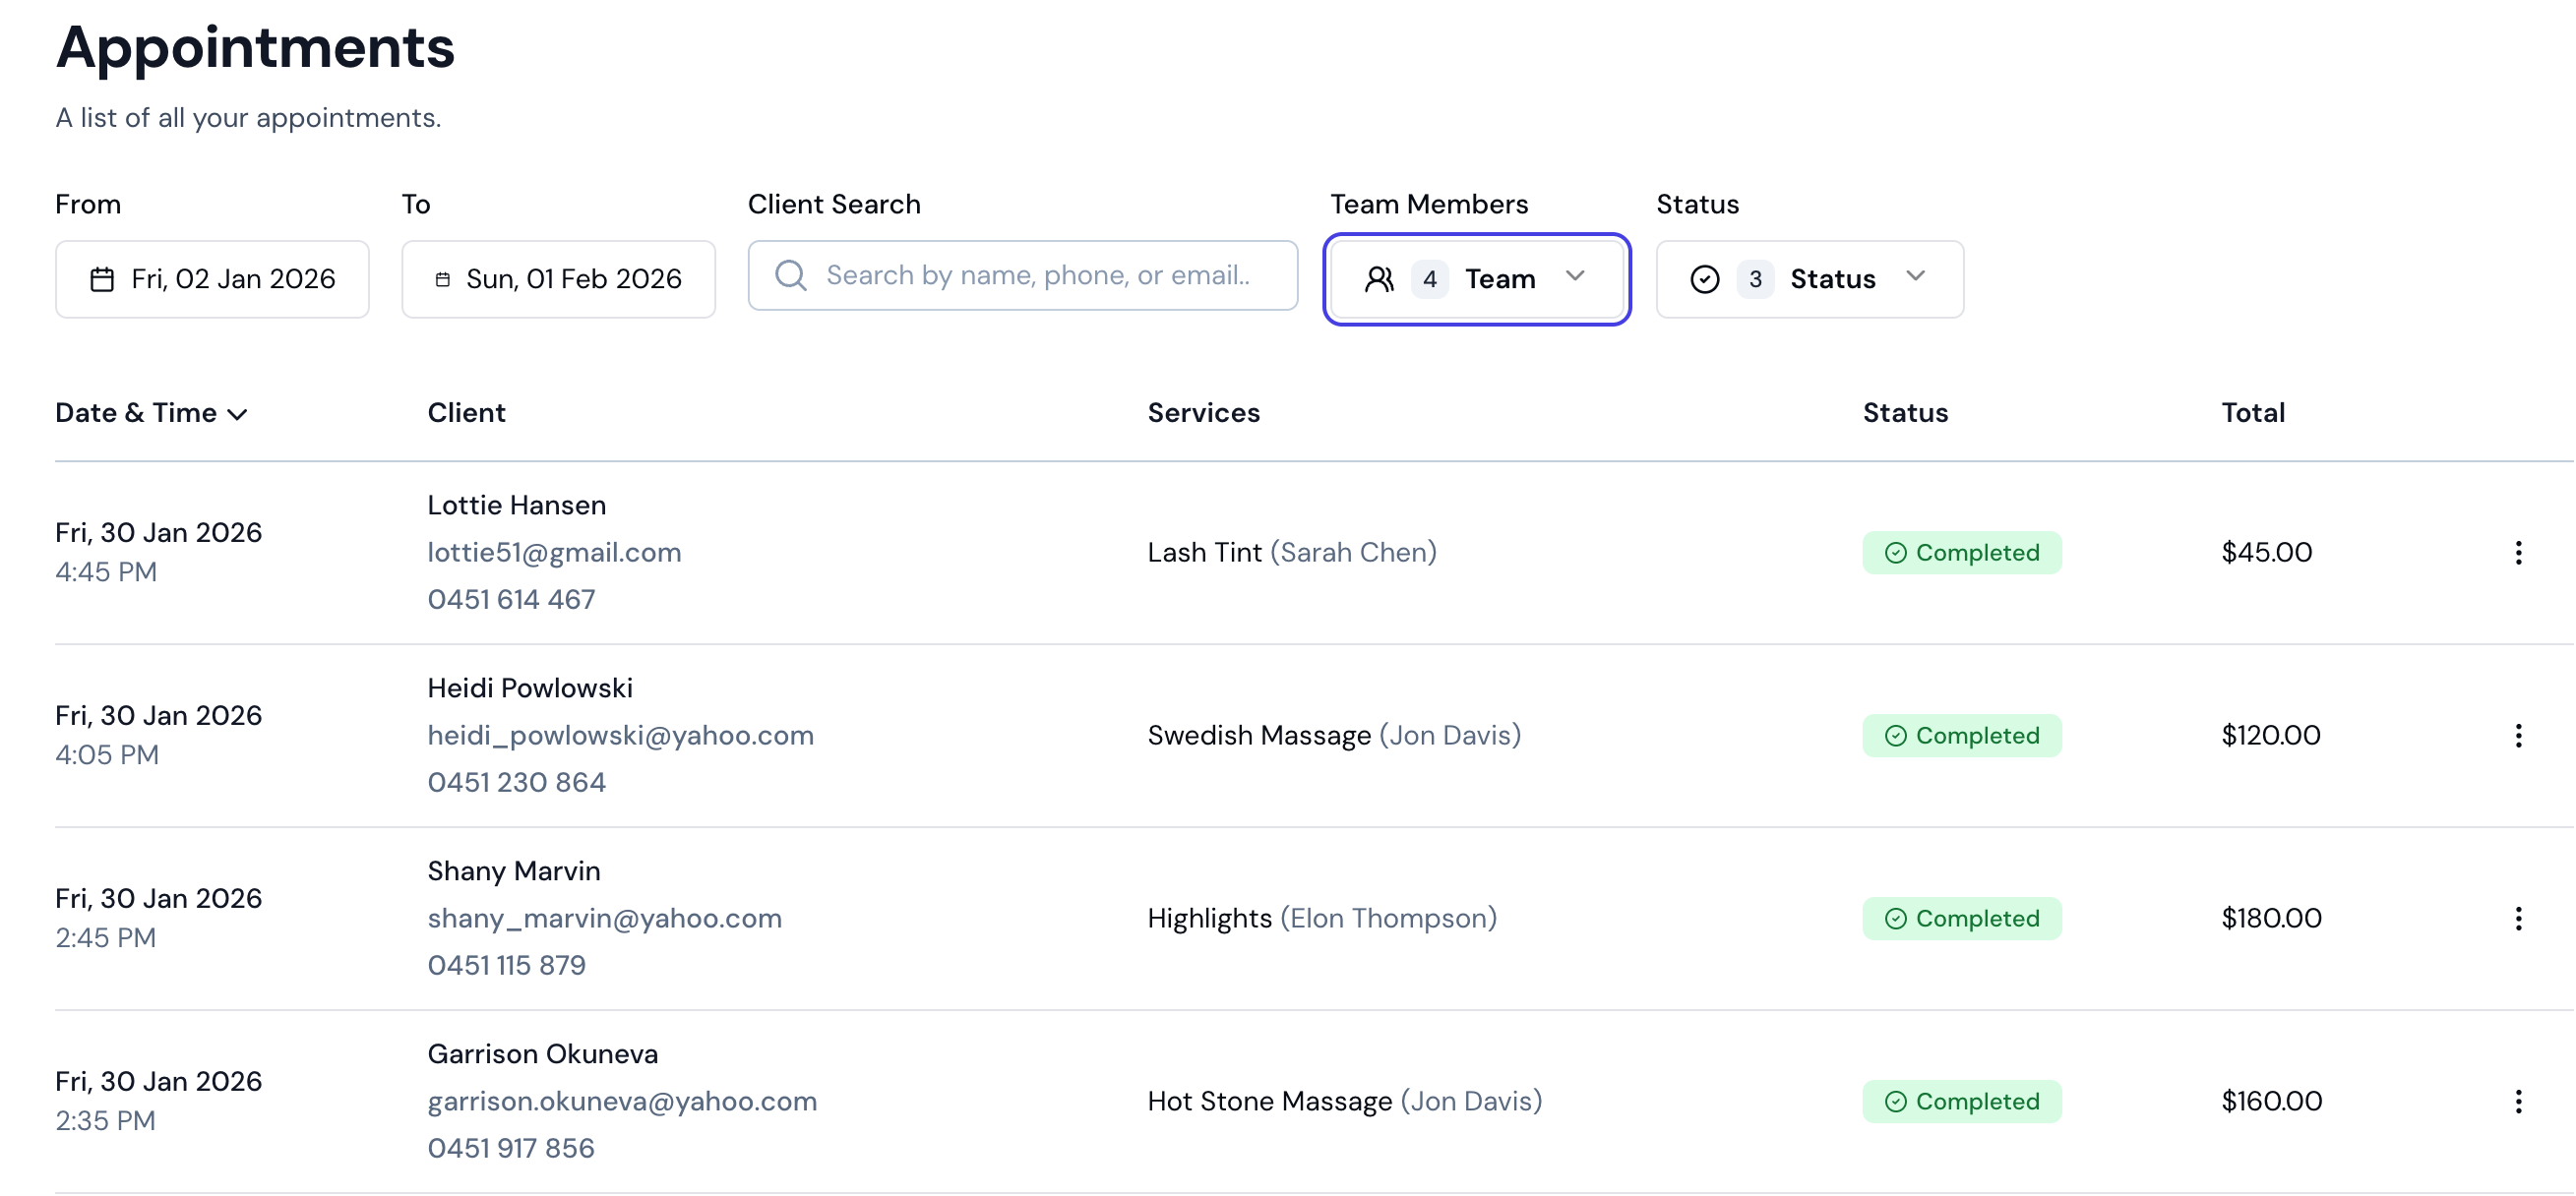
The Appointments page provides a powerful search and filter interface to find, view, and manage appointments across your entire calendar. Use advanced filtering by client, team member, status, and date range to quickly locate any appointment, even across large time periods.Key Features
- Advanced Search: Search appointments by client name, email, or phone number
- Team Member Filtering: Filter appointments by one or more team members
- Status Filtering: Filter by appointment status (Booked, Confirmed, Completed, Cancelled)
- Date Range Filtering: View appointments within custom date ranges using separate From and To date pickers
- Sorting Options: Sort by appointment date, client name, creation date, or status
- Pagination: Navigate through large result sets efficiently
- Quick Access: Click any appointment to view full details and make changes
- CSV Export: Export filtered appointments to CSV for reporting and analysis (includes add-on names per service)
- iCal Export: Export appointments to iCal format for importing into calendar applications
Accessing the Appointments Page
- Click Appointments in the main sidebar navigation
- The Appointments page opens with a default view showing appointments from the last 30 days
Search and Filter Options
Client Search
Search by Name, Email, or Phone:- Type any part of a client’s name, email address, or phone number in the search field
- Results update automatically as you type
- Search works across all fields simultaneously
- “John” - finds all clients named John
- “john@example.com” - finds the specific client with that email
- “0412” - finds all clients with phone numbers containing “0412”
Team Member Filtering
Filter by Team Member:- Use the team member dropdown to select one or more team members
- By default, all team members are selected (shows all appointments)
- Deselect team members to filter appointments to specific staff
- Useful for viewing individual team member schedules or performance
- Appointments for resource-only services (no team member assigned) appear when all team members are selected but are excluded when filtering by specific team members
- Click the team member dropdown
- Select or deselect team members to filter
- The appointment list updates automatically
Status Filtering
Filter by Appointment Status:- Booked: Appointments that require client confirmation or deposit payment (shows “Awaiting Deposit” when deposit is pending)
- Confirmed: Fully confirmed appointments ready to proceed
- Completed: Finished appointments
- Cancelled: Cancelled appointments
- Click the status dropdown
- Select one or more statuses to filter
- By default, Booked, Confirmed, and Completed are selected
- Deselect statuses to exclude them from results
- Select all four statuses to show everything
- Show only upcoming appointments: Select Booked and Confirmed only
- Review completed work: Select Completed only
- Check cancellations: Select Cancelled only
- View everything: Select all four statuses
Date Range Filtering
Set Custom Date Ranges: Use the separate From and To date pickers to define your date range:- From: Select the start date for your search
- To: Select the end date for your search
- The default range shows the last 30 days
- Click the From date field and select a start date from the calendar
- Click the To date field and select an end date from the calendar
- The appointment list updates to show only appointments within the selected range
- Use shorter date ranges for faster loading
- Use longer ranges when searching for specific historical appointments
- The default 30-day range balances performance and coverage
- The To date cannot be set earlier than the From date
Booking Source Filtering
Filter by Booking Source:- All (default): Show appointments from all sources
- Online: Show only appointments booked via your online booking page
- Business: Show only appointments created from the business dashboard
- All: Show all online bookings regardless of staff preference
- Requested staff: Show bookings where the client chose a specific team member
- Any staff: Show bookings where the client selected “any available”
- Online · Requested staff — the client chose a specific team member
- Online · Any staff — the client selected any available team member
Sorting Appointments
Available Sort Options:- Appointment Date: Sort by when the appointment is scheduled (newest or oldest first)
- Client Name: Sort alphabetically by client name
- Creation Date: Sort by when the appointment was created
- Status: Group appointments by status
- Click any column header to sort by that column
- Click again to reverse the sort direction
- The sort indicator (arrow) shows the current sort direction
- Appointments are sorted by appointment date (newest first) by default
Viewing Appointment Details
From the Appointments List:- Click any appointment row in the table
- The appointment details panel opens
- View full appointment information including:
- Client details
- Services and team members (or resource only, for resource-only services)
- Date and time
- Status
- Payment information
- Notes
- Approve / Confirm — For appointments pending approval or confirmation, a prominent button is shown in the action bar. For online bookings, this shows as “Approve Appointment”; for dashboard bookings, “Confirm Appointment”. You can also approve by clicking the status badge
- Edit appointment details
- Reschedule appointment — when editing, the Notifications section appears showing which reminders will be sent for the new time. If rescheduling to a time within a reminder’s window, you can choose to send it immediately
- Cancel appointment
- Checkout appointment (if not completed)
- View client profile
- Resend notification — Resend the booking confirmation, pending approval notice, deposit request, or checkout summary to the client. When a deposit is awaiting payment, the action label shows as “Resend Deposit Request”
- Send reminder — Manually send an appointment reminder to the client (available for Booked and Confirmed appointments)

Understanding Appointment Statuses
Booked Status
- Initial status for appointments requiring client confirmation or deposit payment
- Appointment is created but not yet confirmed
- When a deposit is required, the status badge shows “Awaiting Deposit” alongside “Booked”
- Client must confirm (via link in reminder messages) or complete deposit payment
- If client confirmation is enabled, appointments stay “Booked” until confirmed
- If a deposit is required, appointments stay “Booked” until the deposit is paid (deposit takes precedence over confirmation)
Confirmed Status
- Final status indicating appointment is fully confirmed
- Appointments are auto-confirmed when client confirmation is disabled (location setting)
- When client confirmation is enabled, appointments stay “Booked” until client confirms
- Online bookings with deposit become Confirmed when payment succeeds
Completed Status
- Appointment has been finished
- Checkout has been completed
- Payment has been processed
- Sale record has been created
Cancelled Status
- Appointment has been cancelled
- May include refund information if cancellation policy applied
- Cancelled appointments remain in the system for reporting
Marking a No-Show
When a client misses their appointment without cancelling, you can record it as a no-show. How to mark a no-show:- Open the appointment (from the Scheduler or Appointments list)
- Click Cancel
- In the cancellation dialog, select No show as the reason
- Confirm the cancellation
- No-show: The client did not attend and did not cancel in advance. Increments the client’s no-show count.
- Cancellation: The client (or your team) cancelled before the appointment time. Increments the client’s cancellation count.
Table Columns
The appointments table displays:- Client: Client name with contact information
- Date & Time: Scheduled appointment date and time
- Services: List of services booked (with add-on count indicator when add-ons are selected)
- Team Member: Assigned team member(s). For resource-only services, this column may be empty — the appointment is assigned to a resource instead
- Status: Current appointment status with visual badge
- Total: Total appointment price (includes add-on prices)
Pagination
Navigating Large Result Sets:- Use pagination controls at the bottom of the table
- Navigate page by page or jump to a specific page
- Adjust items per page if needed
- Total count shows how many appointments match your filters
Exporting Appointments
Bella Booking provides two export formats for appointments:CSV Export
Export appointments to a CSV file for reporting and analysis:- Set your desired filters (date range, team members, status, client search)
- Click the Export CSV button at the top of the table
- The CSV file downloads with all filtered appointments
- Open in Excel, Google Sheets, or any spreadsheet application
- Date & Time
- Client name, email, and phone
- Services
- Team members
- Status
- Total
iCal Export
Export appointments to iCal format for importing into calendar applications:- Set your desired filters (date range, team members, status)
- Click the Export iCal button at the top of the table
- An
.icsfile downloads with all filtered appointments - Import the file into your preferred calendar application
- Google Calendar
- Apple Calendar (macOS/iOS)
- Microsoft Outlook
- Any application supporting the iCal (.ics) format
- Appointment date and time
- Client name
- Services and team members
- Appointment duration
- Sync appointments to your personal calendar
- Share schedules with team members who don’t have Bella Booking access
- View appointments alongside personal events
- Backup appointment data in a universal format
Best Practices
Finding Specific Appointments:- Use client search for quick access to a specific client’s appointments
- Combine filters for precise results (e.g., specific team member + date range)
- Use status filters to focus on appointments needing attention
- Use shorter date ranges when possible for faster loading
- Clear filters when done to reset to default view
- Use specific searches rather than broad date ranges when looking for particular appointments
- Check “Booked” status appointments daily to monitor pending confirmations
- Review “Completed” appointments weekly for reporting
- Use “Cancelled” filter to review cancellation patterns
FAQs
Q: Can I search for appointments by service name? A: Currently, search is limited to client information (name, email, phone). Service filtering may be added in future updates. Q: How far back can I search for appointments? A: You can search any date range. However, very large date ranges may take longer to load. We recommend using date range filters for better performance. Q: Can I export appointments from this page? A: Yes! Bella Booking offers two export options:- CSV Export: Click the Export CSV button to download all appointments matching your current filters. The export includes date/time, client details, services, team members, status, and totals. Great for reporting and analysis in spreadsheets.
- iCal Export: Click the Export iCal button to download appointments in iCal format (.ics file). Import this file into Google Calendar, Apple Calendar, Outlook, or any other calendar application. The export respects your current filters (date range, team members, status).
Related Documentation
- Scheduler - Calendar view and appointment management
- Clients - Client management and profiles
- Settings - Online Booking - Online booking configuration
With the Appointments page, finding and managing appointments across your entire calendar is quick and efficient. Use the powerful search and filter tools to locate any appointment in seconds.