

Introduction
Connect your Stripe account and set the payment policies for online bookings on the Payments settings page. This is where you set up deposits, view transaction fees, and manage your Stripe Connect integration.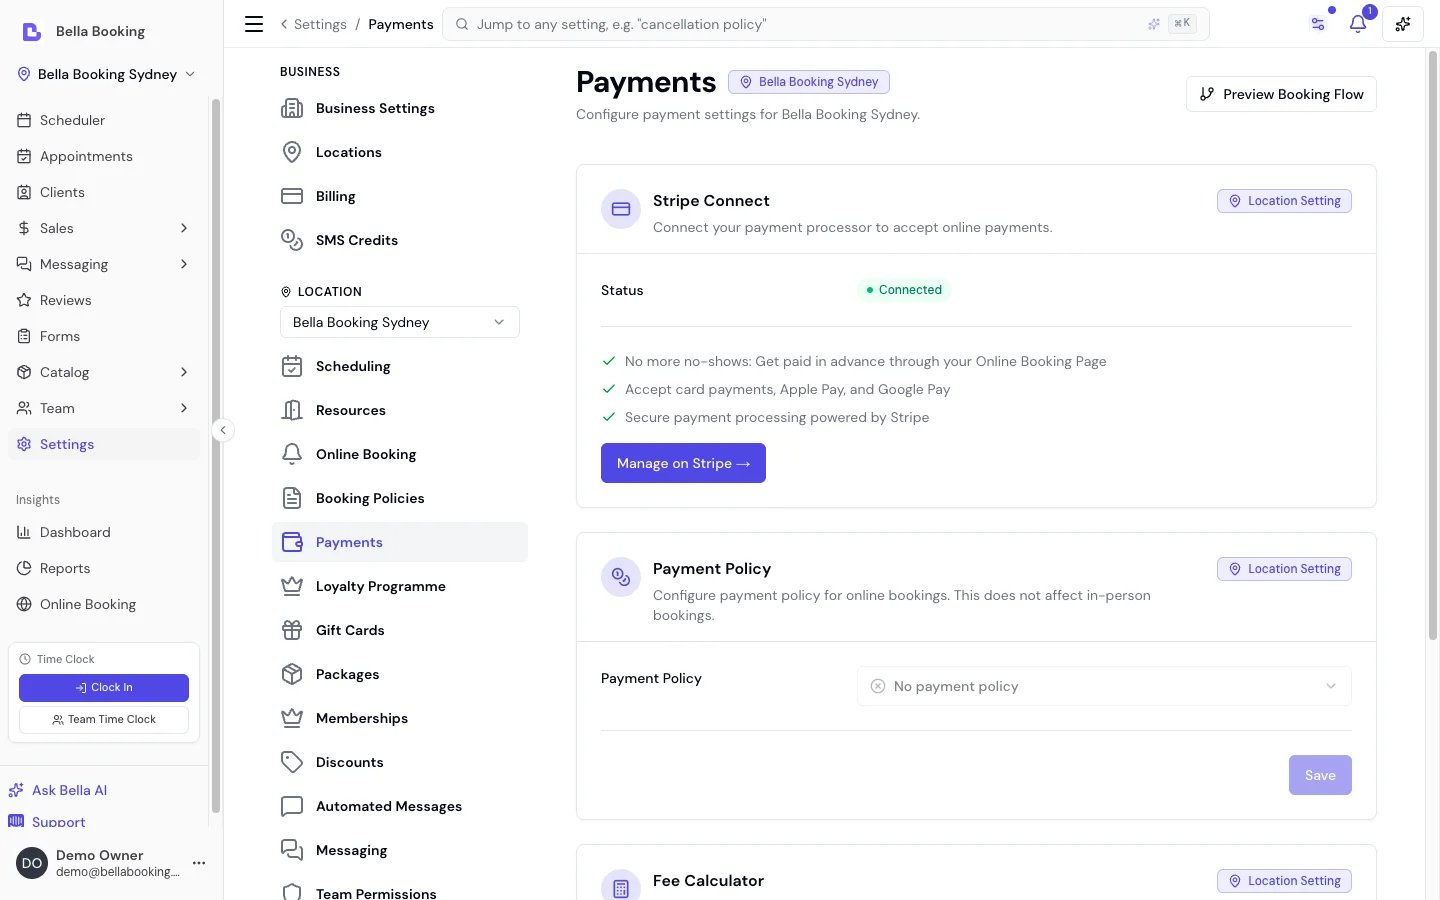
Plan Availability
Stripe Connect, deposits, saved cards (Card on File), Afterpay, and pass-through processing fees are available on every plan - Solo, Starter, and Professional. There are no plan restrictions on core payment functionality. Digital tipping is part of the review-and-tip flow on the client portal, which comes with client reviews - a Professional-plan feature (see Tips).Accessing Payment Settings
- In the main sidebar, go to Settings
- Select Payments from the settings menu (under the location settings group)
Stripe Connect
Stripe Connect lets you accept card payments from clients who book online. You connect your own Stripe account so funds go directly to your bank account.Connection Status
The status badge shows one of these states:- Connected (green): Your Stripe account is fully set up and ready to accept payments
- Setup incomplete (amber): You started connecting Stripe but haven’t finished its steps. Click Finish Stripe setup to pick up where you left off
- Restricted (amber): Your Stripe account requires additional verification. Click Stripe dashboard to complete it
- Not connected (grey): No Stripe account is linked yet
Connecting Stripe
If you haven’t connected yet:- Go to Settings → Payments
- Click Connect Stripe
- A confirmation dialog explains what will happen:
- Create a new Stripe Express account, or connect your existing one
- Redirect you to Stripe to verify your identity and business details
- Enable you to accept card payments through Bella Booking
- Click Continue to Stripe
- Complete the Stripe onboarding process (typically 5-10 minutes)
- You may need to provide business documentation (ABN for Australia, EIN or SSN for United States, IRD number for New Zealand) and bank account details
After Connecting
Once connected, the page shows:- Status: Connected (Setup incomplete if you haven’t finished Stripe’s steps, or Restricted if verification is required)
- Account ID: Your Stripe connected account identifier
- Finish Stripe setup button (while setup is incomplete): Reopens Stripe’s setup flow so you can finish the remaining steps
- Stripe dashboard button (once set up): Opens your Stripe Express dashboard in a new tab, where you can view payouts, transactions, and account settings
What You Can Do Once Connected
- Accept deposits when clients book online (fixed amount or percentage)
- Accept card payments, Apple Pay, and Google Pay through your online booking page
- Accept Afterpay / Clearpay payments for deposits, gift cards, and packages (see Afterpay / Clearpay)
- Let clients save cards for faster checkout (see Saved Cards & Card on File)
- Charge saved cards during appointment checkout (Card on File)
- Automatic refunds when clients cancel within the cancellation policy (see Cancellation Policy)
- Sell digital gift cards through your online booking portal (see Gift cards)
- Process recurring membership subscription payments (see Memberships)
- Accept payments for online product purchases through the Product shop
Account Balance
When Stripe is connected, an Account Balance card appears at the top of the Payments settings page showing a snapshot of your Stripe account finances:
This card provides a quick overview without needing to open the Stripe Dashboard. For detailed transaction history and payout breakdowns, click Stripe dashboard.
Payment Policy
Configure whether clients must pay a deposit (or save a card) to secure a booking. When you require a deposit, two more rows sit under it and decide what that deposit actually does: When a client books online (whether the appointment exists before the deposit is paid) and Deposit applies to (which bookings are asked for one at all). Both are covered below. Note: If Stripe is not connected - or you started connecting but haven’t finished Stripe’s setup - the payment policy options are unavailable. An alert in their place prompts you to connect Stripe (or finish its remaining steps) first.Policy Options
When a client books online
This row decides whether an online booking exists before its deposit is paid. It sits under Payment policy once Require a deposit is selected.
Under Pay to book:
- The client goes straight to a payment page headed Your time is held until the hold’s end time. Leaving the page doesn’t give the time back: the same page is waiting with a Pay deposit button if they come back before the hold ends (or Pay to confirm if Collect at booking took an appointment fee on that charge)
- Your team can’t book over a held time. The Scheduler blocks the save with “A client is paying for this time until 2:45 PM.” (the business’s own clock) until the hold ends
- Nothing is drawn on your calendar while a time is held, and no notification is raised
- If the client walks away, the hold ends quietly. Nothing is cancelled and no appointment message goes out, because nothing was ever booked. The lead lands on the Scheduler’s Incomplete bookings tab as Stopped at payment, where it gets the usual abandoned-booking follow-up: the bell, and the Incomplete booking reminder if you have it switched on
- The money arrives with the booking, so the client gets a confirmation instead of a Pending confirmation / deposit message
Pay to book applies when Require a deposit is the payment policy for your
location. A service that asks for a deposit through a service-level
override, at a location whose own policy is something else, is still
booked first and asked for the deposit afterwards.
Bookings taken through your own website with an API key have no payment page to be held on, so
under Pay to book they are created first and released 30 minutes later if the deposit is
unpaid.
Deposit applies to
This row decides which bookings are asked for a deposit at all:
How a deposit is collected depends on who made the booking:
- Bookings clients make themselves - the client pays on a payment page as part of booking.
- Appointments you create (under All bookings) - the appointment is held with a “Deposit required” indicator and the client is sent a payment link. You can instead record the deposit manually (cash, bank transfer), charge a saved card on file at the moment you create it, or waive or override the deposit for that one appointment.
When a card on file is required
Under the Card on file policy, an online booking from a client with no saved card doesn’t reach your calendar until they save one. There’s nothing to switch on. It’s what the policy does, and it has nothing to do with When a client books online, which governs deposits only.- No appointment is created. Bella holds that time for 30 minutes while the client saves a card, and the slot disappears from your booking page so nobody else can take it
- The client goes straight to a secure card form: Stripe’s hosted page, or a form on the booking page itself if you take payments through Square. Nothing is charged. The card is saved so you can charge a late-cancellation or no-show fee later if your cancellation policy applies
- Saving the card creates the appointment, already Confirmed, and the client gets the confirmation message
- Your team can’t book over a held time. The Scheduler blocks the save with “A client is saving a card for this time until 2:45 PM.” (the business’s own clock) until the hold ends
- Nothing is drawn on your calendar while a time is held, and no notification is raised
- If the client walks away, the hold ends quietly. Nothing is cancelled and no appointment message goes out, because nothing was ever booked. The lead lands on the Scheduler’s Incomplete bookings tab as Stopped at card, where it gets the usual abandoned-booking follow-up: the bell, and the Incomplete booking reminder if you have it switched on
- A client who already has a saved card is never asked again. That booking is created as usual and confirms straight away, unless you require approval
- A service-level override or a membership benefit that requires a card, at a location whose own policy is something else. That booking is created first and shows Awaiting Card until the card is saved
- A booking that also carries products you take full payment for at booking. One combined payment pays for the products and saves the card, so the appointment is created first
Bookings taken through your own website with an API key have no booking page to save a card on.
They are never held, and the card requirement never applies to them.
What happens when a client doesn’t finish paying
A payment policy holds an online booking until the client completes the payment step. Most clients finish straight away - and under the card-on-file policy a client who already has a saved card has nothing to do, so their booking goes through as usual (and confirms straight away unless you require approval). When someone doesn’t finish, what waits depends on your settings, and on two of these rows there is nothing on your calendar to wait at all:
Where a booking exists, the client is sent a link to finish and you’re notified so nothing sits
unnoticed. A card hold shows Approve and Decline right on the appointment, because approving
it gives up the saved card. A deposit hold uses the appointment’s own menu instead - Approve,
Record deposit, or Cancel.
Approving a held booking waives the payment step for that appointment. For a card-on-file hold
that means there’s no saved card to charge if the client later cancels late or doesn’t show, so
Bella asks you to confirm before it goes through.
Deposit Configuration
When “Require a deposit” is selected, configure the deposit type:
Additional fields:
- Deposit Amount: Shown when deposit type is “Fixed amount”. Enter the dollar amount clients must pay.
- Deposit Percentage: Shown when deposit type is “Percentage of total”. Enter a value between 0 and 100.
How Deposits Work
The steps depend on When a client books online. Pay to book:- Client selects services and, if enabled, a team member on your online booking page, then taps Book
- No appointment is created. Bella holds that time for 30 minutes and takes the client to a payment page: Stripe’s secure payment page, or a card form on the booking page itself if you take payments through Square
- The page is headed Your time is held until the end of the hold, and shows the deposit due today and the balance due at the appointment
- Client pays
- The appointment is created, already Confirmed, and the confirmation notification is sent. There is no Pending confirmation / deposit message, because nothing is pending
- The deposit is applied toward the total service cost - any remaining balance is due at the appointment
- Client selects services and, if enabled, a team member on your online booking page
- Appointment is created in “Booked” status with an “Awaiting Deposit” indicator
- Client receives a Pending confirmation / deposit notification (SMS and/or email) containing a deposit payment link
- The email shows a “Pay deposit & confirm” button (amber) with the deposit amount. If Collect at booking took an appointment fee, the button says “Pay to confirm”. The SMS includes a link to the appointment details page where the client can pay
- Client clicks the link, logs in (or registers with their phone number), and completes payment via Stripe
- On successful payment, the appointment status changes to “Confirmed” and a confirmation notification is sent
- The deposit is applied toward the total service cost - any remaining balance is due at the appointment
{{SelfServiceLink}} variable (and the SMS channel is enabled for that reminder). See Automated Messages.
The deposit payment link is sent via the Pending confirmation / deposit
notification, which can be configured as SMS, email, or both (see Automated
Messages). However, the client portal uses
phone-based login (SMS verification code). If a client does not have a
phone number, they can receive the link via email but will not be able to log
in to complete payment. In this case, add a phone number to the client’s
profile or collect the deposit manually using the Record deposit action.
Auto-Cancel Unpaid Deposits
This is the release valve for Book now, pay within a window: the booking exists, so something has to hand the time back when the deposit never comes. Under Pay to book the 30-minute hold does that job and the row is hidden. You can release a booking automatically when its deposit is not paid within a window you choose:- Under Payment policy (Settings > Payments, or the Payments & deposits card on Settings > Booking policies), set When a client books online to Book now, pay within a window, then open the Auto-cancel unpaid row beneath it
- Choose from: 30 minutes, 1 hour, 2 hours, 4 hours, 8 hours, 12 hours, 1 day, 2 days, 3 days, or 7 days
- Choose Don’t auto-cancel (the default) to keep unpaid bookings until you act
- The countdown starts when the appointment is booked (created) - it is not counted back from the appointment date. An appointment booked six weeks ahead with a 7-day window is cancelled one week after it was booked if the deposit is still unpaid, not one week before the appointment
- With Stripe and a window of up to a day, the payment page is given the same deadline, so a client who leaves it without paying has the booking released the moment the page expires. 30 minutes is the shortest window because that is the shortest life Stripe allows a payment page; choose it if you want an abandoned checkout to release the time straight away. The booking page tells the client until when their time is held
- With Square, and for windows longer than a day, Bella checks for unpaid deposits every 15 minutes and releases the booking on the first check after the window ends
- Released appointments are cancelled with reason “Deposit Expired”
- The window applies only to bookings clients make themselves (your booking page, or your own website through the API). Appointments you or your team create still ask the client for the deposit, but they are never cancelled automatically: they show as awaiting deposit until you confirm them, waive the deposit, or cancel them yourself
- Under Pay to book, one kind of booking still arrives unpaid: a booking taken through your own website with an API key, which has no payment page to be held on. It is created first and released 30 minutes later if the deposit is unpaid, whatever window you had set before
- It applies to bookings made after you switch it on (or change its length). The bookings already on your calendar at that moment are never touched, and neither are appointments imported from another system or appointments that have already started
- An appointment with a waived deposit is never auto-cancelled, and for a recurring series only the first appointment follows the window
- As a safeguard, a single check will not release more than a handful of bookings at one business at once; if it ever would, nothing is released and the Bella team is alerted instead
- Cancelled appointments do not count toward the client’s cancellation record
- The client receives a cancellation notification (email and/or SMS) so they can rebook if desired
There is no way to set a deposit deadline relative to the appointment date
(e.g. “pay by one week before your appointment”). If you want to chase unpaid
deposits as the appointment approaches, use the appointment reminders instead -
while the deposit is unpaid, the reminder email includes the Pay deposit
button automatically, and the first reminder can be set as far out as 7 days
before the appointment (see Automated Messages).
If a client’s card is declined or they close the payment page, the booking
stays until the window ends and the client can retry from the same deposit
link in the meantime. With no window set, nothing cancels an unpaid booking
but you.
Deposit Precedence Over Confirmation
When both deposits and client confirmation are configured (under Book now, pay within a window, and on the appointments your team creates; under Pay to book an online booking is created only once the deposit is paid, so it is confirmed from the start):- Deposit takes precedence - the appointment stays “Booked” until the deposit is paid, even if appointment confirmation is disabled in Booking policies
- Payment acts as confirmation - once the deposit is paid (online or recorded manually), the appointment is automatically confirmed
- Recording a manual deposit (e.g. cash or bank transfer) also confirms the appointment automatically
- The client receives the deposit payment link instead of a simple confirmation link
Service-Level Overrides
Each service can override the location-level payment policy. Open the service in the Service Catalogue, go to its Booking policies tab, and scroll to the Payment section at the bottom:- Use default: Apply the location payment policy
- No deposit: No upfront payment for this service
- Require deposit: Specify a fixed amount or percentage for this service
- Card on file: The client saves a card to secure the booking - no upfront charge
Adjusting the Deposit on One Appointment
Service and membership overrides are standing rules. For a one-off adjustment, the Scheduler’s appointment form gives you direct control at the moment of booking. When you create (or rebook) an appointment for a client and your policy requires a deposit, the form shows a Deposit required box with the calculated amount, where you can:- Change the amount - the Deposit amount field is pre-filled with the calculated deposit and fully editable; type any figure up to what the client owes (after any discounts) to use it for this booking only - a deposit can never exceed what’s owed, so a larger figure is capped. The payment link, reminders, and the client’s payment page all use your adjusted amount
- Waive it - flip Waive deposit - auto-confirm now to skip the deposit entirely; the appointment confirms immediately. Waiving only decides what the client is asked for up front: if you change your mind later, Record deposit on the appointment still takes one
- Charge it now - if the client has a saved card on file, tick Charge deposit to saved card now to collect the deposit at the moment you create the appointment. If Collect at booking is taking the fee on that charge, the toggle says Charge to saved card now
The deposit box appears on the create / rebook form. Rebooking from the calendar
confirm uses the policy default; tap Review in form to waive or change the amount.
The edit and reschedule forms have no deposit controls. A custom amount you typed at creation stays
pinned (it can only shrink, if the booking’s total later drops below it), but a
standard calculated deposit still tracks the appointment’s services:
editing an unpaid-deposit appointment’s services changes the amount the client is asked
to pay. After creation, use Record deposit on the appointment to collect (or
part-collect) the deposit manually. The box is only shown to team members whose role
can view client financials.
Deposits and Cancellation Refunds
When a client cancels an appointment that had a deposit paid via Stripe, the refund is calculated based on your Cancellation Policy:- Sufficient notice (cancelled before the cancellation period): The deposit is refunded automatically through Stripe. A non-refundable appointment fee taken at booking is left out unless you include it (see Appointment fee)
- Insufficient notice (cancelled within the cancellation period): The cancellation fee is applied to the deposit. For example, if the deposit was 50 refund and $50 is forfeited
- Business override: A team member can manually override the calculated refund amount when processing a cancellation
Saved Cards & Card on File
Clients can save their payment cards for faster checkout. Once saved, these cards can be used by both the client when booking online and by a team member when checking out an appointment in the Scheduler.How Clients Save Cards
Clients manage their saved cards through the online booking portal:- The client logs in to your online booking page
- From the user menu (top right), they select Payment methods
- On the Payment methods page they can:
- Add a card - click Add a card to be redirected to a secure Stripe-hosted page where they enter their card details
- Remove a card - click the delete icon next to a saved card and confirm removal
Clients can save a card at any time - they do NOT need to pay a deposit first.
The Payment methods page lets them add a card purely for future convenience
(faster checkout, tip payments, or if you later need to charge a cancellation
fee). This uses Stripe’s secure SetupIntent flow - no payment is taken when
saving the card.
Clients must have an account and be logged in to manage payment methods. The
Payment methods page is only available when Stripe Connect is configured for
your location.
How Cards Get Saved
Cards are always saved through a client-initiated action - a team member cannot add a card on the client’s behalf. Your team can, however, send the client a link to add one: the Copy/Send add-a-card link action on a client (in Clients) opens the portal’s Payment methods page for them, and Send pre-writes an SMS or email with the link.
Once a card is saved through any of these paths, a team member can then charge it from the dashboard (checkout, deposit recording, rebooking).
Card on File at Checkout
When recording a deposit, checking out an appointment, or creating a sale, a team member sees the same four payment options:
The Card on File option always shows the card’s brand, last four digits and expiry date so you can see before charging whether the card is expiring soon or already expired. An expired card shows a red Expired label and cannot be charged; a card expiring within two months shows an amber Expiring label so you can prompt the client to update it.
When Card on File is selected:
- If the client has multiple saved cards, a dropdown appears so you can pick which one to charge
- The action button label updates to reflect the choice - for example “Charge Visa ····4242” or “Charge Visa ····4242 for Deposit”
- Clicking the action button processes the payment through Stripe automatically
- The sale or deposit is recorded with the payment details for reporting and refunds
Refunds for Card on File Payments
When a sale was paid using Card on File, refunds are processed automatically through Stripe:- Navigate to the sale in Sales and click Refund
- Enter the refund amount and reason
- The refund is submitted to Stripe and returned to the client’s original card
- Both full and partial refunds are supported
Payment Links (Pay Your Balance Online)
Ask a client to pay their appointment’s remaining balance online instead of at the counter - useful when they’ve already left, or you simply prefer they pay without you handling a card. Open the appointment (Scheduler, appointment page, or the ⋯ menu on the Appointments list), choose Send payment link, and pick SMS or email. The client signs in to their booking account, taps Pay now and pays by card - and the appointment checks itself out, creating the sale exactly as the till would. See Payment links for the full walkthrough, when the action is available, what the client sees, and the answers to the common questions.Fee Calculator
The fee calculator helps you understand how much you’ll receive after fees for a given deposit amount.Fee Structure
Regional Stripe Fees
Stripe fees are based on the connected account’s country, not the platform’s. The fee calculator automatically uses the correct rates for your region.
Tax & GST
If your business is registered for GST, VAT or sales tax, Bella captures the tax component on every sale, shows it on the receipt (a tax invoice), and reports it per period for your BAS or VAT return. Turn it on in Settings → Tax.- Register once, per location. Set your rate and label (GST / VAT / Sales tax). Bella suggests sensible defaults from your business’s country.
- Prices already include tax. Enter your prices tax-inclusive - Bella backs the tax out of the price and shows it on the receipt without changing the total. (Tax-added-on-top pricing is coming soon.)
- Per-service and per-product control. Every service and product is taxable by default when you’re registered; mark any of them exempt.
- Tax collected report. Insights → Reports → Tax collected shows taxable sales, exempt sales, tax collected and tax refunded per period.
Your Bella subscription is separate. GST is applied to what you pay
Bella - your subscription and SMS-credit invoices are issued by Bella with
GST added automatically where required (handled by Stripe). That tax sits on
Bella’s invoices to you, separate from the tax you capture on the payments you
take from your own clients.
Pass Processing Fees to Clients
By default, Stripe and platform fees are deducted from the amount you receive. With Pass Processing Fees enabled, processing fees are added as a separate line item on the client’s payment - so you receive the exact service price. This option is not available in countries that ban card surcharging - the United Kingdom now, and Australia from 1 October 2026 (when the Reserve Bank of Australia’s surcharge ban takes effect) - where Bella hides the setting entirely and never adds a fee. Australian businesses can pass fees up to that date, but only up to their cost of acceptance; a reminder of the upcoming ban is shown until then, after which Bella stops passing card fees automatically and removes the setting.Appointment fee is separate. A fixed appointment fee is a method-neutral bill line included in the prices clients see and charged once per service-bearing appointment. It is not a card processing surcharge, does not switch off with card-surcharge country restrictions, and cannot be used as a replacement for Pass processing fees.
Enabling Fee Passing
- Go to Settings → Payments
- Under Pass Processing Fees, toggle the switch to on
- Click Save
What Clients See
When fee passing is enabled, clients see a Processing Fee line item added to their payment total - both on the online booking checkout page and when charged via Card on File. For example:How the Fee Is Calculated
The processing fee is calculated using an inverse formula so that, after Stripe deducts its fees from the total charged amount, you receive the exact service price. For example, with Australian Stripe fees (1.7% + A$0.30) and the 1% application fee:- Service price: $100.00
- Gross charge = (0.30) ÷ (1 − 0.017 − 0.01) = $103.04
- Processing fee shown to client: 100.00 = $3.04
- After Stripe and platform fees are deducted from 100.00**
Service-Level Override
Each service can override the location-level fee passing setting. Configure this in the Service Catalogue under each service’s settings:- Use default: Apply the location-level fee passing setting
- Pass fees: Always add the processing fee for this service, regardless of the location setting (except in countries that ban surcharging - the United Kingdom now, and Australia from 1 October 2026 - where fees are never passed and this override is hidden)
- Absorb fees: Never add the processing fee for this service, regardless of the location setting
Where Fee Passing Applies
Processing fees are added when a payment is processed through Stripe:- Online booking deposits - the fee is calculated on the deposit amount
- Card on File charges - the fee is added when a team member charges a client’s saved card at checkout
- Gift card purchases - the fee is added to the gift card total at checkout
- Tips - the fee is added to the tip amount
Deposit and Checkout Fees Are Separate
When a client pays a deposit online and then pays the remaining balance at checkout, two independent processing fees are charged - one for each Stripe transaction:- At booking - A processing fee is calculated on the amount charged at booking (the deposit, plus any appointment fee collected at booking) and charged in that Stripe Checkout session. This fee is stored against the appointment’s deposit record.
- At checkout - A processing fee is calculated on the remaining balance (everything left on the bill after what was prepaid at booking, including any appointment fee that was not collected at booking) and charged via Card on File. This fee is stored on the sale record.
The deposit fee (8.42) appears on the sale. They are tracked and refunded independently.
Refunds
When a payment that included a processing fee is refunded, the full amount - including the processing fee - is returned to the client. The Stripe processing fees on the original transaction are not refunded to you by Stripe.Legal considerations: Some jurisdictions ban or restrict surcharging card
payments. Bella automatically blocks fee pass-through in countries where it is
prohibited - the United Kingdom now, and Australia from 1 October 2026,
when the Reserve Bank of Australia’s ban on card surcharging takes effect. In
a banned country the setting and any per-service override are hidden and fees
are never passed; where a ban is scheduled (Australia), a reminder is shown
until the ban date, after which Bella stops passing card fees automatically
and removes the setting. Where surcharging is still permitted, check the laws
and card network rules for your region before enabling: in Australia, until
the ban, surcharges must not exceed the cost of acceptance. Ensure the
processing fee shown to clients accurately reflects your actual costs.
Digital Tipping
Allow clients to leave tips for team members after their appointment. Tips are processed securely through your connected payment account and go directly to you.Enabling Tips
- Go to Settings → Payments
- In the Tipping section, set Tipping to On
- Apply the change
How Tipping Works
- After an appointment is completed, the client opens Leave a review & tip on the appointment in the online booking portal
- The tip prompt shows a card for each team member who provided the service
- The client selects a preset amount (10, or $20) or enters a custom amount
- The tip is paid on a secure checkout page
- Your business receives a notification via the notification centre, email, and/or SMS, and the team member who provided the service is also notified
Tip Notifications
When a client leaves a tip, your business receives a Tip received notification. This can be configured in Automated messages with customisable email and SMS templates. Template variables include{{TipAmount}} and {{TeamMemberName}}.
Afterpay / Clearpay (Buy Now, Pay Later)
Allow clients to pay using Afterpay (or Clearpay in the United Kingdom) - a buy now, pay later service that splits payments into 4 interest-free instalments. Clients pay over time; you receive the full amount upfront through Stripe.Eligible Countries
Afterpay is available for businesses in the following countries:
The Afterpay section only appears on the Payments settings page if your business is in an eligible country. Stripe also requires that both your business and the client are in the same country.
Enabling Afterpay
- Go to Settings → Payments
- Under Afterpay (or Clearpay in the UK), toggle the switch to on
- Click Save
Where Afterpay Appears
When enabled, Afterpay appears as an additional payment option alongside card on Stripe Checkout pages for:- Online booking deposits - clients choose between card and Afterpay when paying a deposit
- Gift card purchases - Afterpay is available on the gift card checkout page
- Package purchases - Afterpay is available on the package checkout page
What Clients See
When a client reaches the Stripe Checkout page, they see both Card and Afterpay as payment options. If they select Afterpay, Stripe shows the instalment breakdown (e.g., 4 payments of 120.00 deposit). The client is redirected to Afterpay to approve the purchase, then returned to your booking page. No changes are needed to your online booking page - Stripe handles the Afterpay UI automatically.How It Works for Your Business
- You receive the full amount upfront - Afterpay pays you immediately through Stripe, and collects the instalments from the client over time
- Stripe processing fees apply - Afterpay transactions are subject to Stripe’s Afterpay processing fees (separate from standard card rates). These fees are set in your Stripe merchant agreement
- If “Pass Processing Fees” is enabled, the processing fee shown to clients is calculated at standard card rates. If the client chooses Afterpay, you absorb the difference between card and Afterpay processing rates
- Refunds work the same way - cancellation refunds and sale refunds are processed through Stripe regardless of whether the client paid with card or Afterpay. Stripe handles reversing the Afterpay instalments automatically
Cards and Afterpay
When a client pays with a card on a checkout page that also offers Afterpay, their card is still saved for future use (Card on File) as normal. When a client pays with Afterpay, no card is saved - Afterpay is a separate payment method that does not store card details through Bella Booking.Card terminals - name your machines
Run one or more EFTPOS machines alongside Bella? Name them at Settings → Card terminals so every in-person card payment says which machine took it, and each machine balances at end of day.- Record only. Naming a machine never changes how money moves - payments are still recorded as Card (Manual), processed on your own machine, never charged by Bella.
- At the till: with one or two named terminals, each machine appears as its own row in the payment picker; from three, choosing Card (Manual) asks which machine. The same names appear when recording a deposit, topping up client credit, selling a gift card, and correcting a sale’s collection method.
- At end of day: the Card terminal takings card on the Sales summary report shows what each machine took, refunded and netted - attributed to the day the machine actually took or refunded the money, so it lines up with each terminal’s own settlement. Two things it doesn’t net yet: a refunded deposit and a reversed client credit top-up - allow for those on the days they occur. The sales CSV also carries Card terminal and Terminal amount columns.
- On receipts: never. Terminal names are for your balancing only; the client’s receipt still reads Card (Manual).
- Archive, don’t delete. Archiving a machine removes it from the picker; historical payments keep its name.