Last verified: June 2026
For the export, log in to your Fresha partner account at partners.fresha.com. You need a role with export permission (for clients, the “Can download clients” permission). For the import, you’ll need the Create clients permission in Bella Booking.
Part 1 — Export from Fresha
You will export three things — your clients, your service menu, and your products — each as a CSV file.1. Export your clients
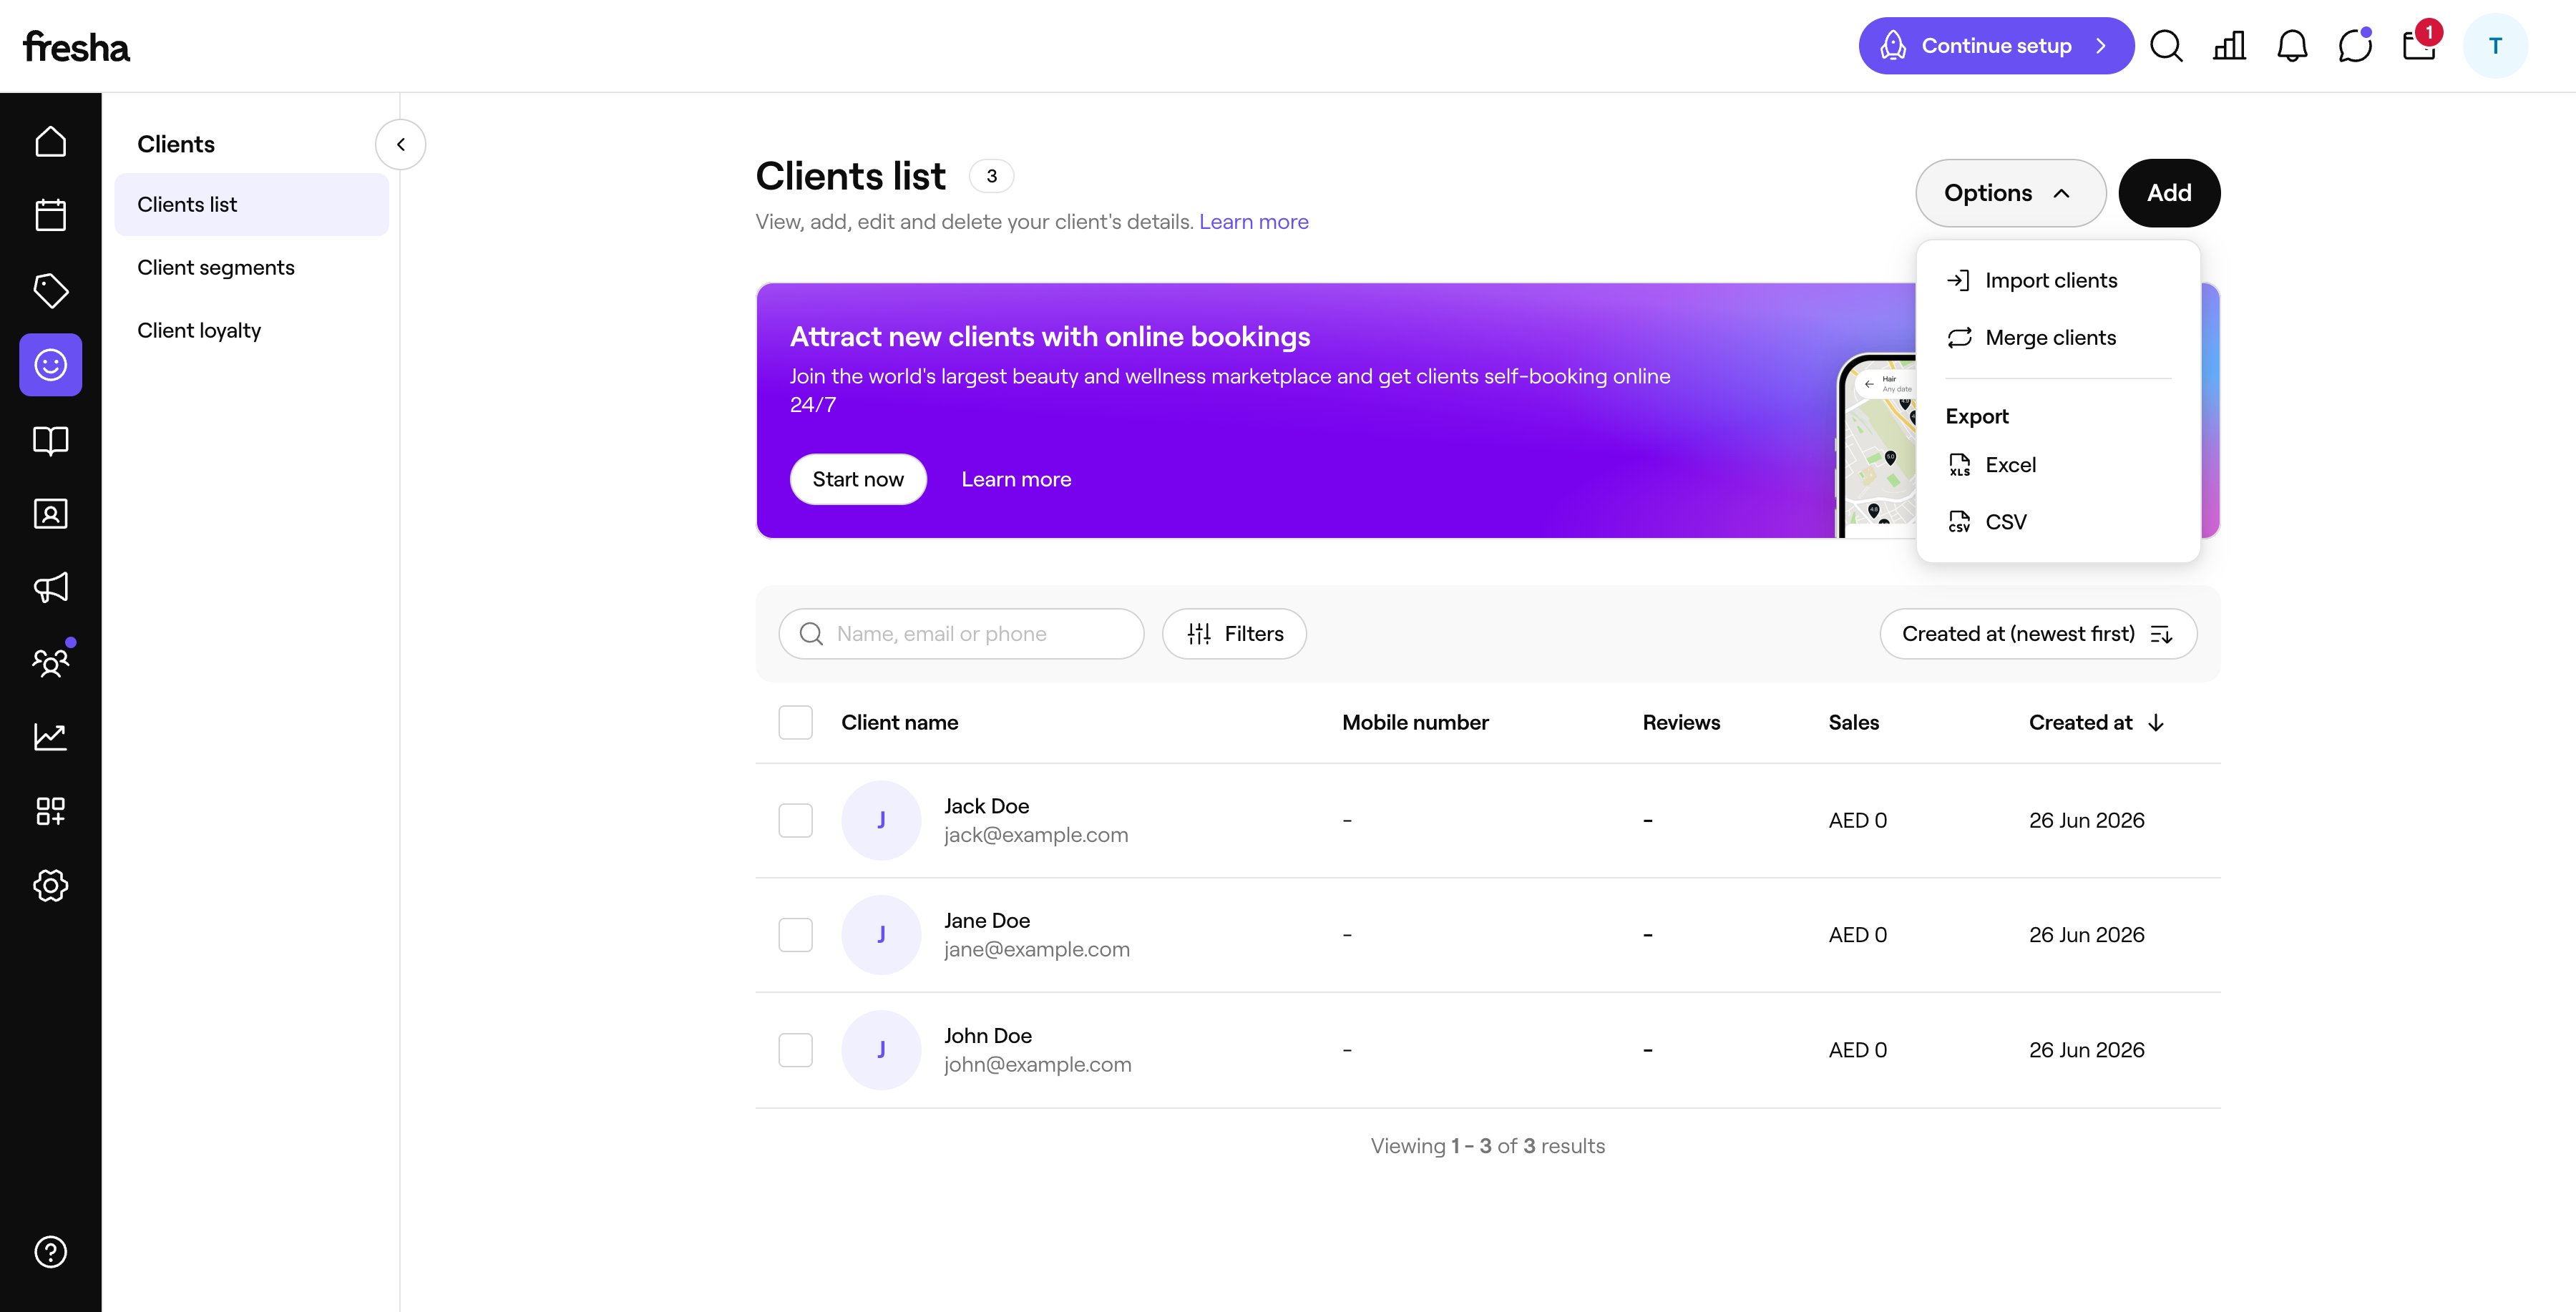
- Go to Clients > Clients list.
- Click Options in the top right.
- Under the Export heading, choose CSV (or Excel).
2. Export your service menu
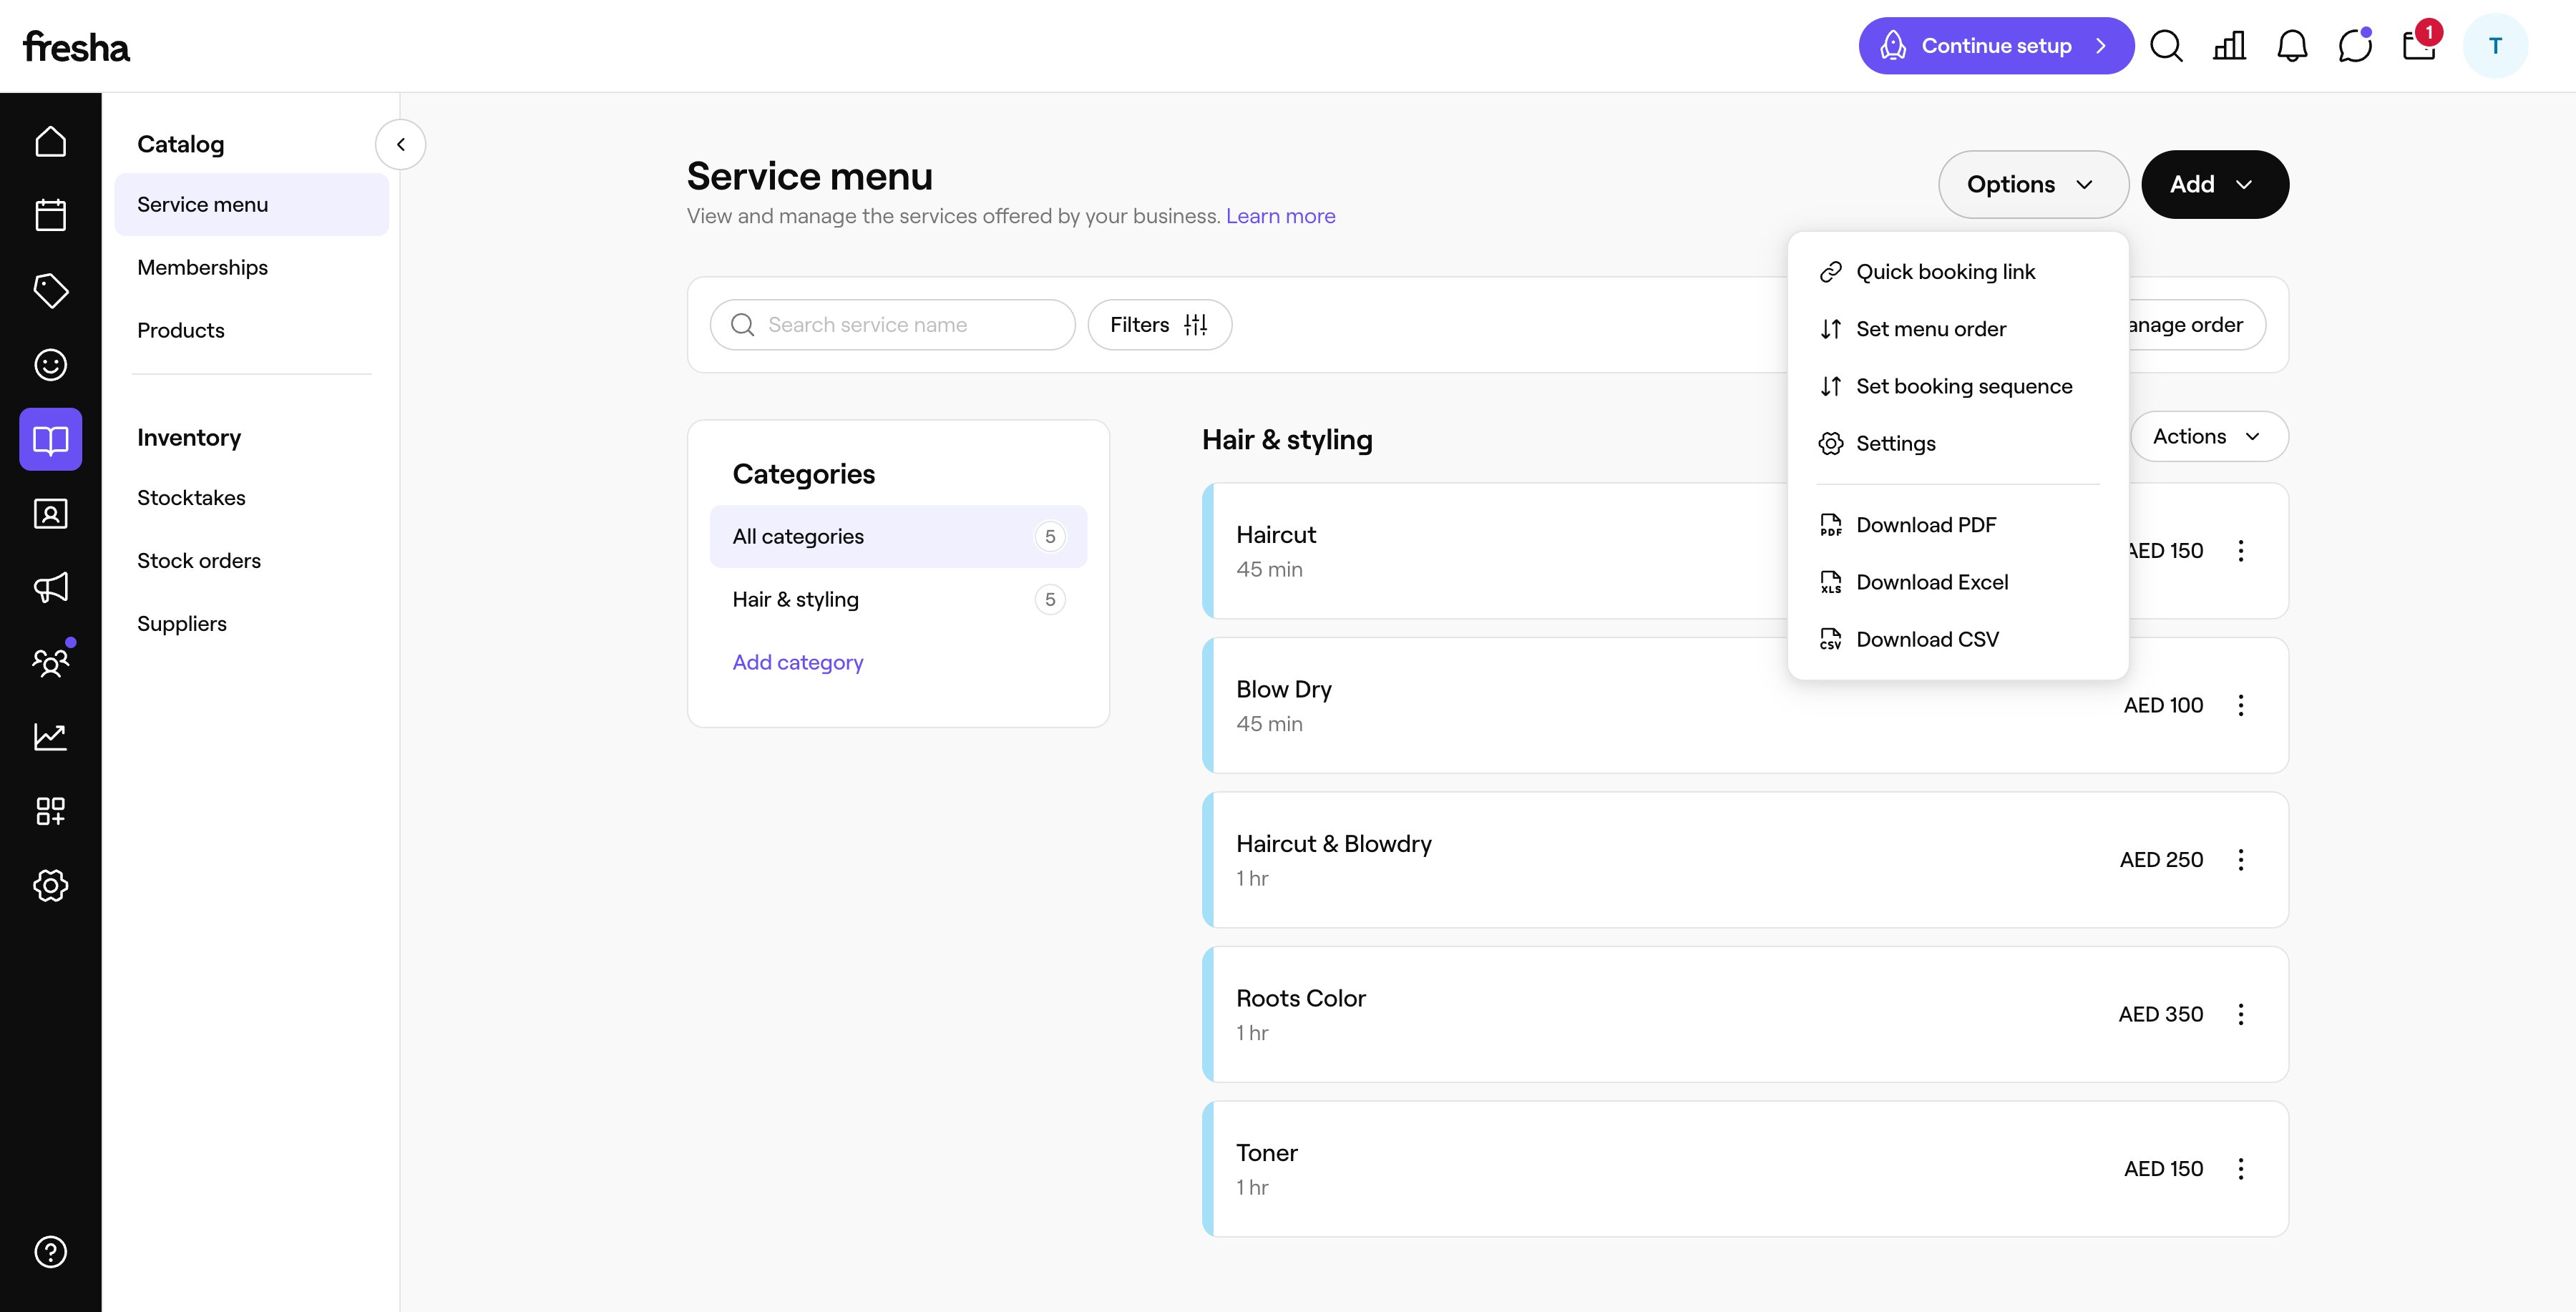
- Go to Catalog > Service menu.
- Click Options in the top right.
- Choose Download CSV (you can also pick Download Excel or Download PDF).
3. Export your products
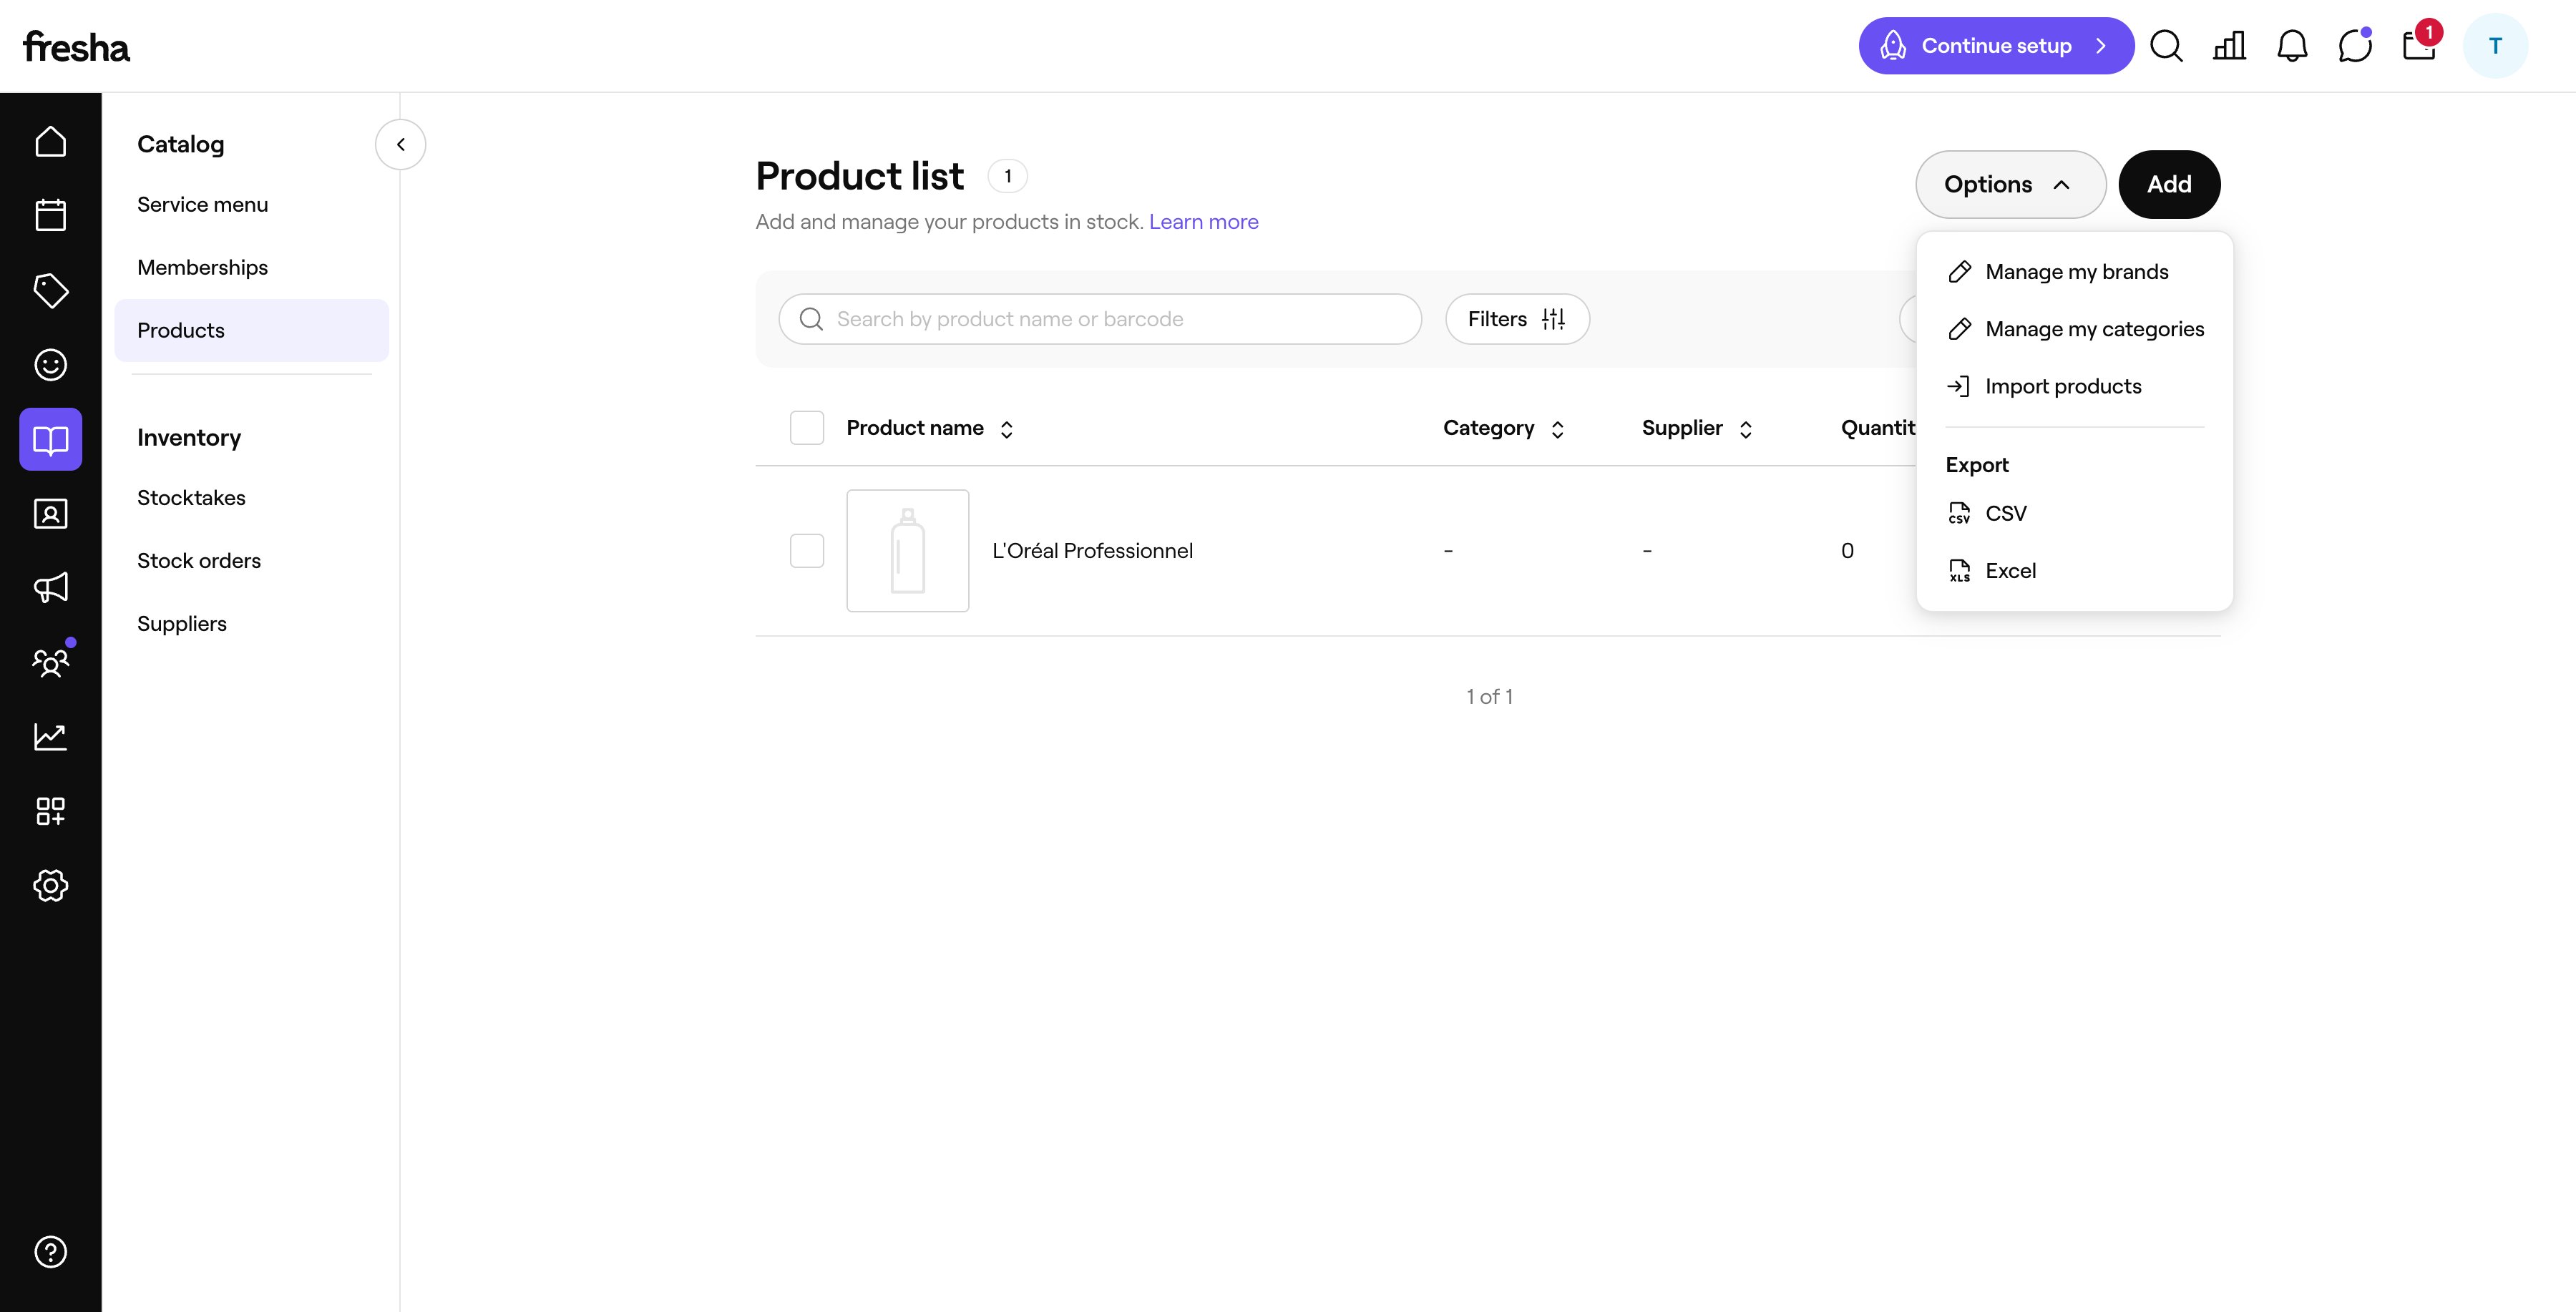
- Go to Catalog > Products.
- Click Options in the top right.
- Under the Export heading, choose CSV (or Excel).
Export quick reference
| Export | Where | Steps |
|---|---|---|
| Clients | Clients > Clients list | Options → CSV |
| Service menu | Catalog > Service menu | Options → Download CSV |
| Products | Catalog > Products | Options → CSV |
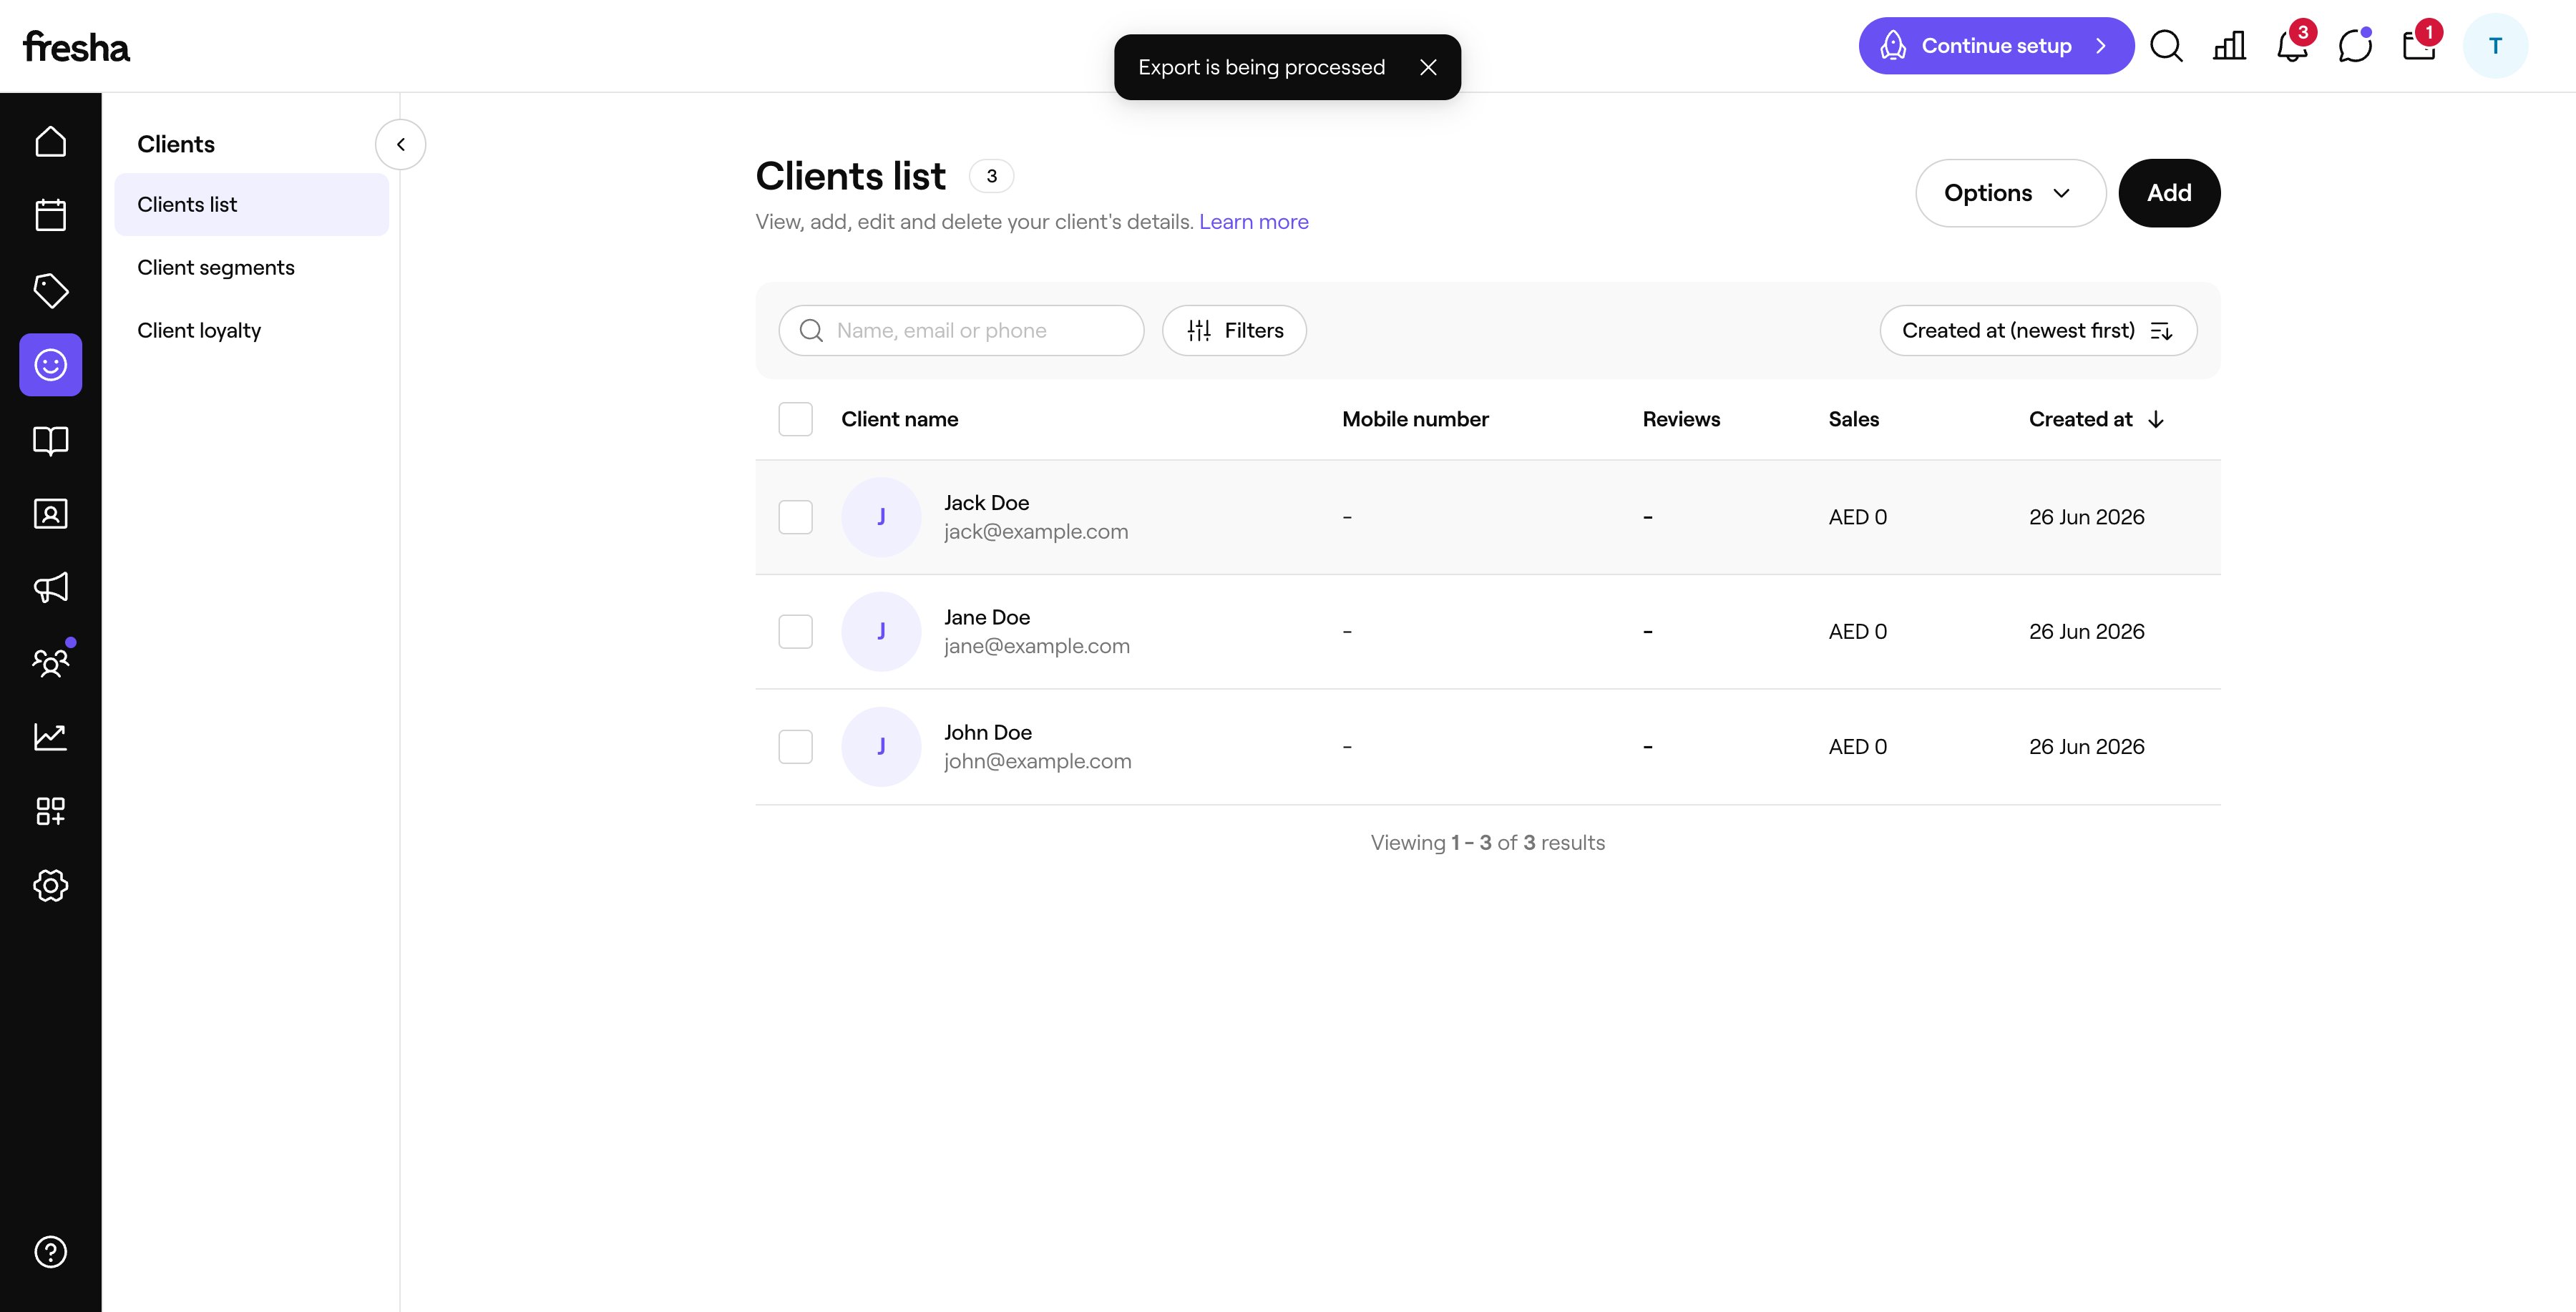
Clients and products are processed and emailed to you (look for the “Export is being processed” banner). The service menu downloads directly. If an emailed export doesn’t arrive, check your spam folder and confirm your account email under Settings.
Part 2 — Import your clients into Bella Booking
Now bring your clients CSV (the file Fresha emailed you) into Bella. The guided wizard matches your columns automatically, checks every row, and helps you resolve duplicates and fix invalid records before anything is saved.What Bella recognises
The columns in your file map across automatically — Bella matches common header names, so there’s usually nothing to adjust. The only required field is First name.| Column | What it’s for |
|---|---|
| First name (required) | The client’s first name. Rows without one can’t be imported. |
| Last name | The client’s surname. |
| Used for confirmations, reminders and marketing (with consent). | |
| Mobile number | Validated against your business’s country. Both local and full international (+) formats work. |
| Date of birth | Powers birthday greetings. Day/month order follows your business country. |
| Client notes | Free-text notes about the client. |
| Main Client Email / Relationship Type | Links a person to another client as a family member (see below). |
1. Open the importer
On the Clients page, click Import (top right, next to Add client). You’ll need the Create clients permission.
2. Upload your file
Drag your CSV onto the upload area, or click Choose a CSV file.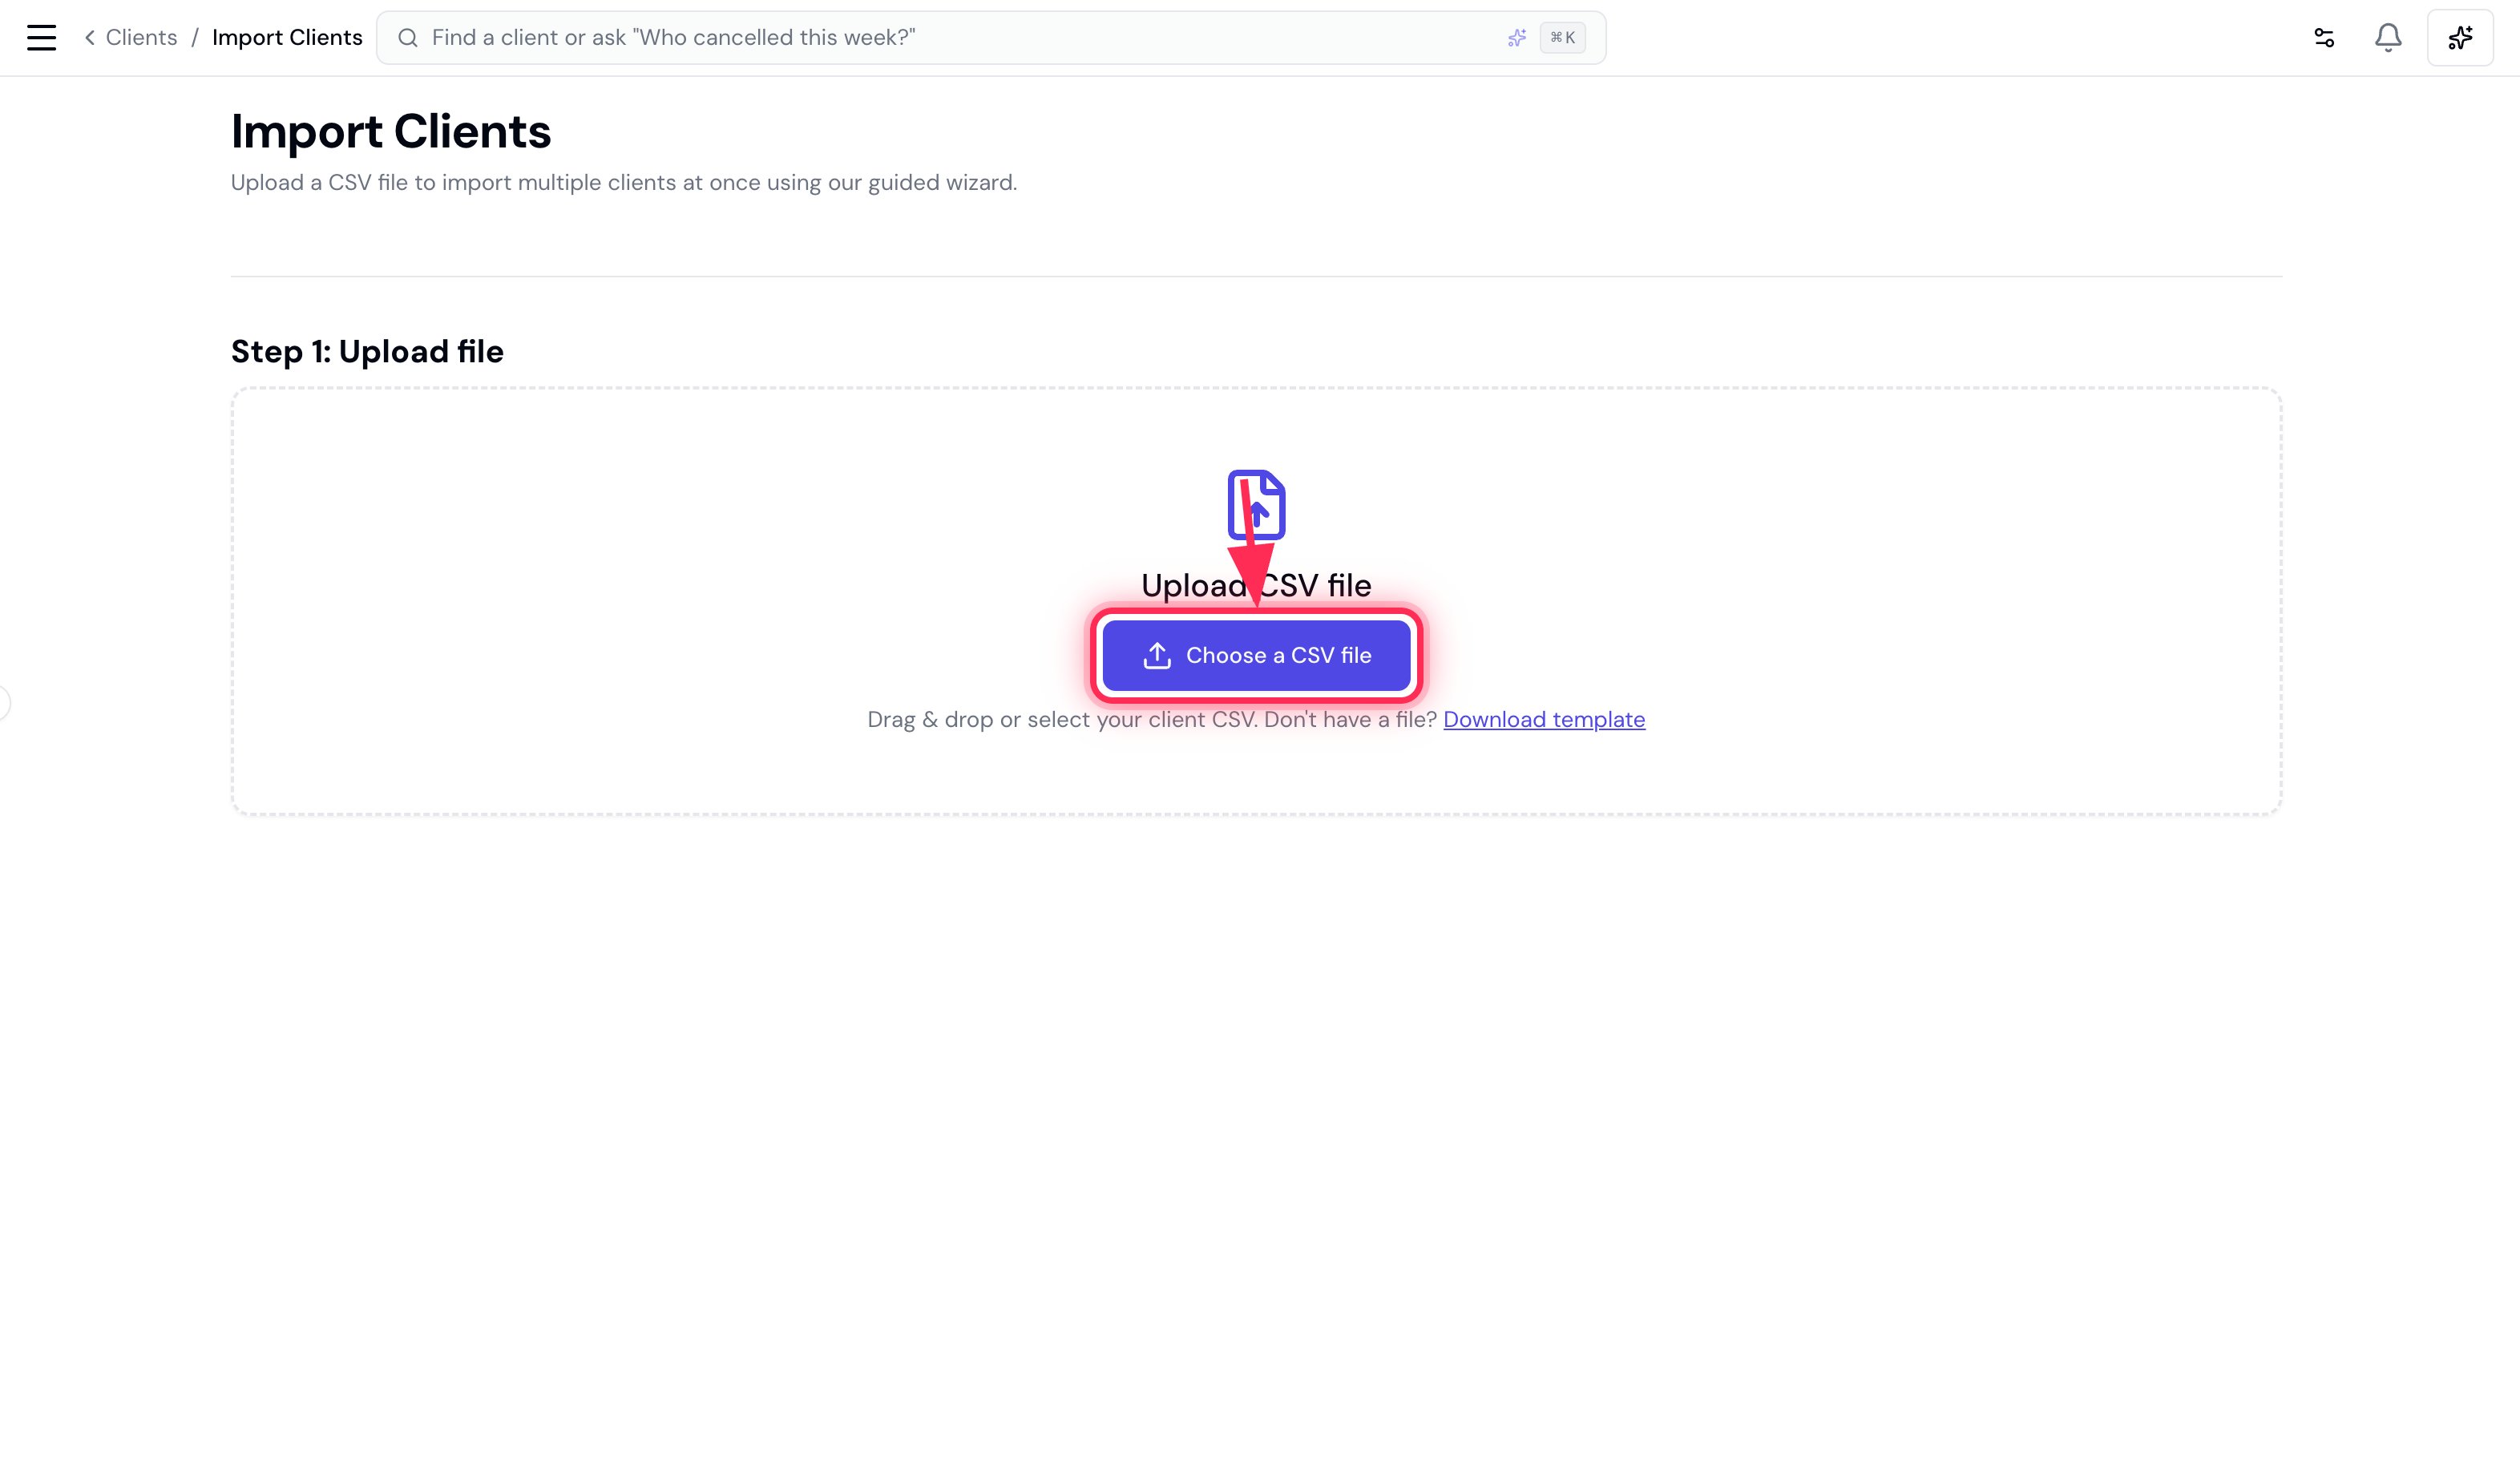
3. Review column matching
Bella auto-matches each of its fields to a column in your file. Check the matches, adjust any with the dropdowns if needed (the only one that must be set is First name), then click Next.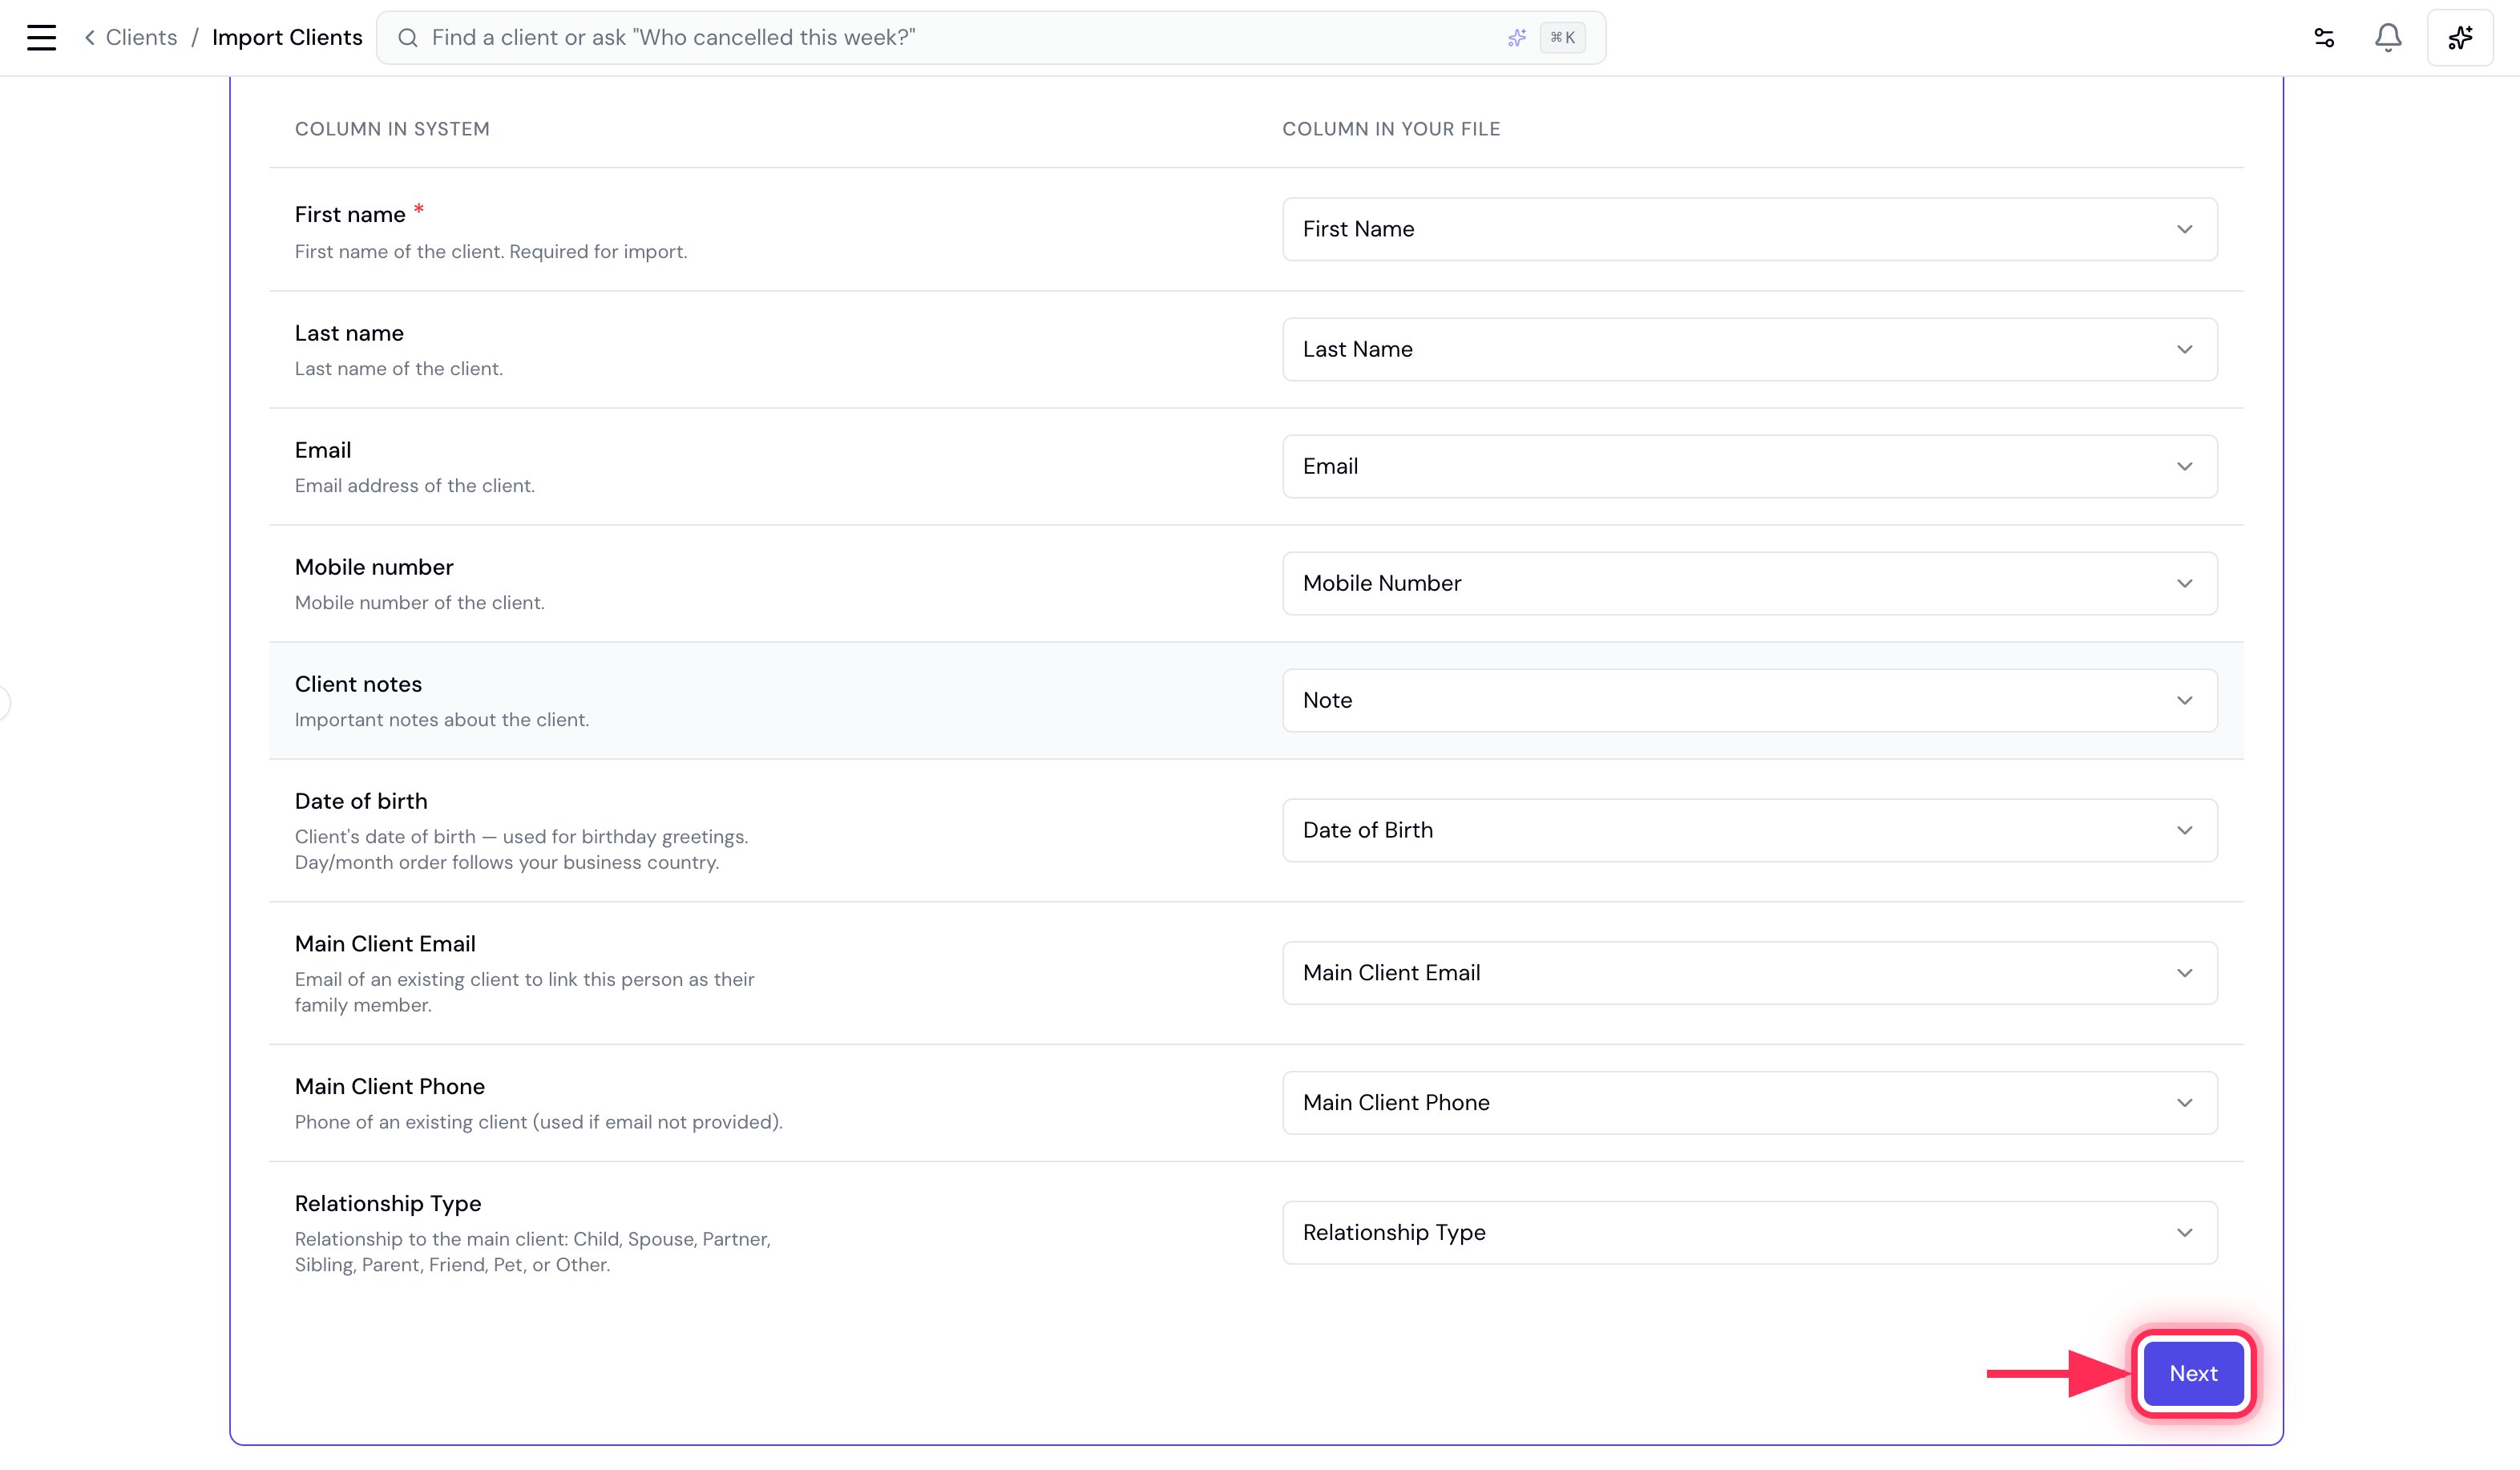
4. Preview and resolve
Bella checks every row against your existing clients and against itself, then splits the results into two tabs:- Ready to import — clean rows that will be added.
- Needs attention — duplicates and invalid rows. Nothing here is imported until you sort it out, and each row joins Ready to import the moment it’s resolved.
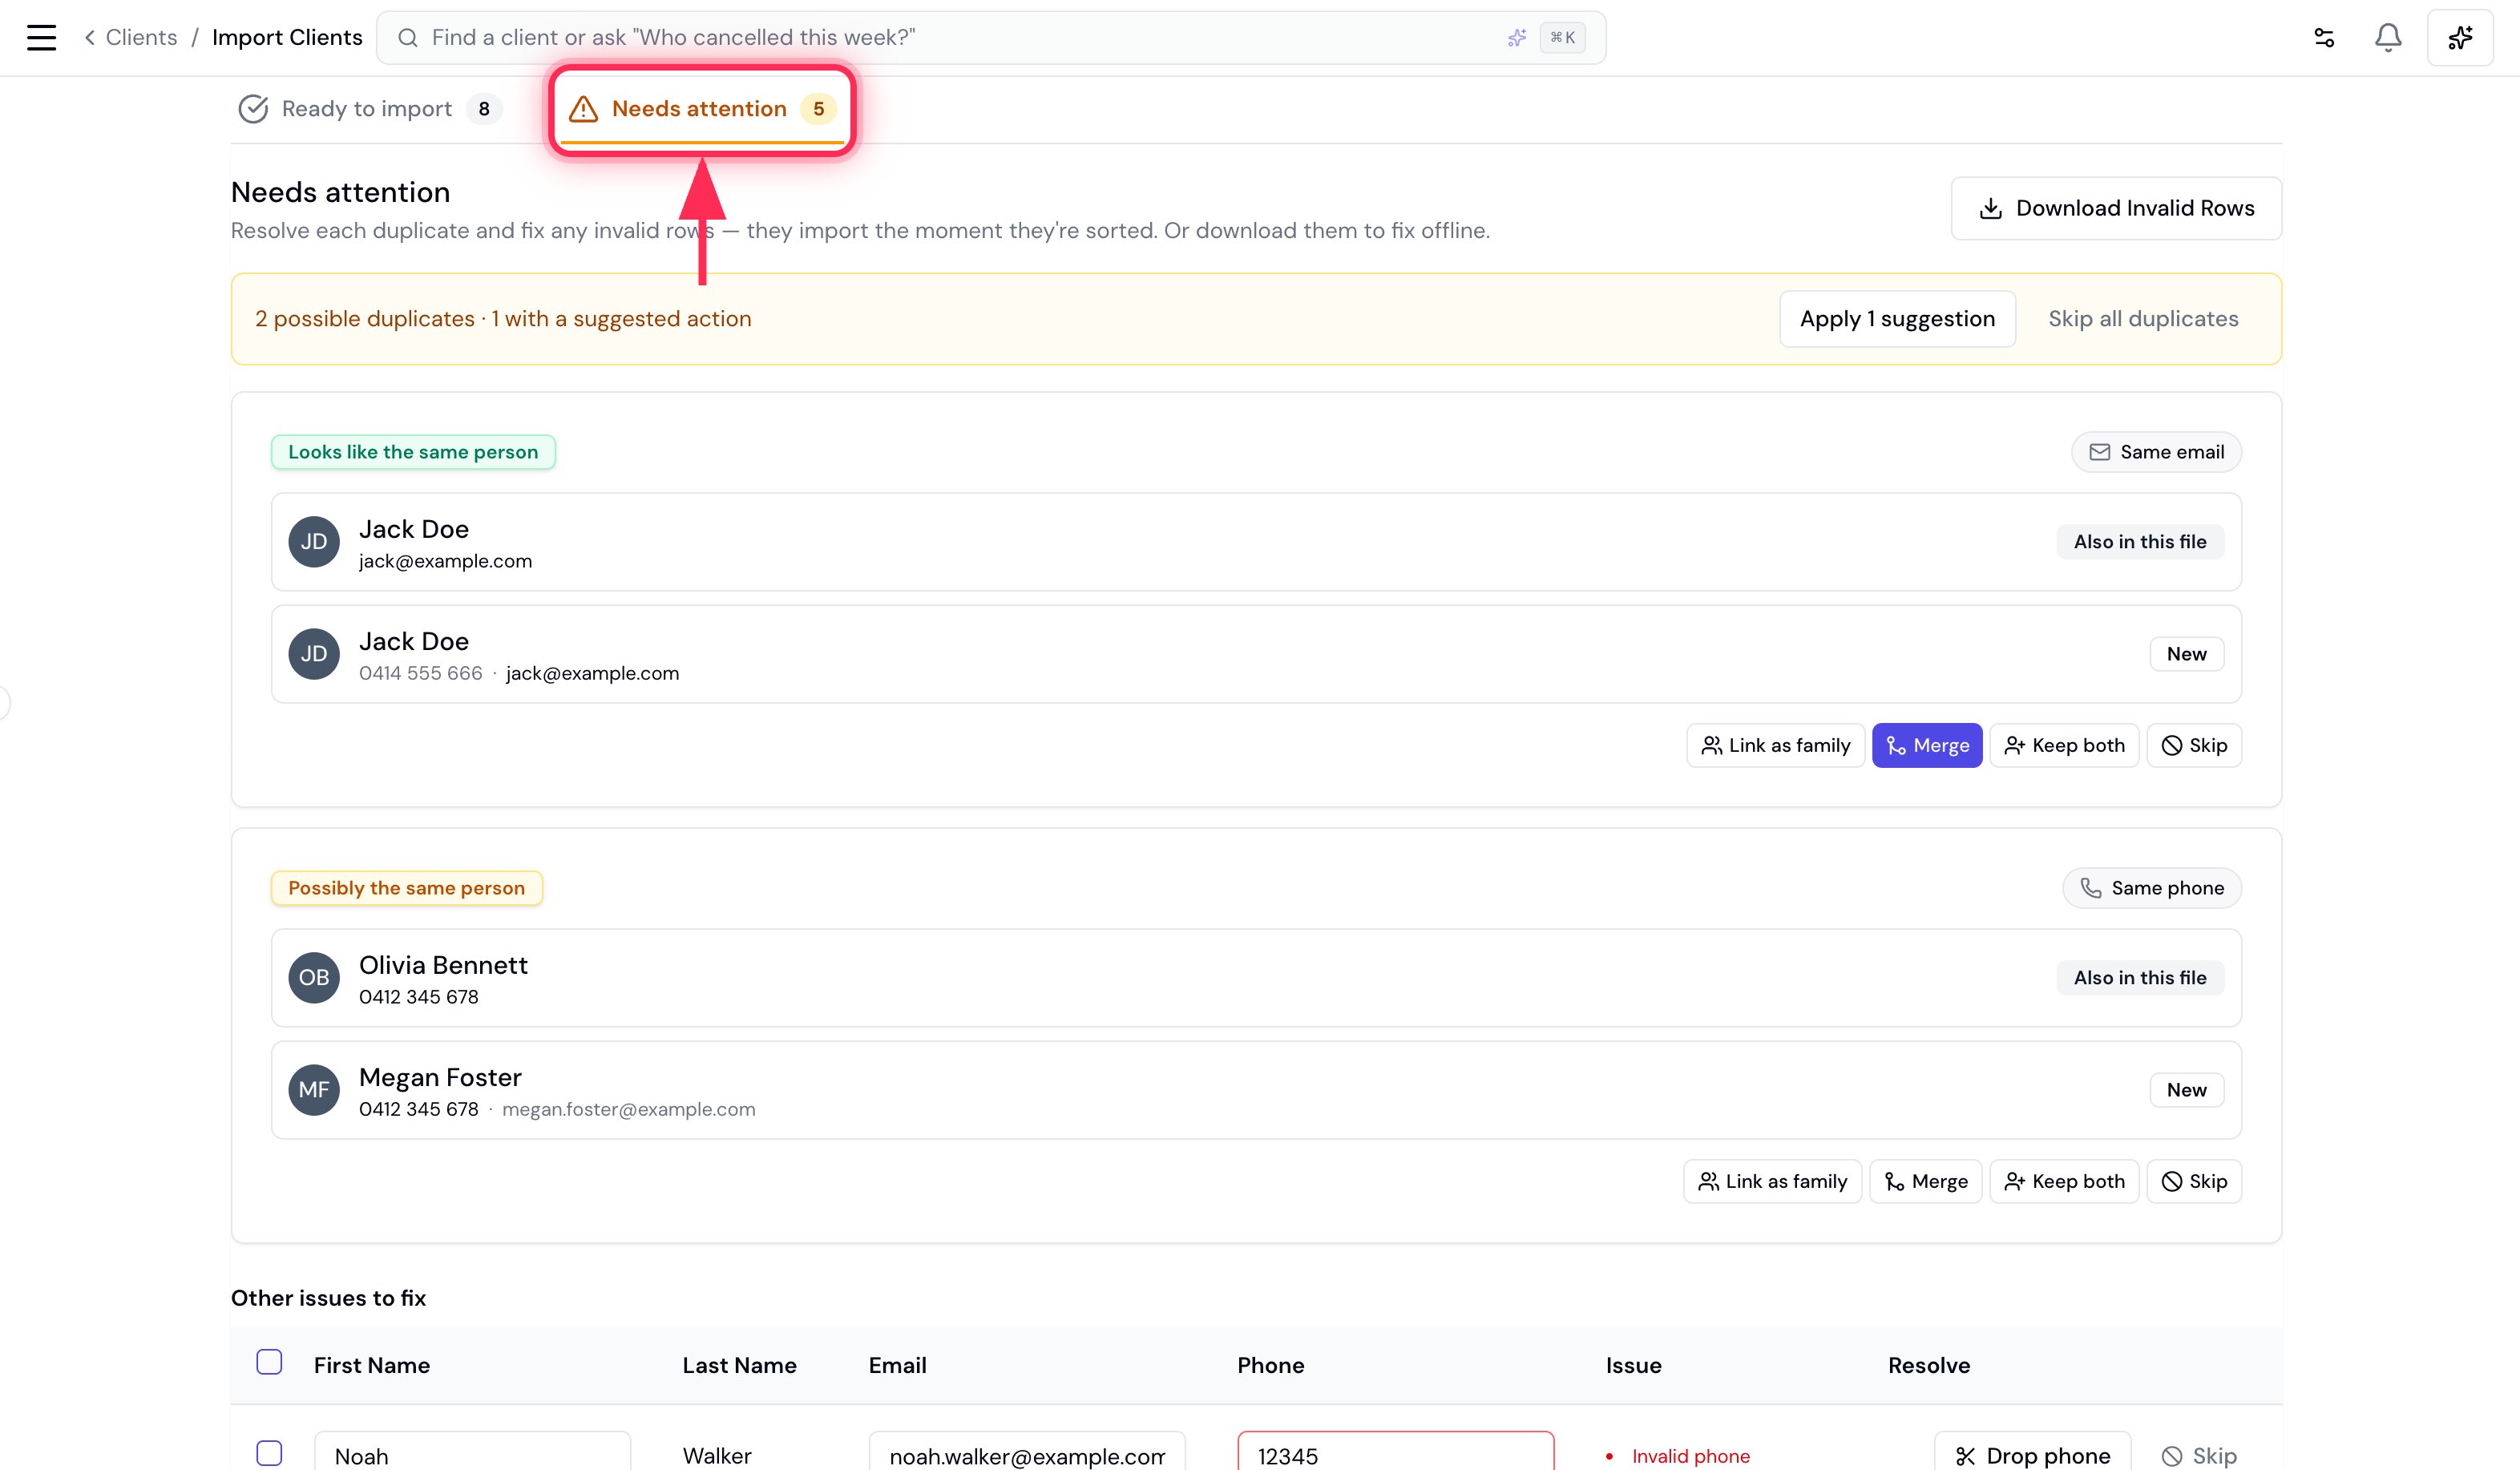
Resolving duplicates
Each possible duplicate is shown as a pair — the row from your file next to the record it clashes with (labelled Also in this file or Already in your account). Bella tells you why they matched (same email or same phone) and suggests an action. You have four choices:| Action | Use when | What happens |
|---|---|---|
| Merge — same person | It’s the same person twice | Fills any blank details on the existing record; no duplicate is created. |
| Link as family | Different people who share contact details (e.g. a parent and child) | Imports as a separate client, linked as a family member. |
| Keep both | Two genuinely separate clients | Imports as a new client without the shared email/phone. |
| Skip | You don’t want this row | The row is dropped. |
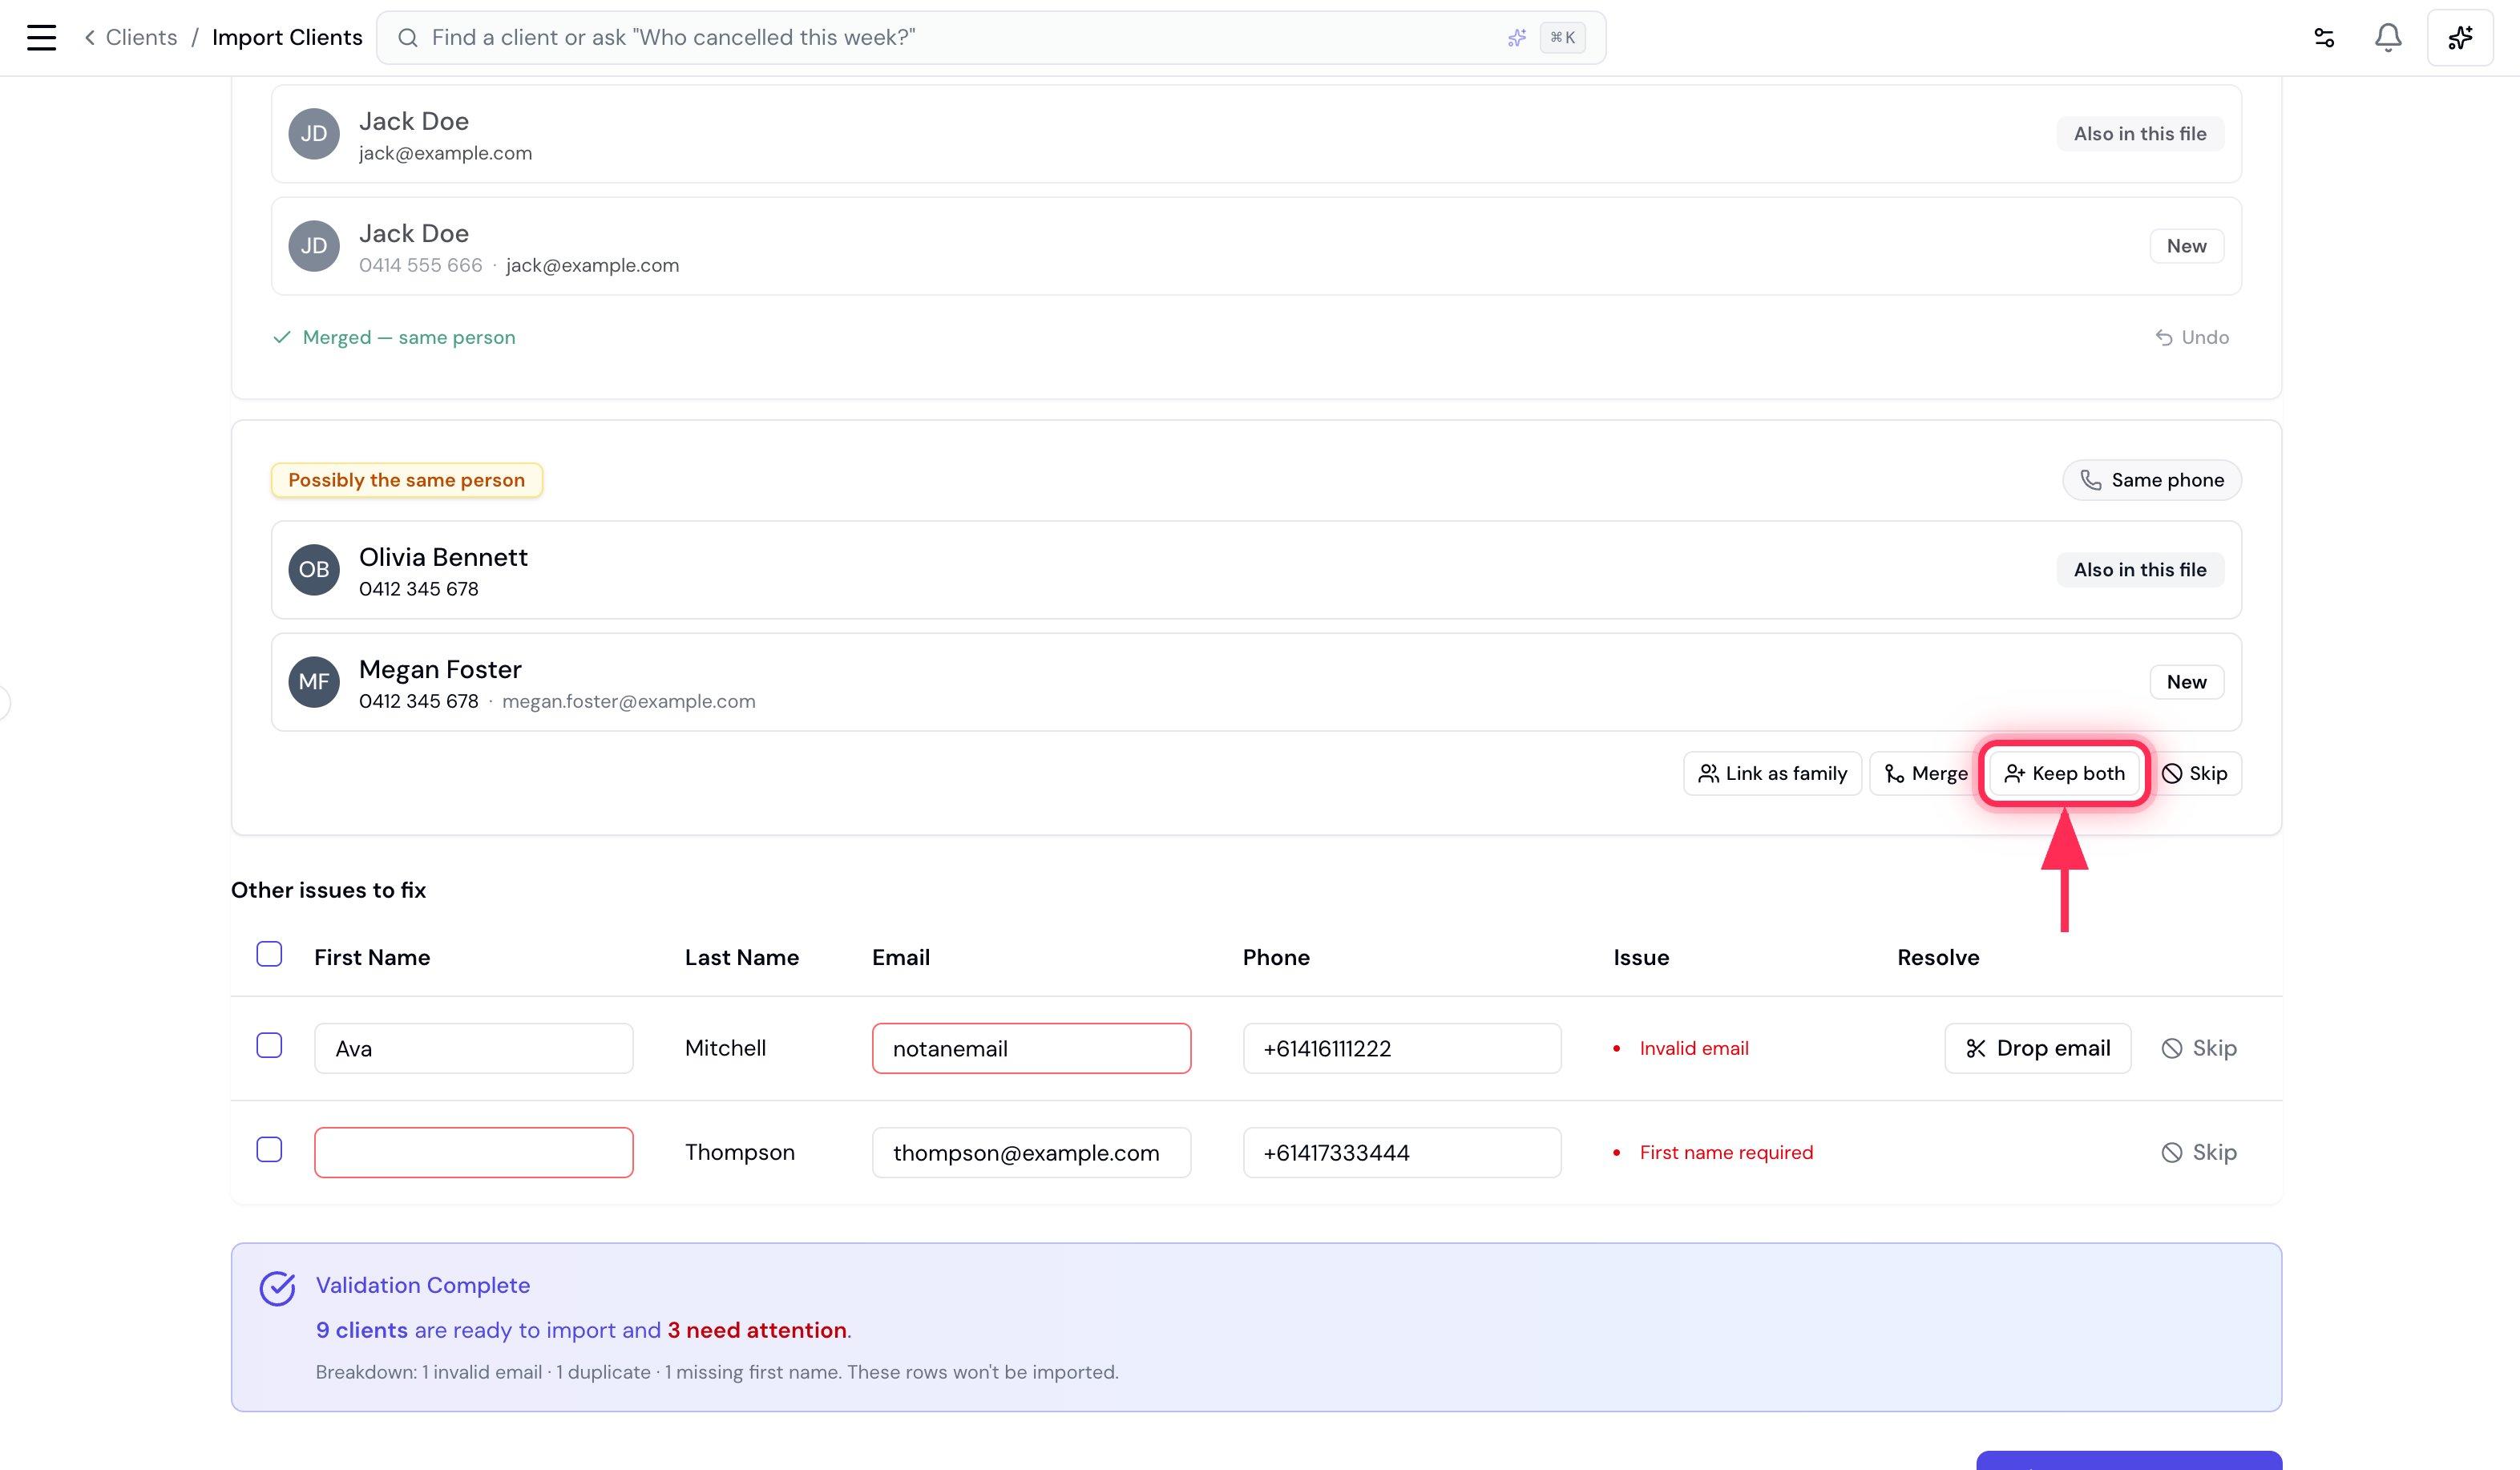
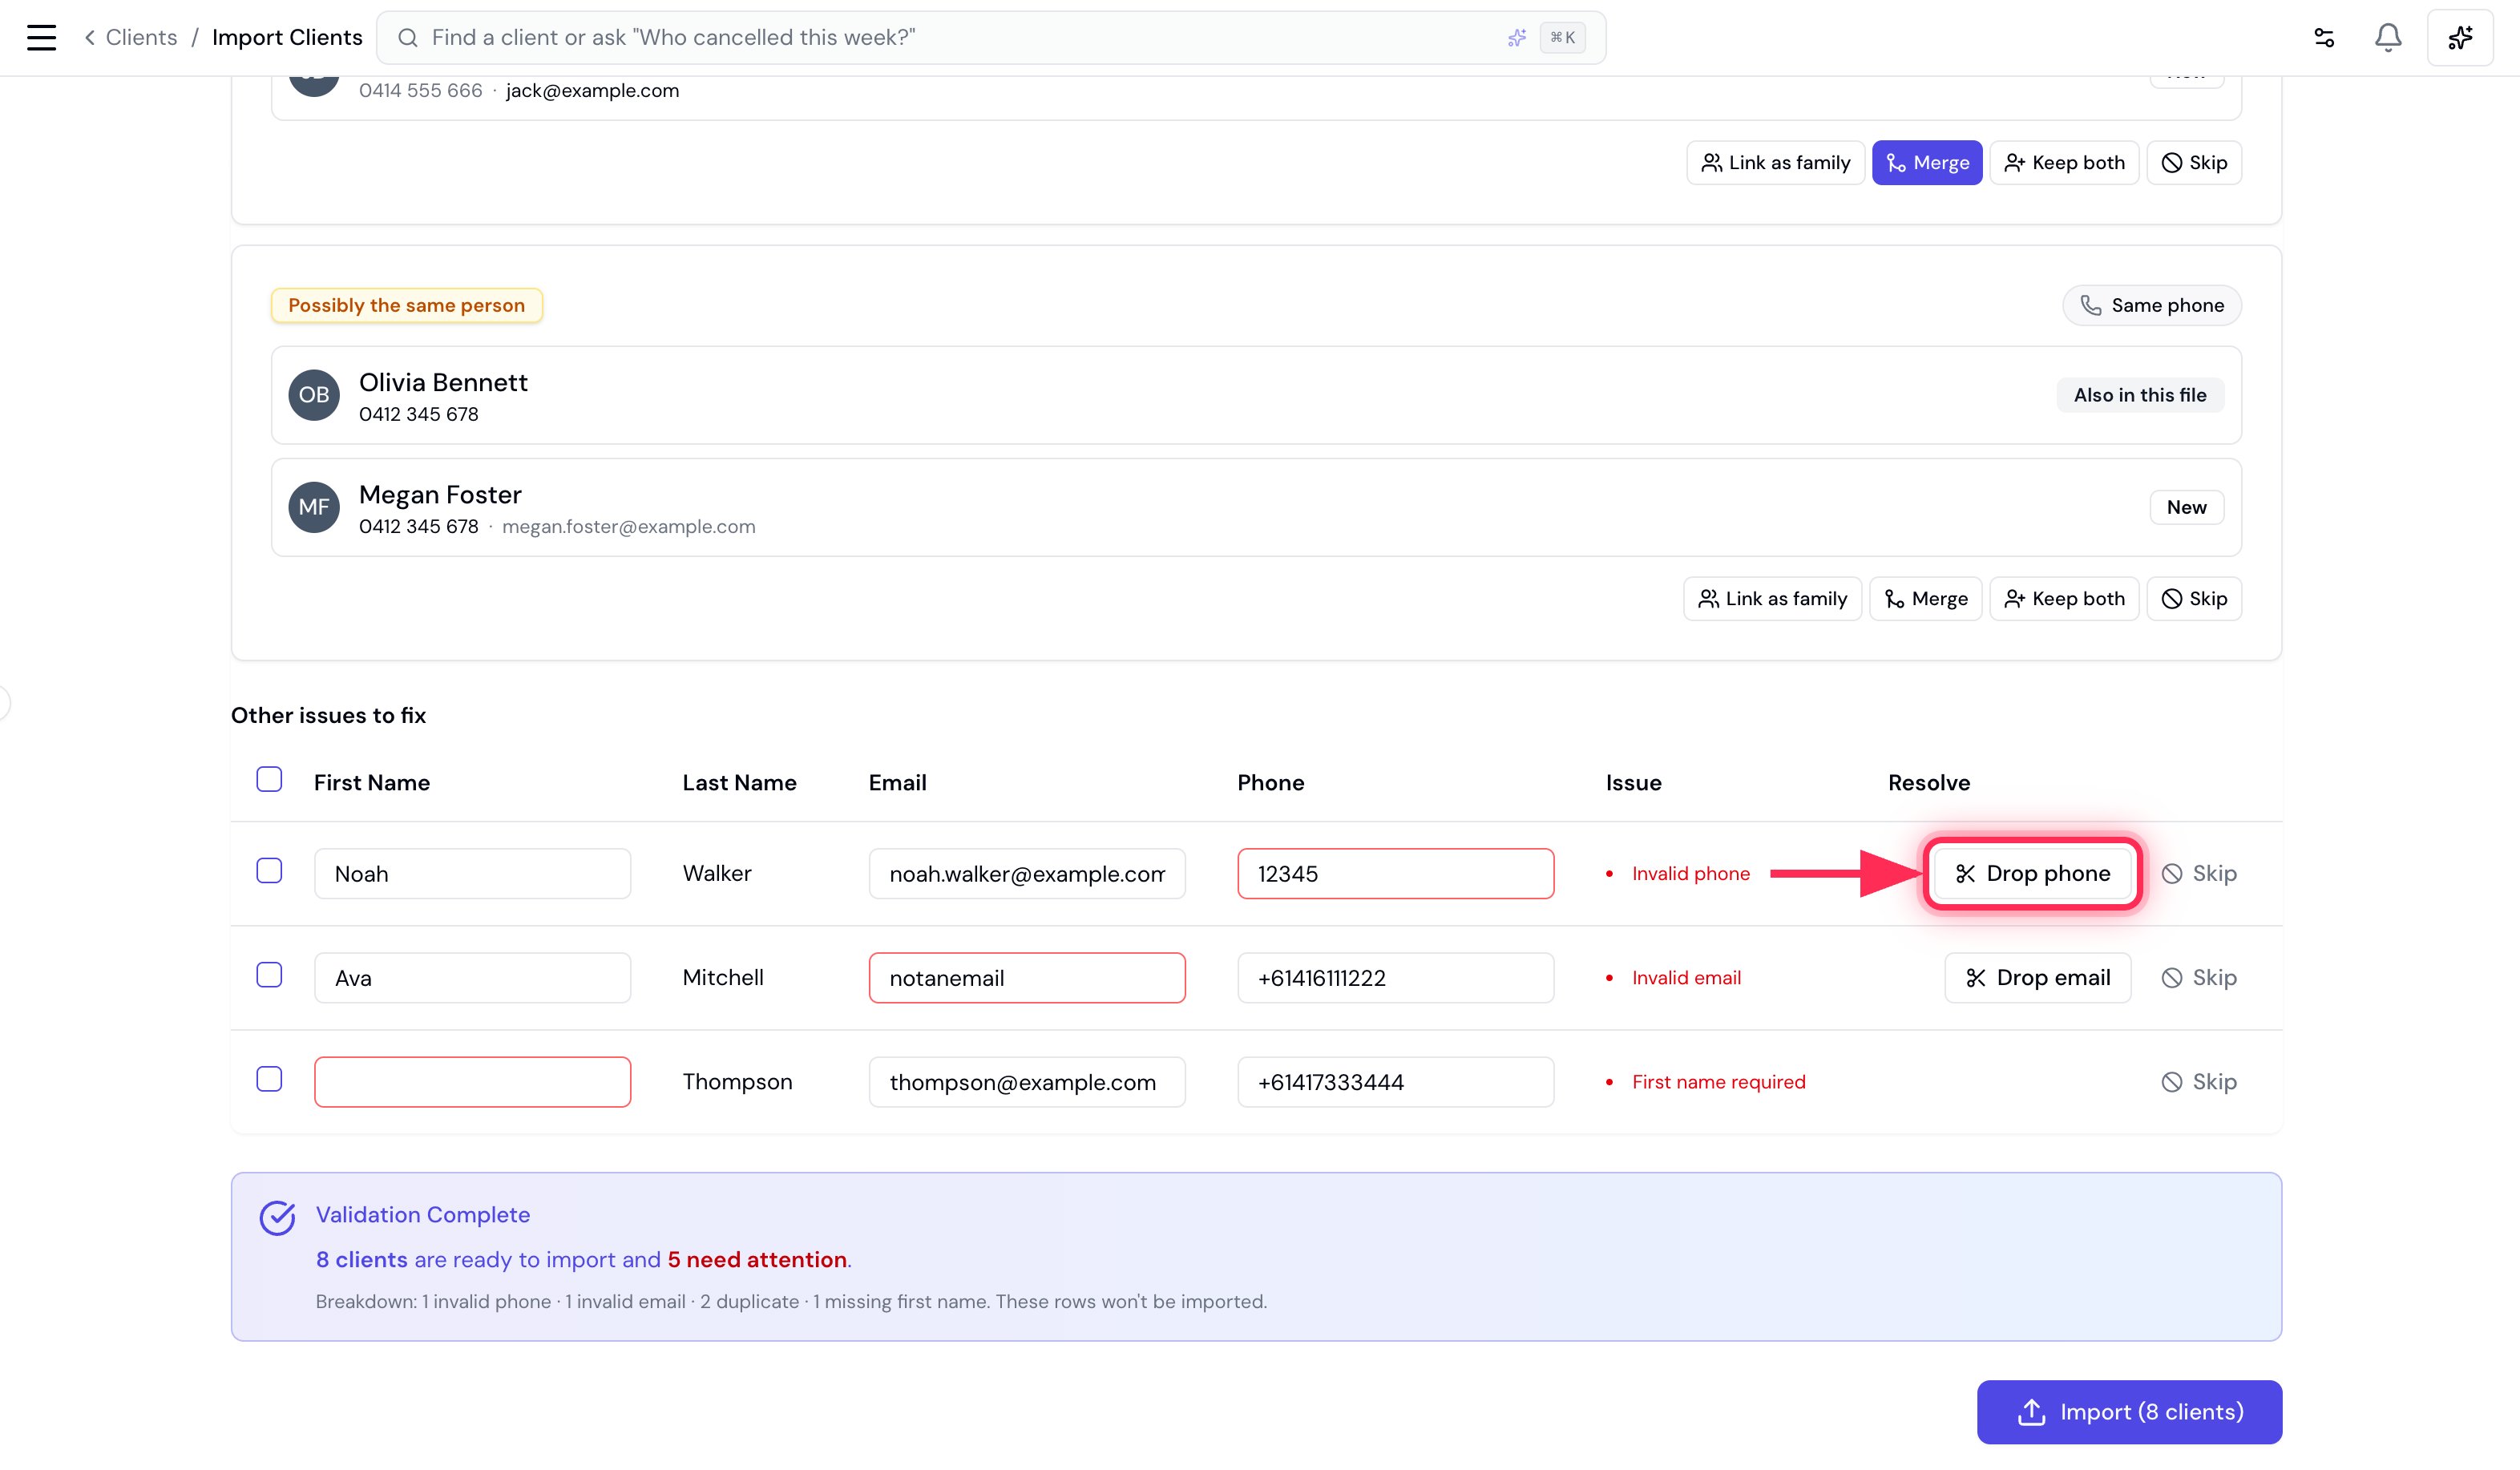
Fixing invalid records
Rows with a bad field appear under Other issues to fix. You can:- Fix it inline — type straight into the First name, Email or Phone cell (the problem field is outlined in red). The row turns green and moves to Ready to import as soon as it’s valid.
- Drop the bad field — e.g. Drop phone keeps the client but removes the unusable number.
- Skip the row entirely.
Family members
A row with a Main Client Email (or Main Client Phone) is treated as a family member of that person — so it’s never flagged as a duplicate, even when it shares the primary’s contact details. Family rows sit under Ready to import with their relationship shown, and the link is created when you import. The primary can be elsewhere in the same file or already in your account.5. Import
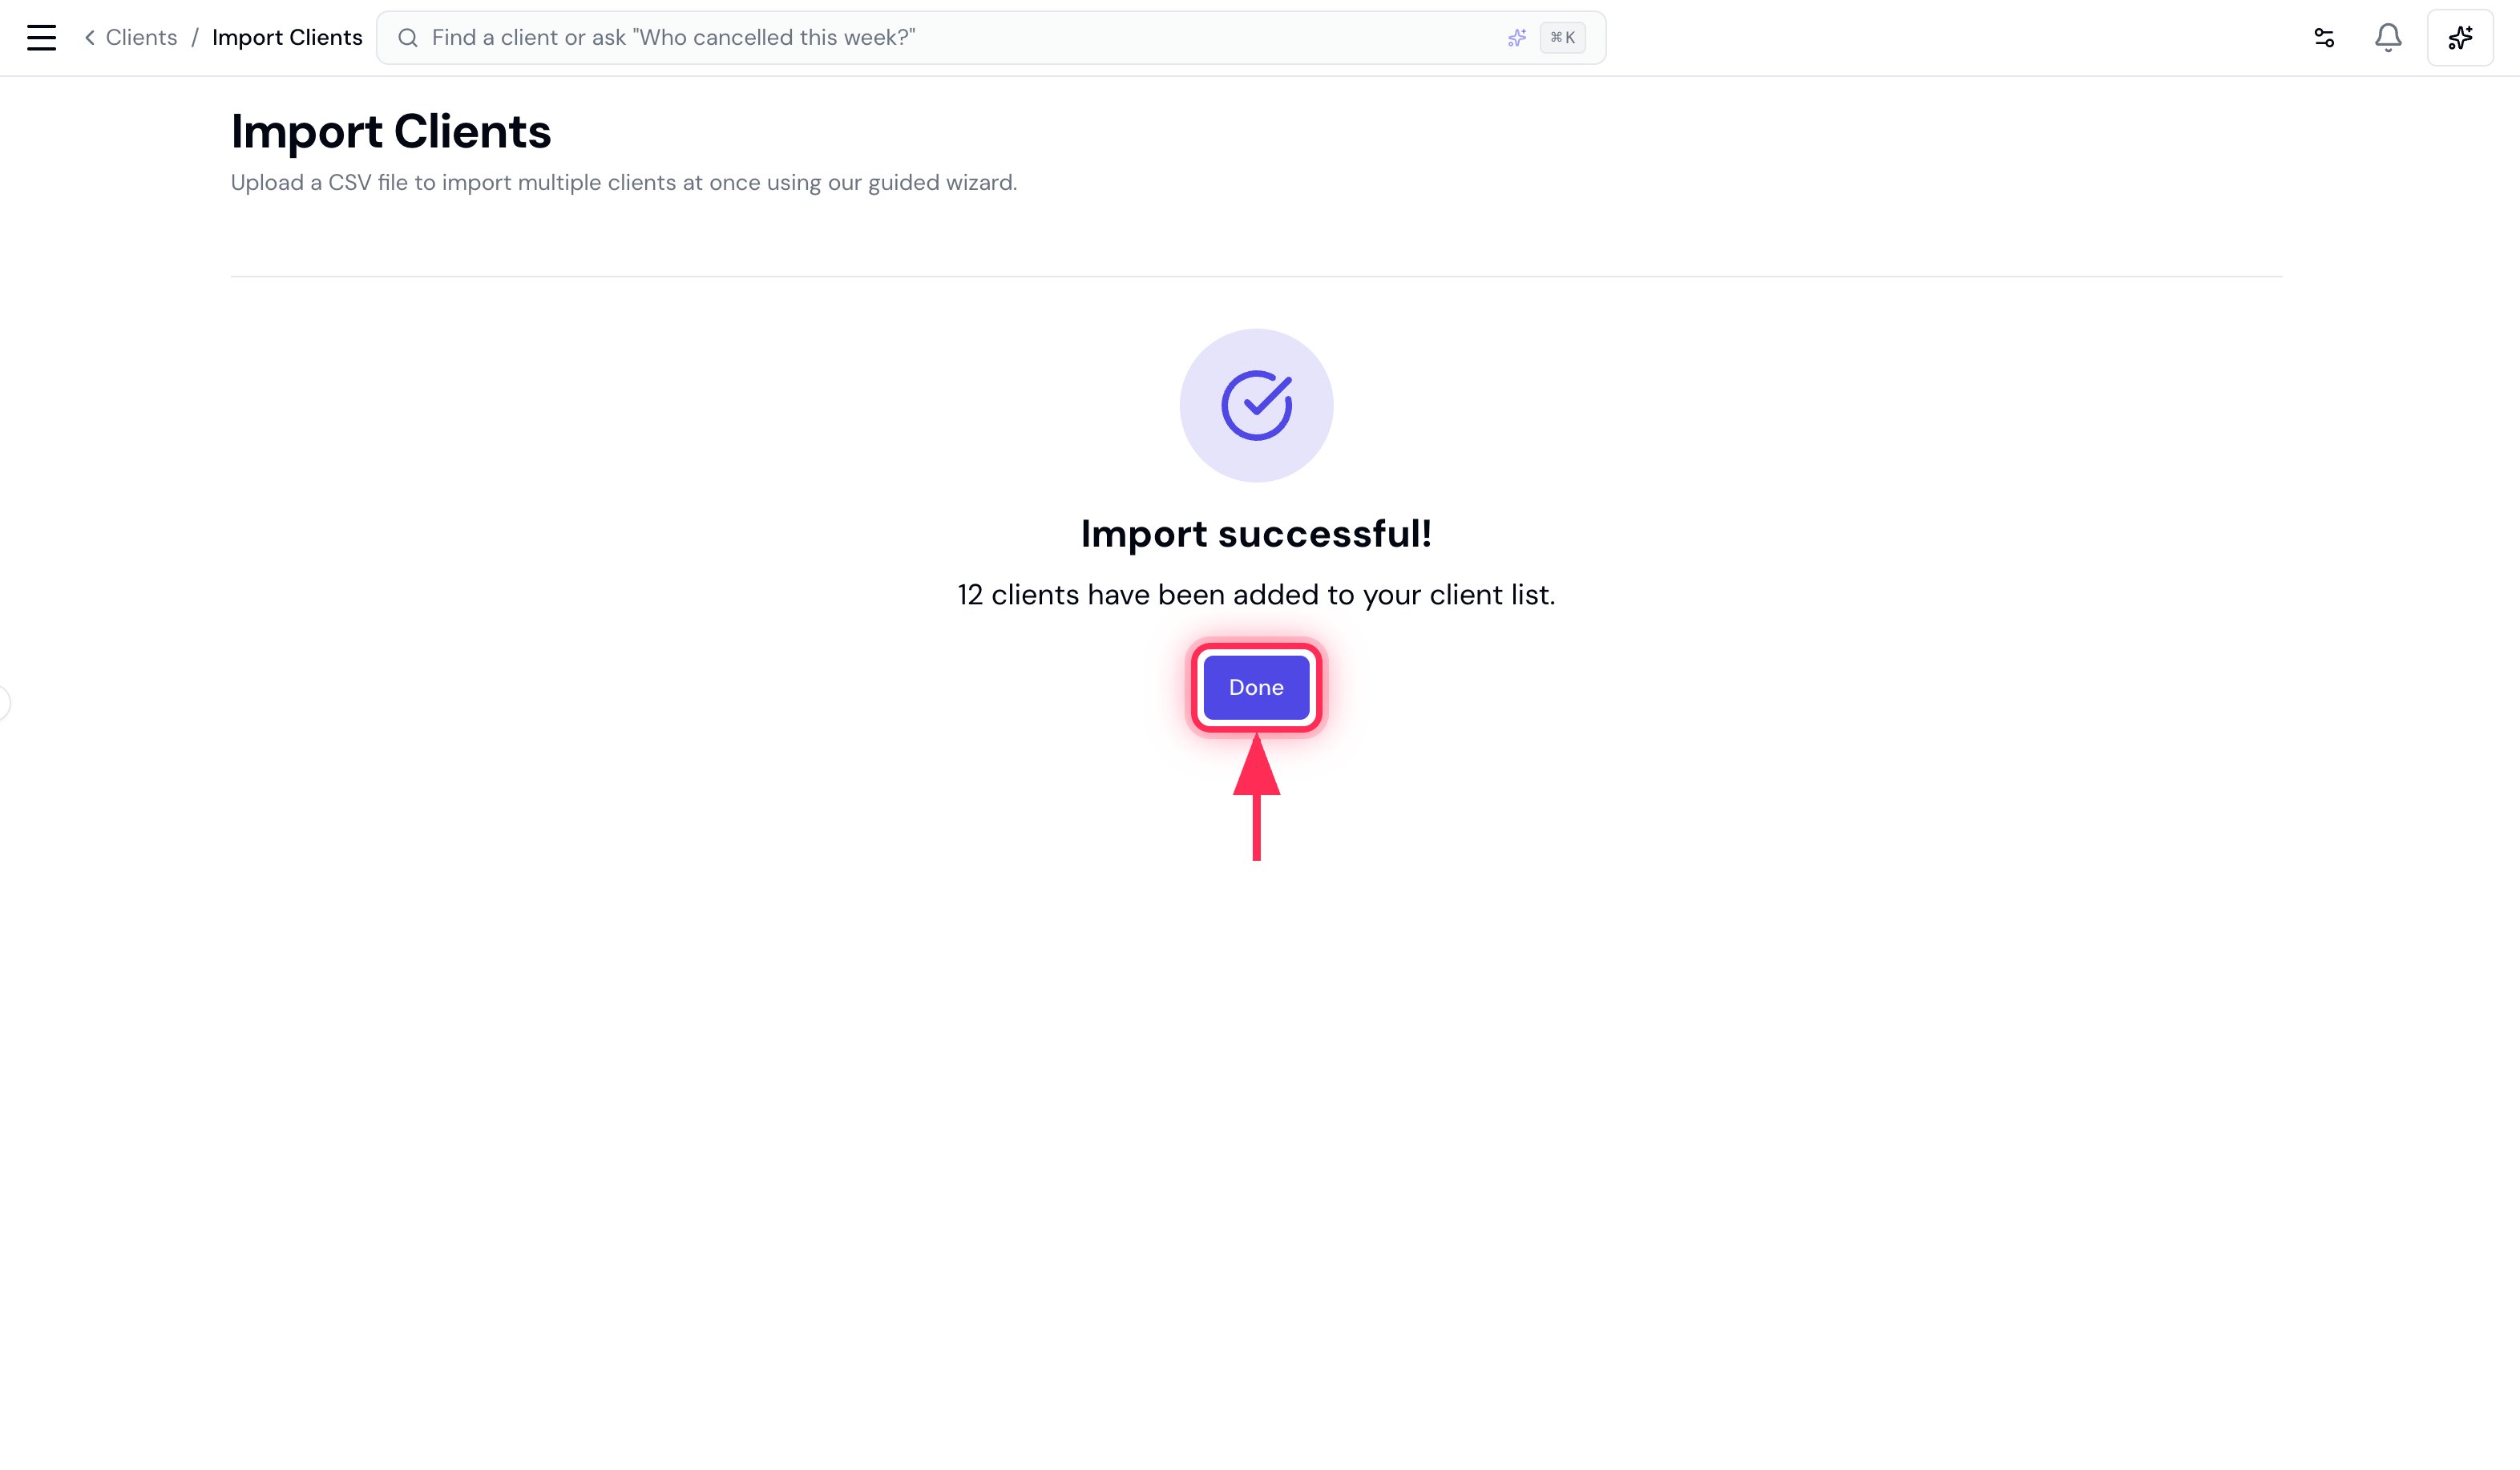
When Needs attention reaches zero (or you’re happy to skip what’s left), click Import.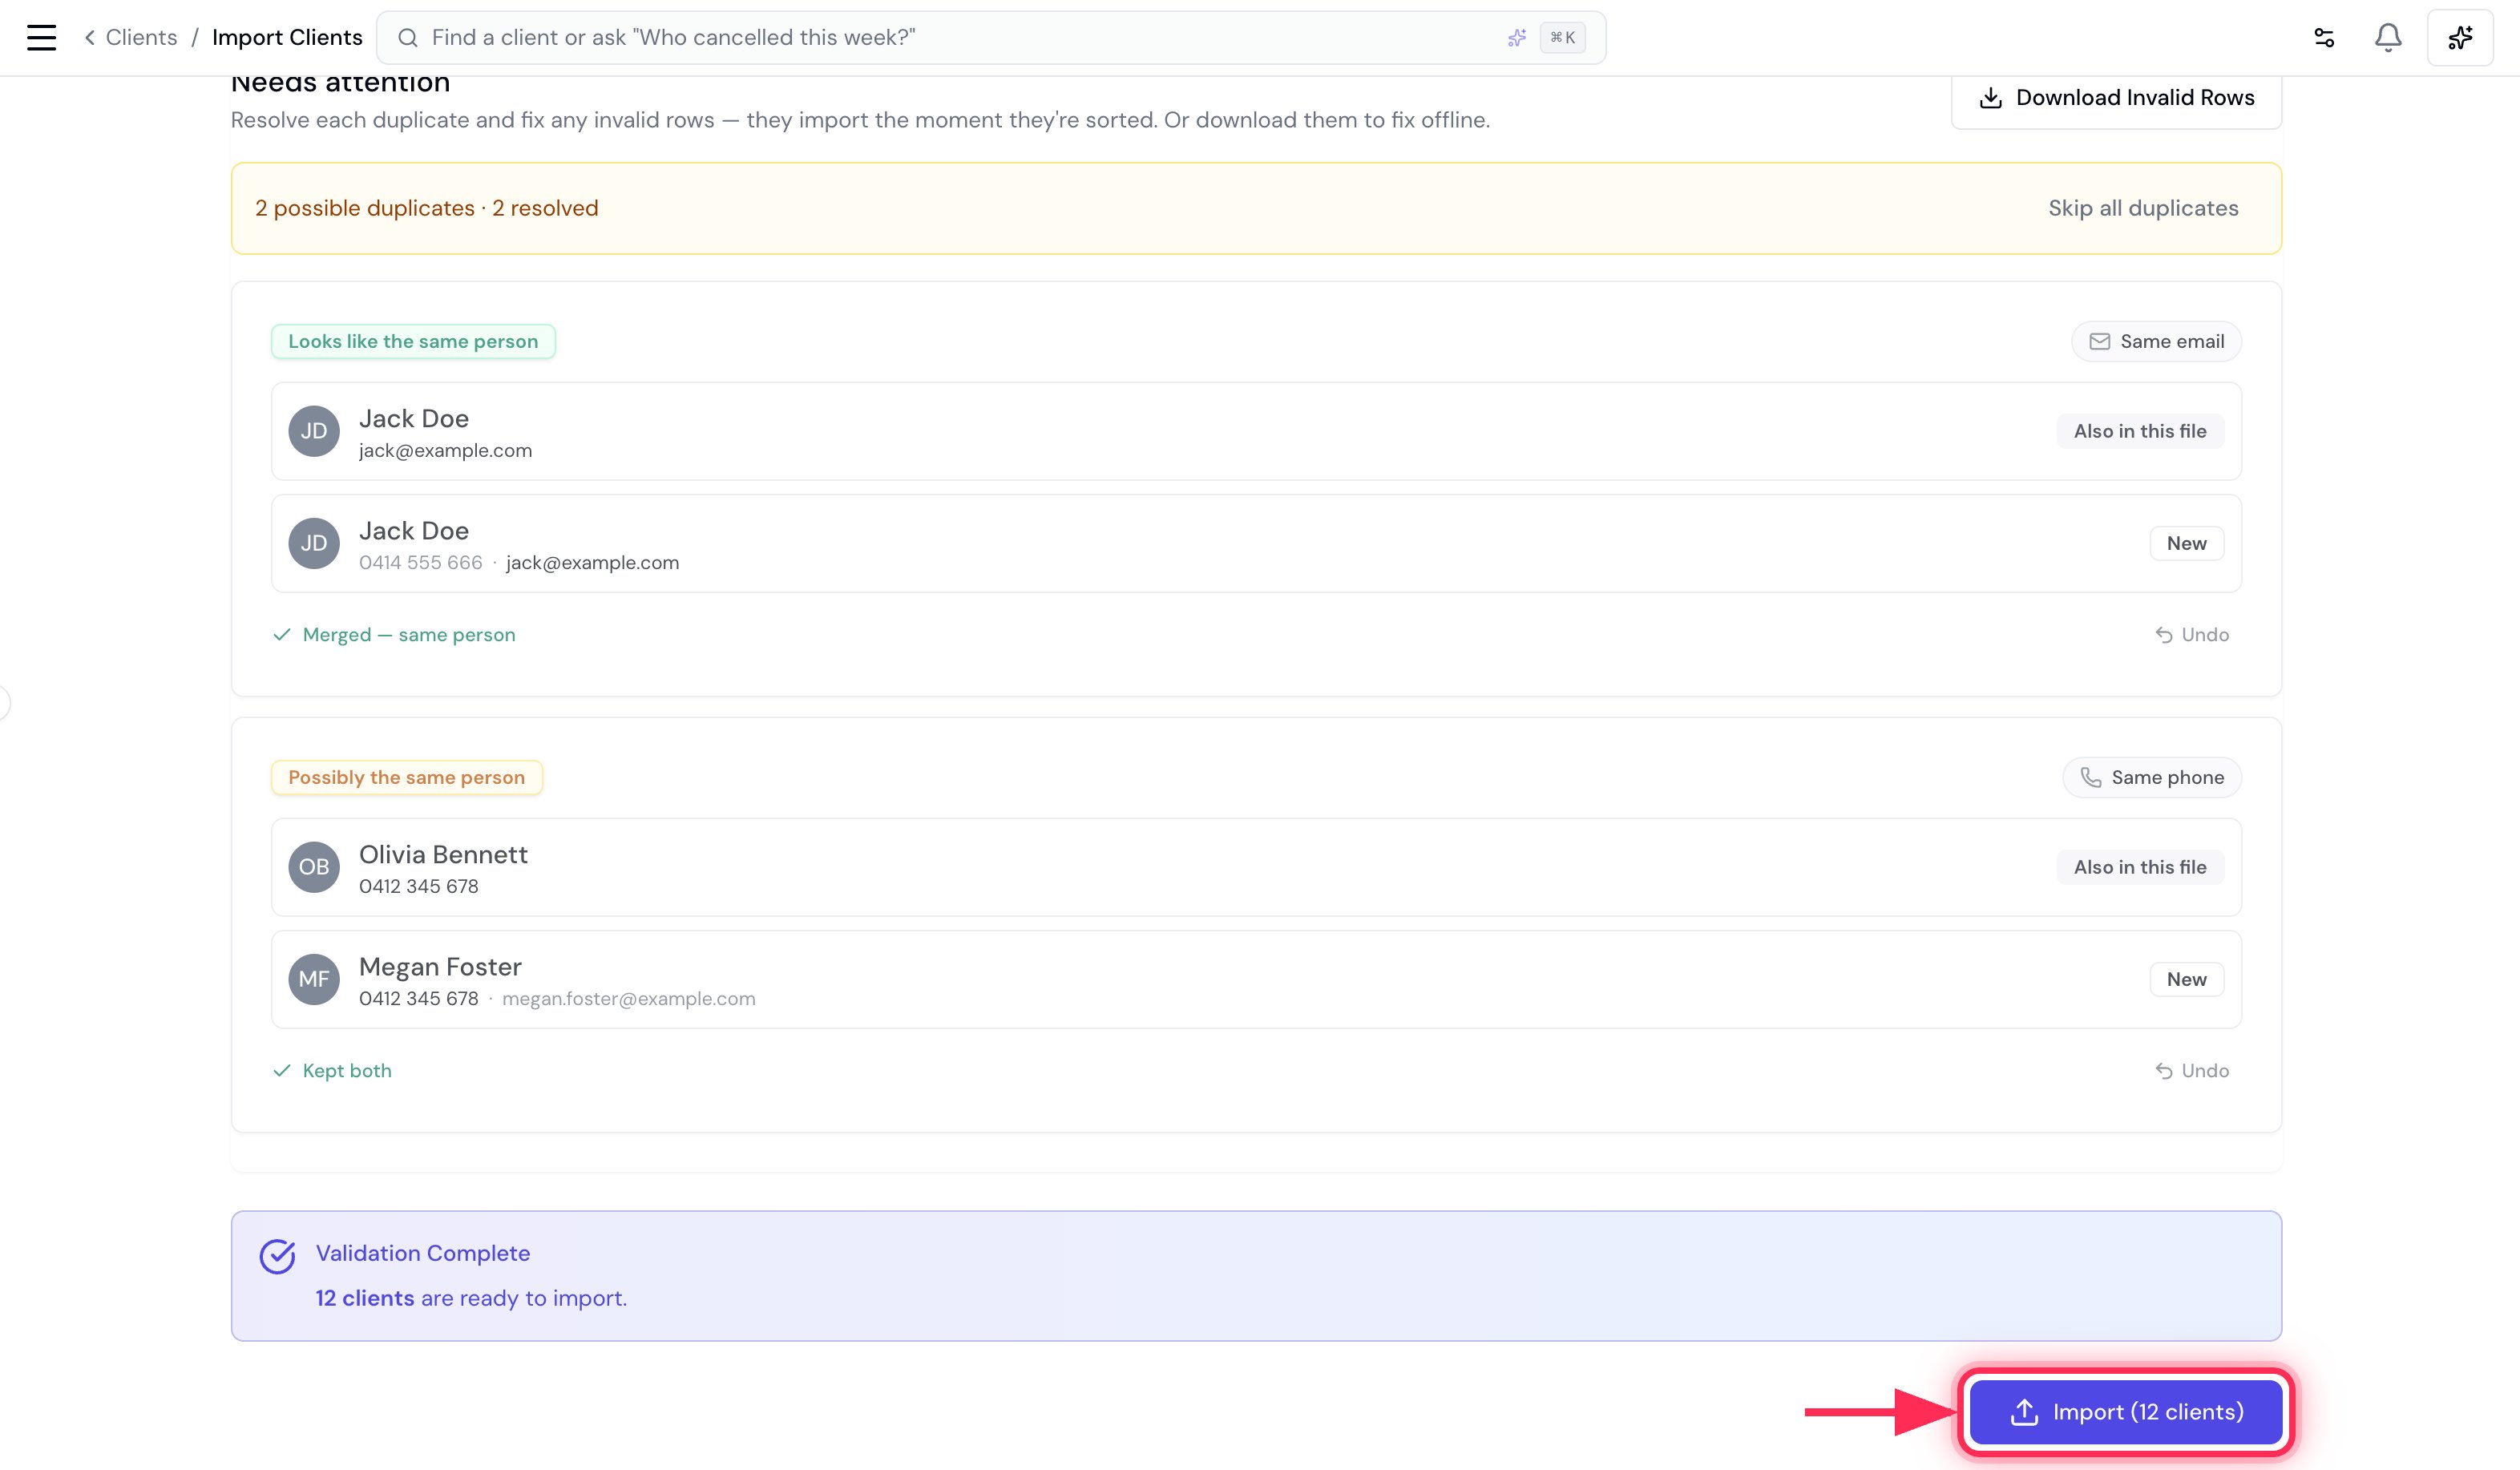
Tips
- Re-importing is safe. Run the same file again and the rows you already added show up as duplicates (Already in your account) for you to merge or skip — Bella won’t silently create copies.
- Fix offline if you prefer. Use Download Invalid Rows to get just the problem rows as a CSV, correct them in your spreadsheet, and re-upload.
Part 3 — Import your services into Bella Booking
Now bring your service menu CSV (the file you downloaded from Fresha) into Bella. The wizard works the same way as the client import, and any categories in your file are created for you automatically.What Bella recognises
Bella matches common header names automatically. The required fields are Service name, Category, Price and Duration.| Column | What it’s for |
|---|---|
| Service name (required) | The name of the service. |
| Category (required) | The menu category. Created automatically if it doesn’t exist yet. |
| Price (required) | The service price (e.g. 50.00). |
| Duration (minutes) (required) | How long the service takes, in whole minutes (e.g. 30). |
| Description | An optional description shown to clients. |
1. Open the importer
On the Services page (Catalogue → Services), click Import (top right, next to Export and Add Category). You’ll need the Manage catalogue permission.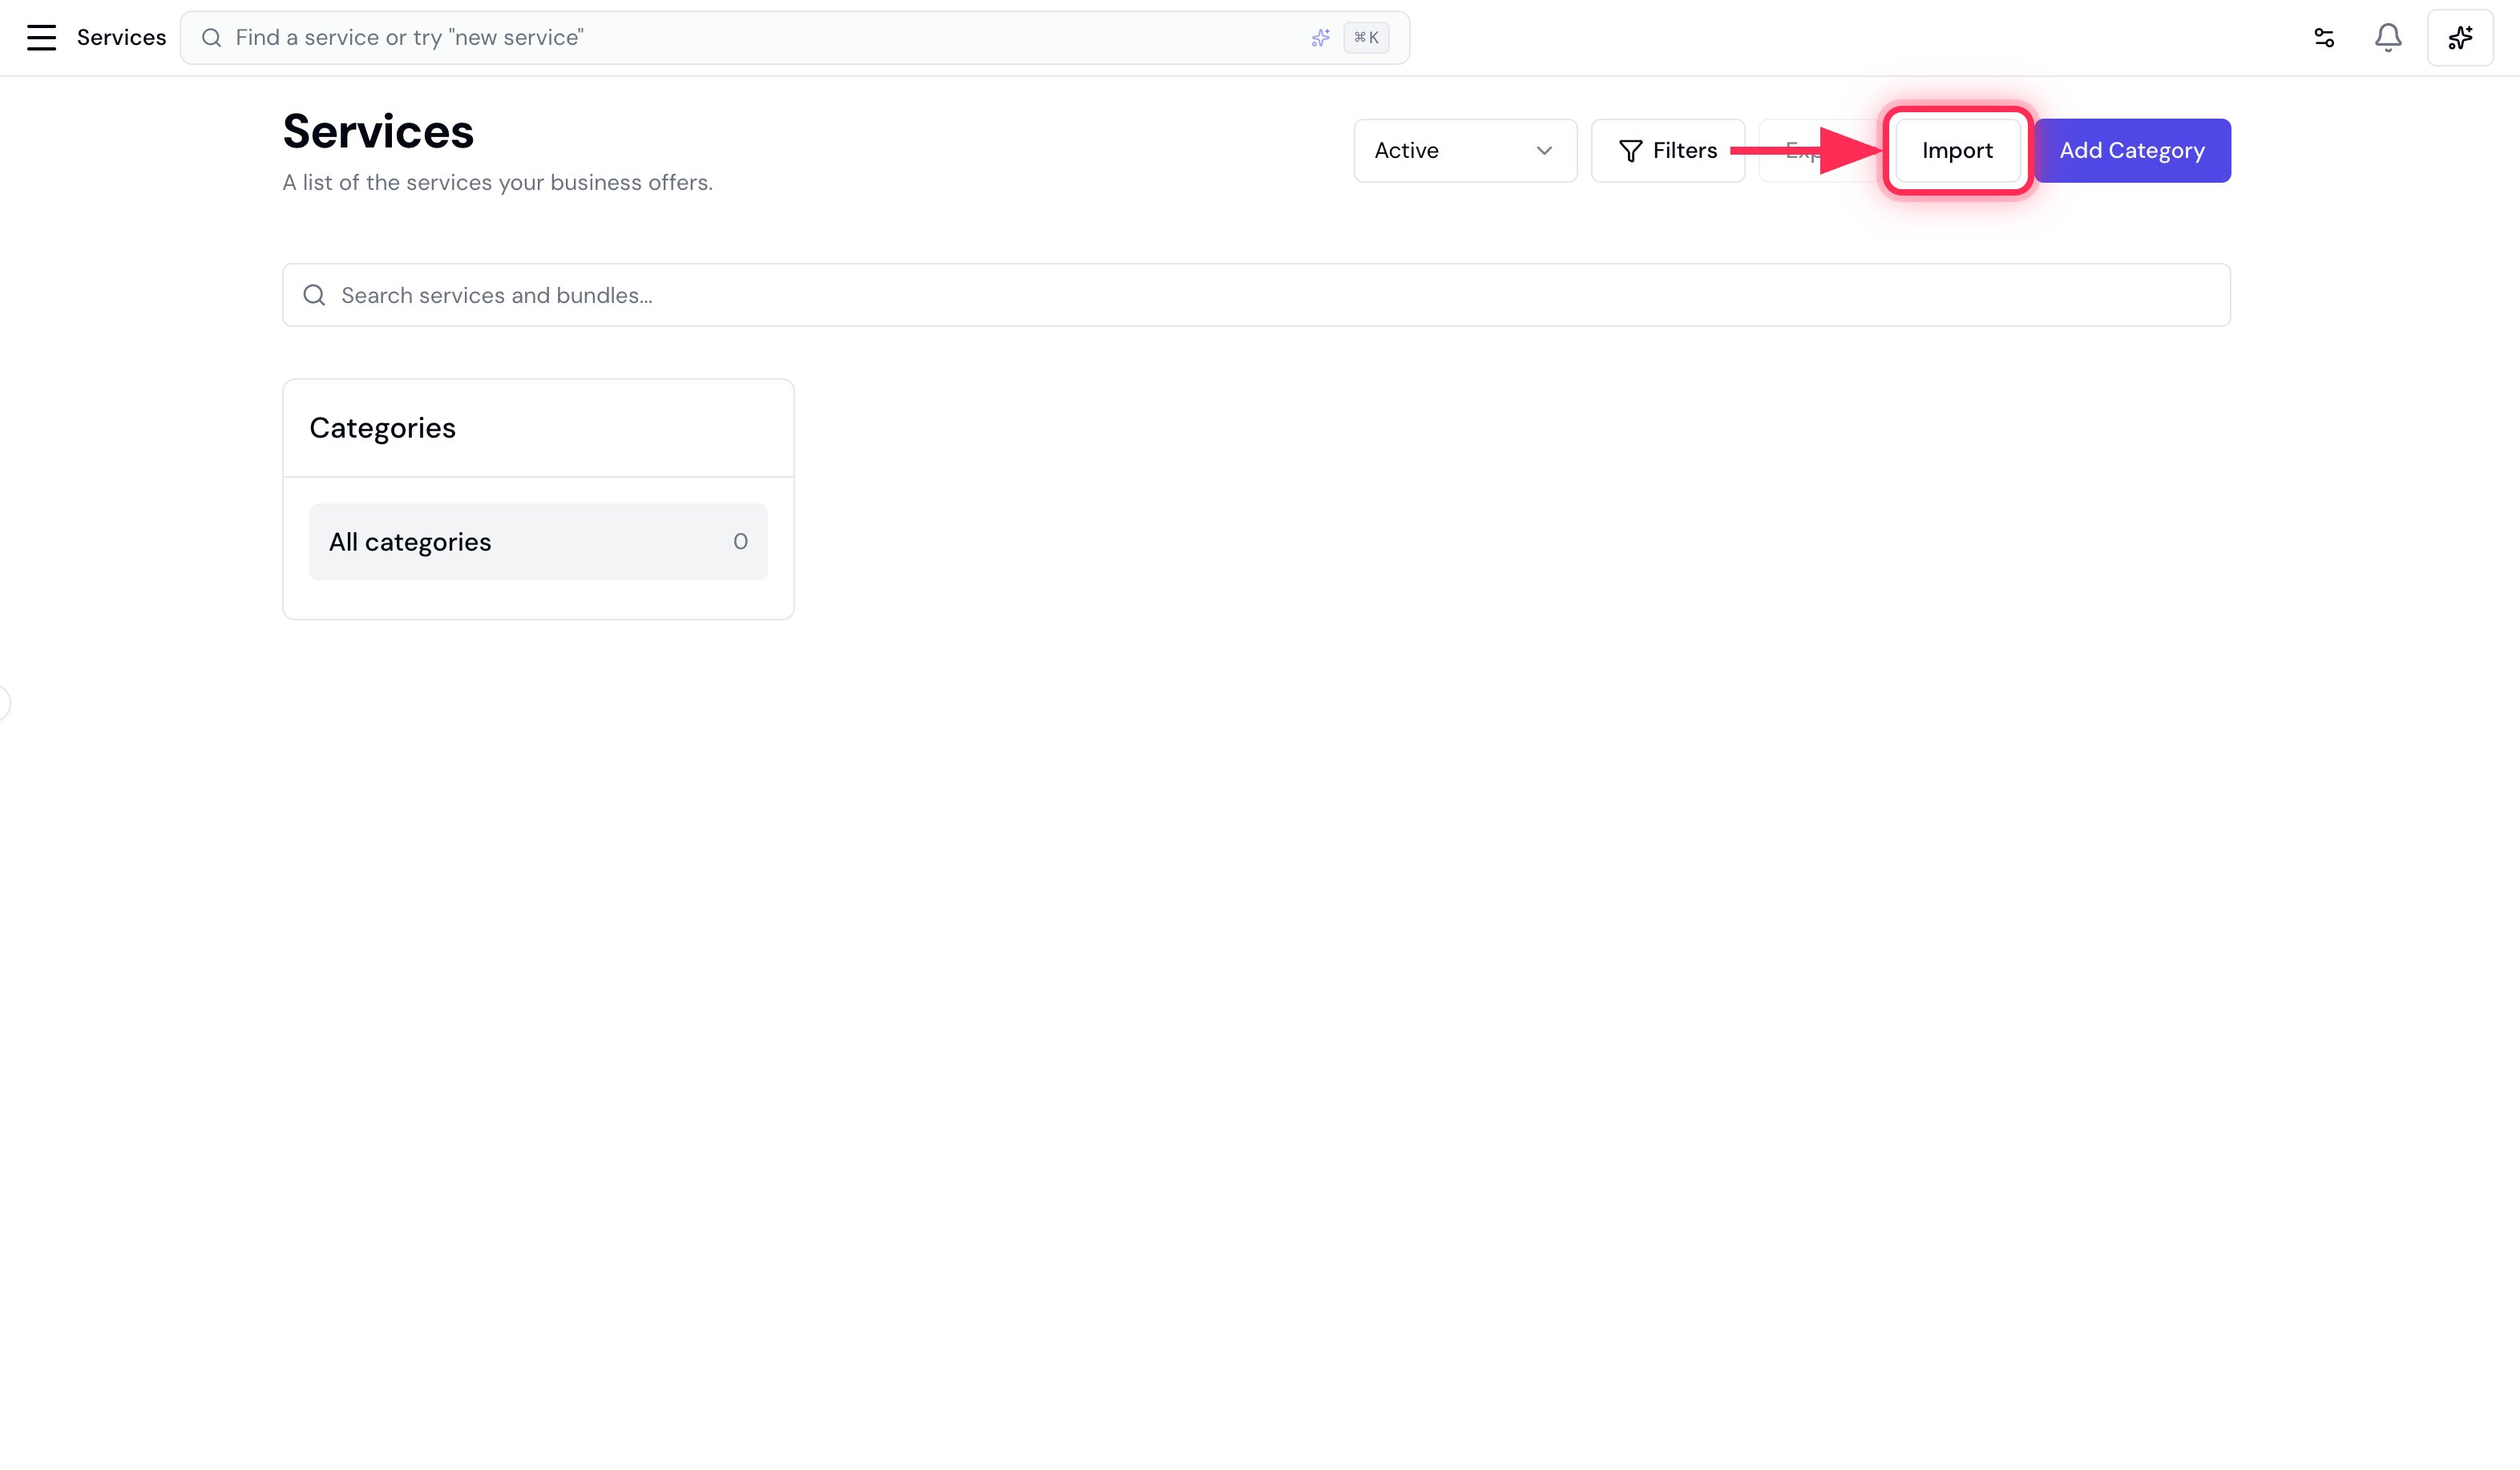
2. Upload your file
Drag your CSV onto the upload area, or click Choose a CSV file. No file yet? Click Download template for a ready-made CSV with the right headers.3. Match your columns
Bella auto-matches each of its fields to a column in your file. Check the matches (the required fields are marked with a red asterisk), then click Next.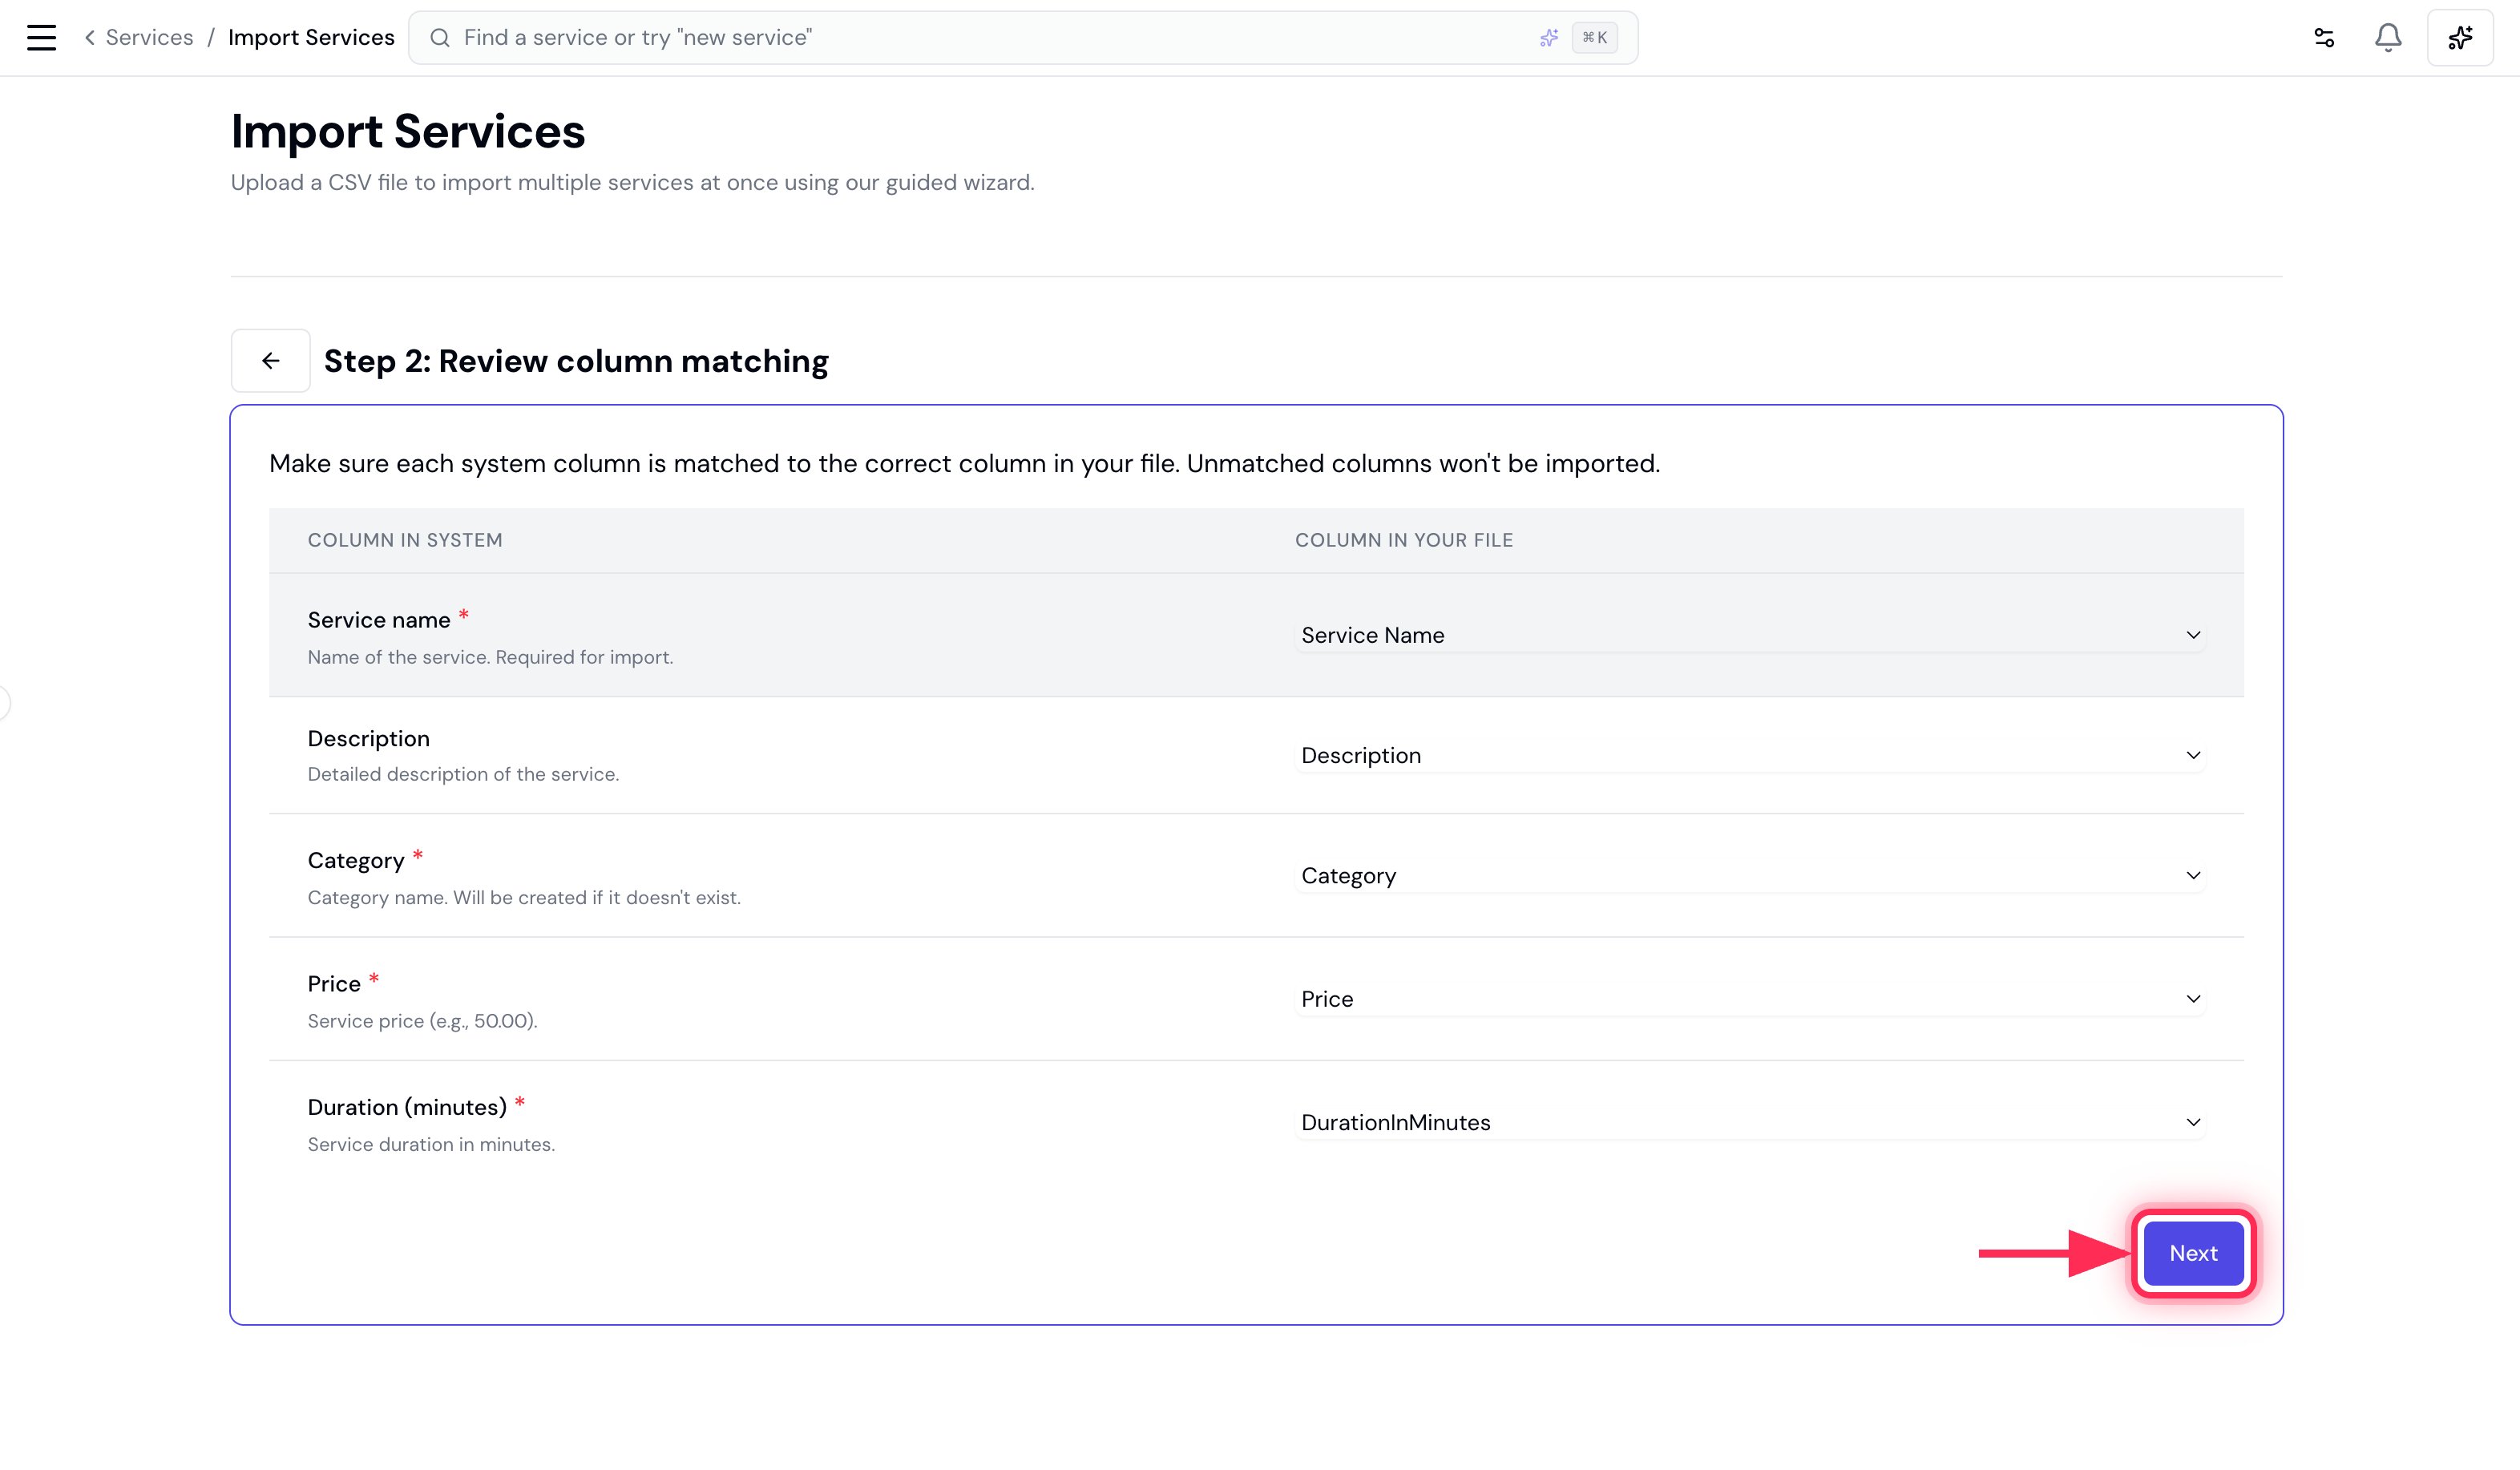
4. Review and fix errors
Bella validates every row and splits the results into two tabs:- Ready to Import — rows that will be added, with their category, price and duration.
- Validation Errors — rows that can’t be imported yet.
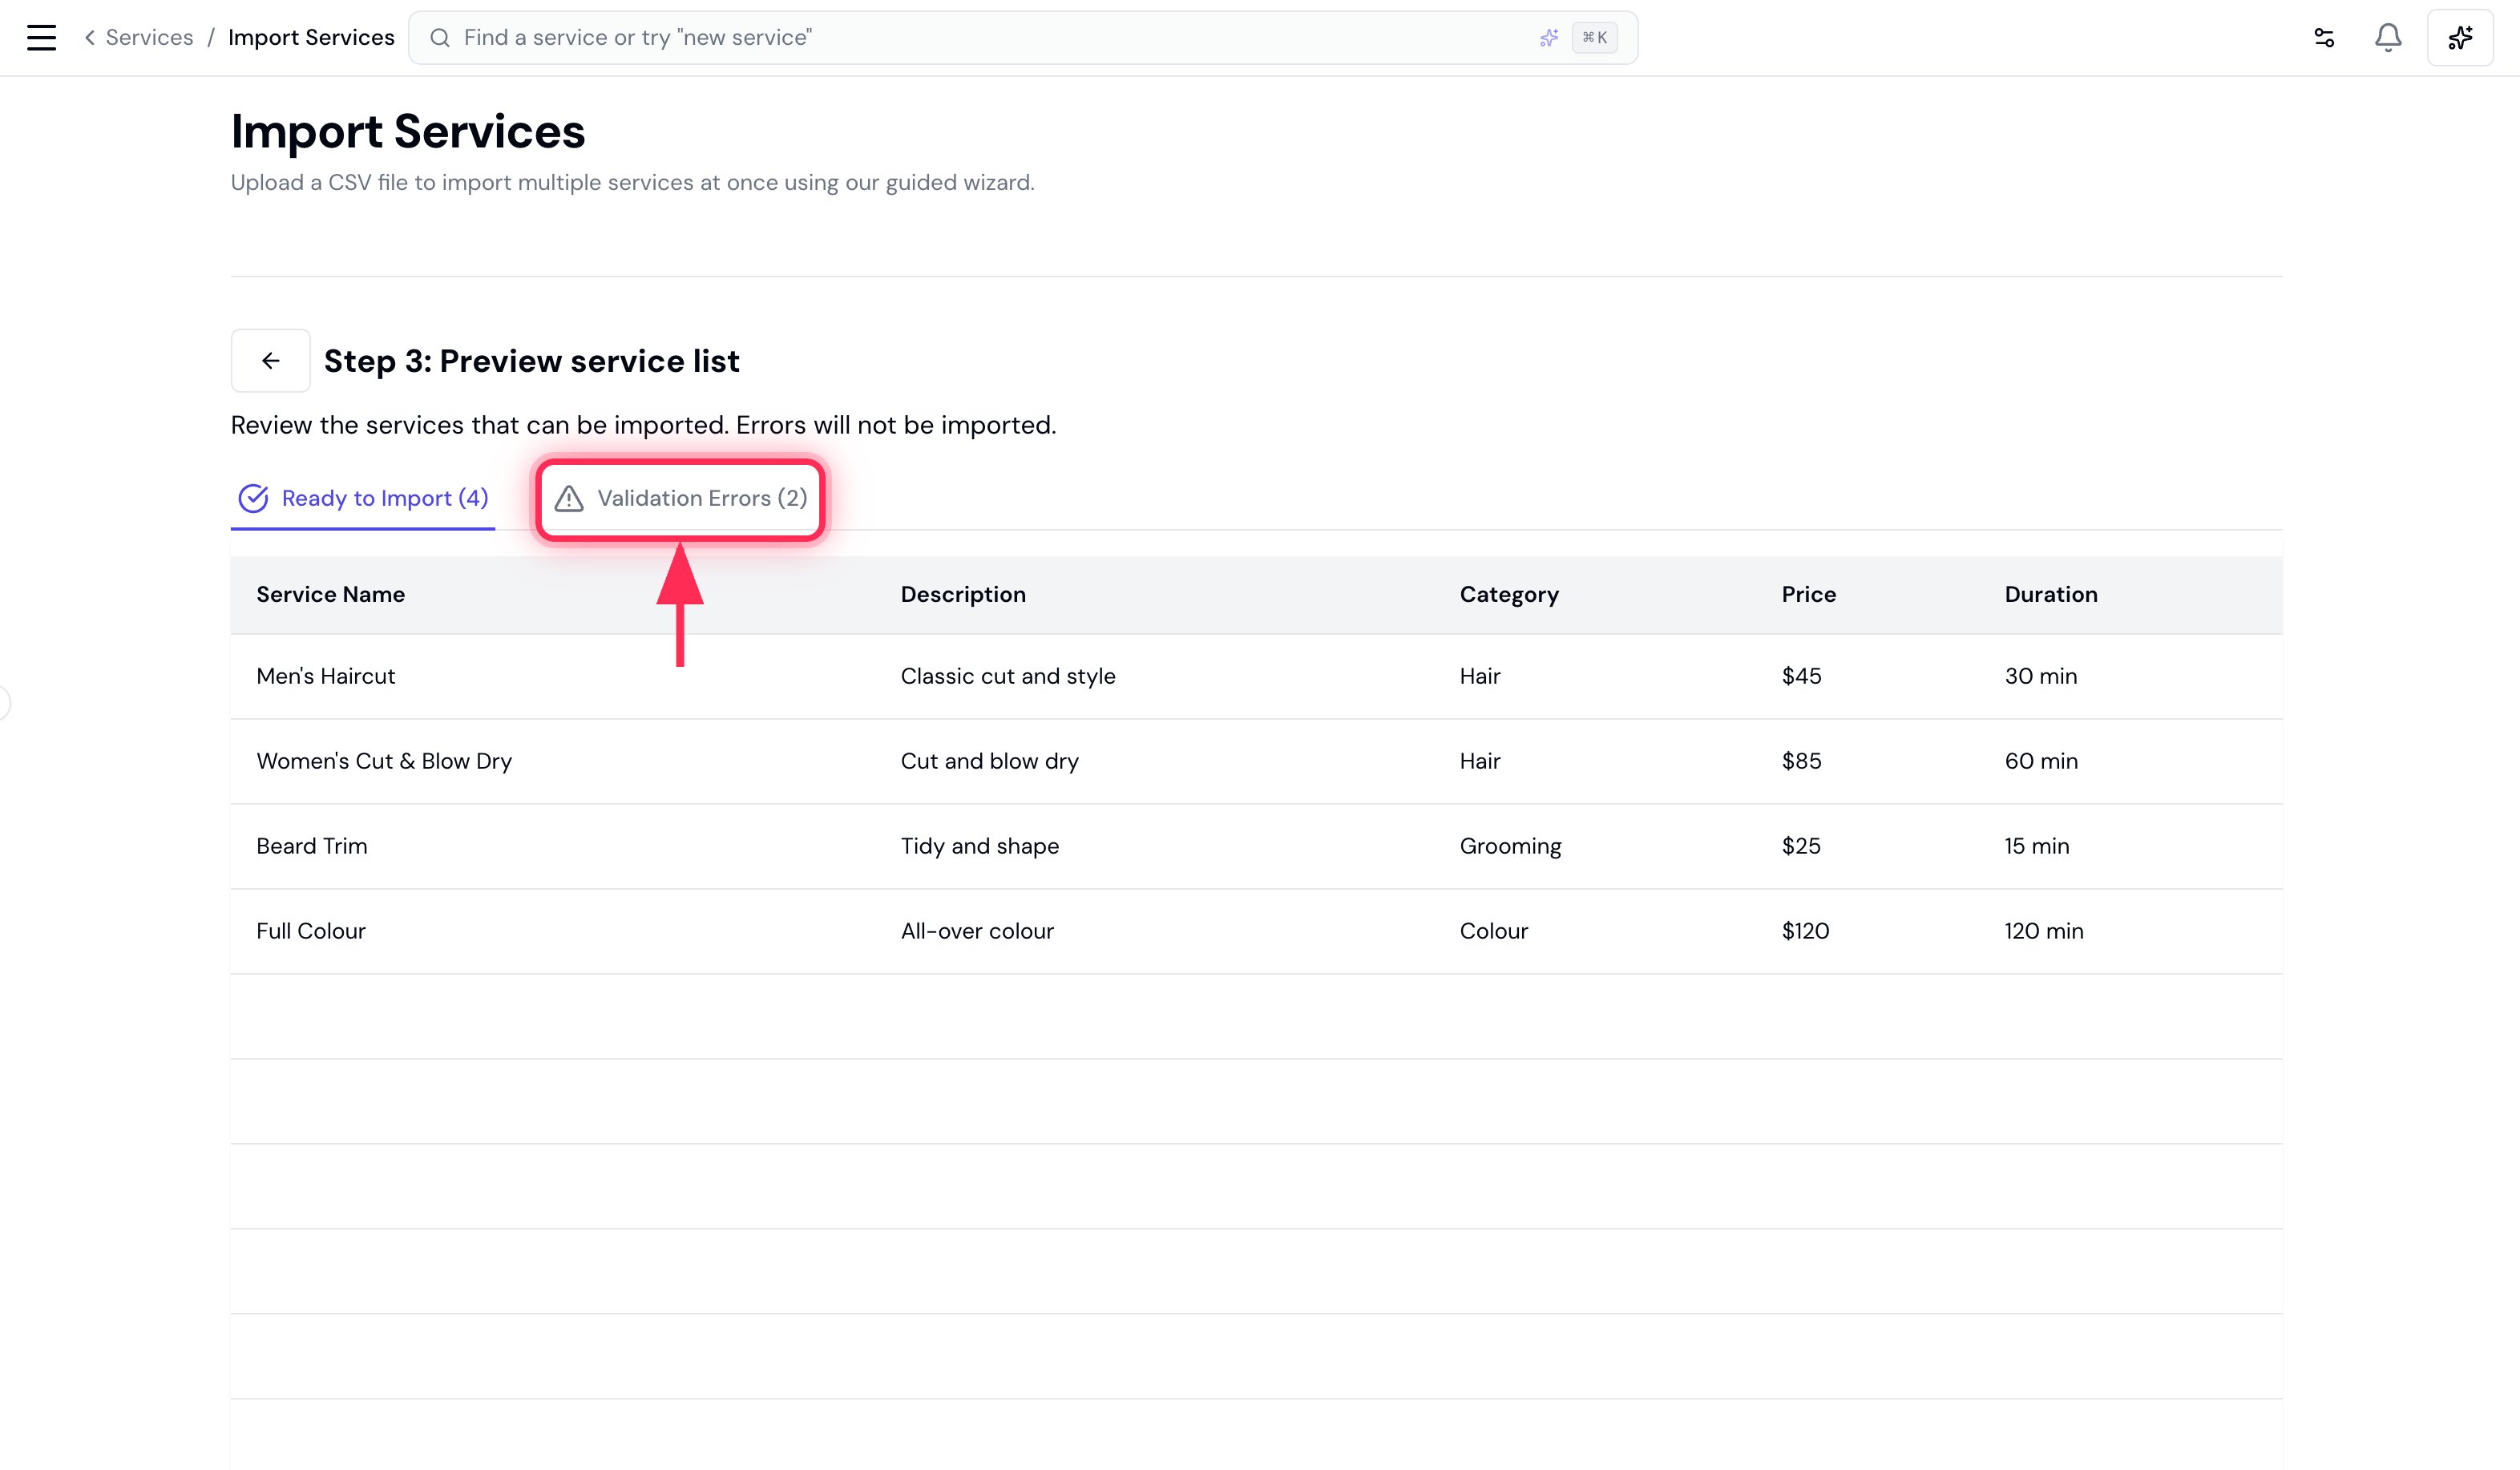
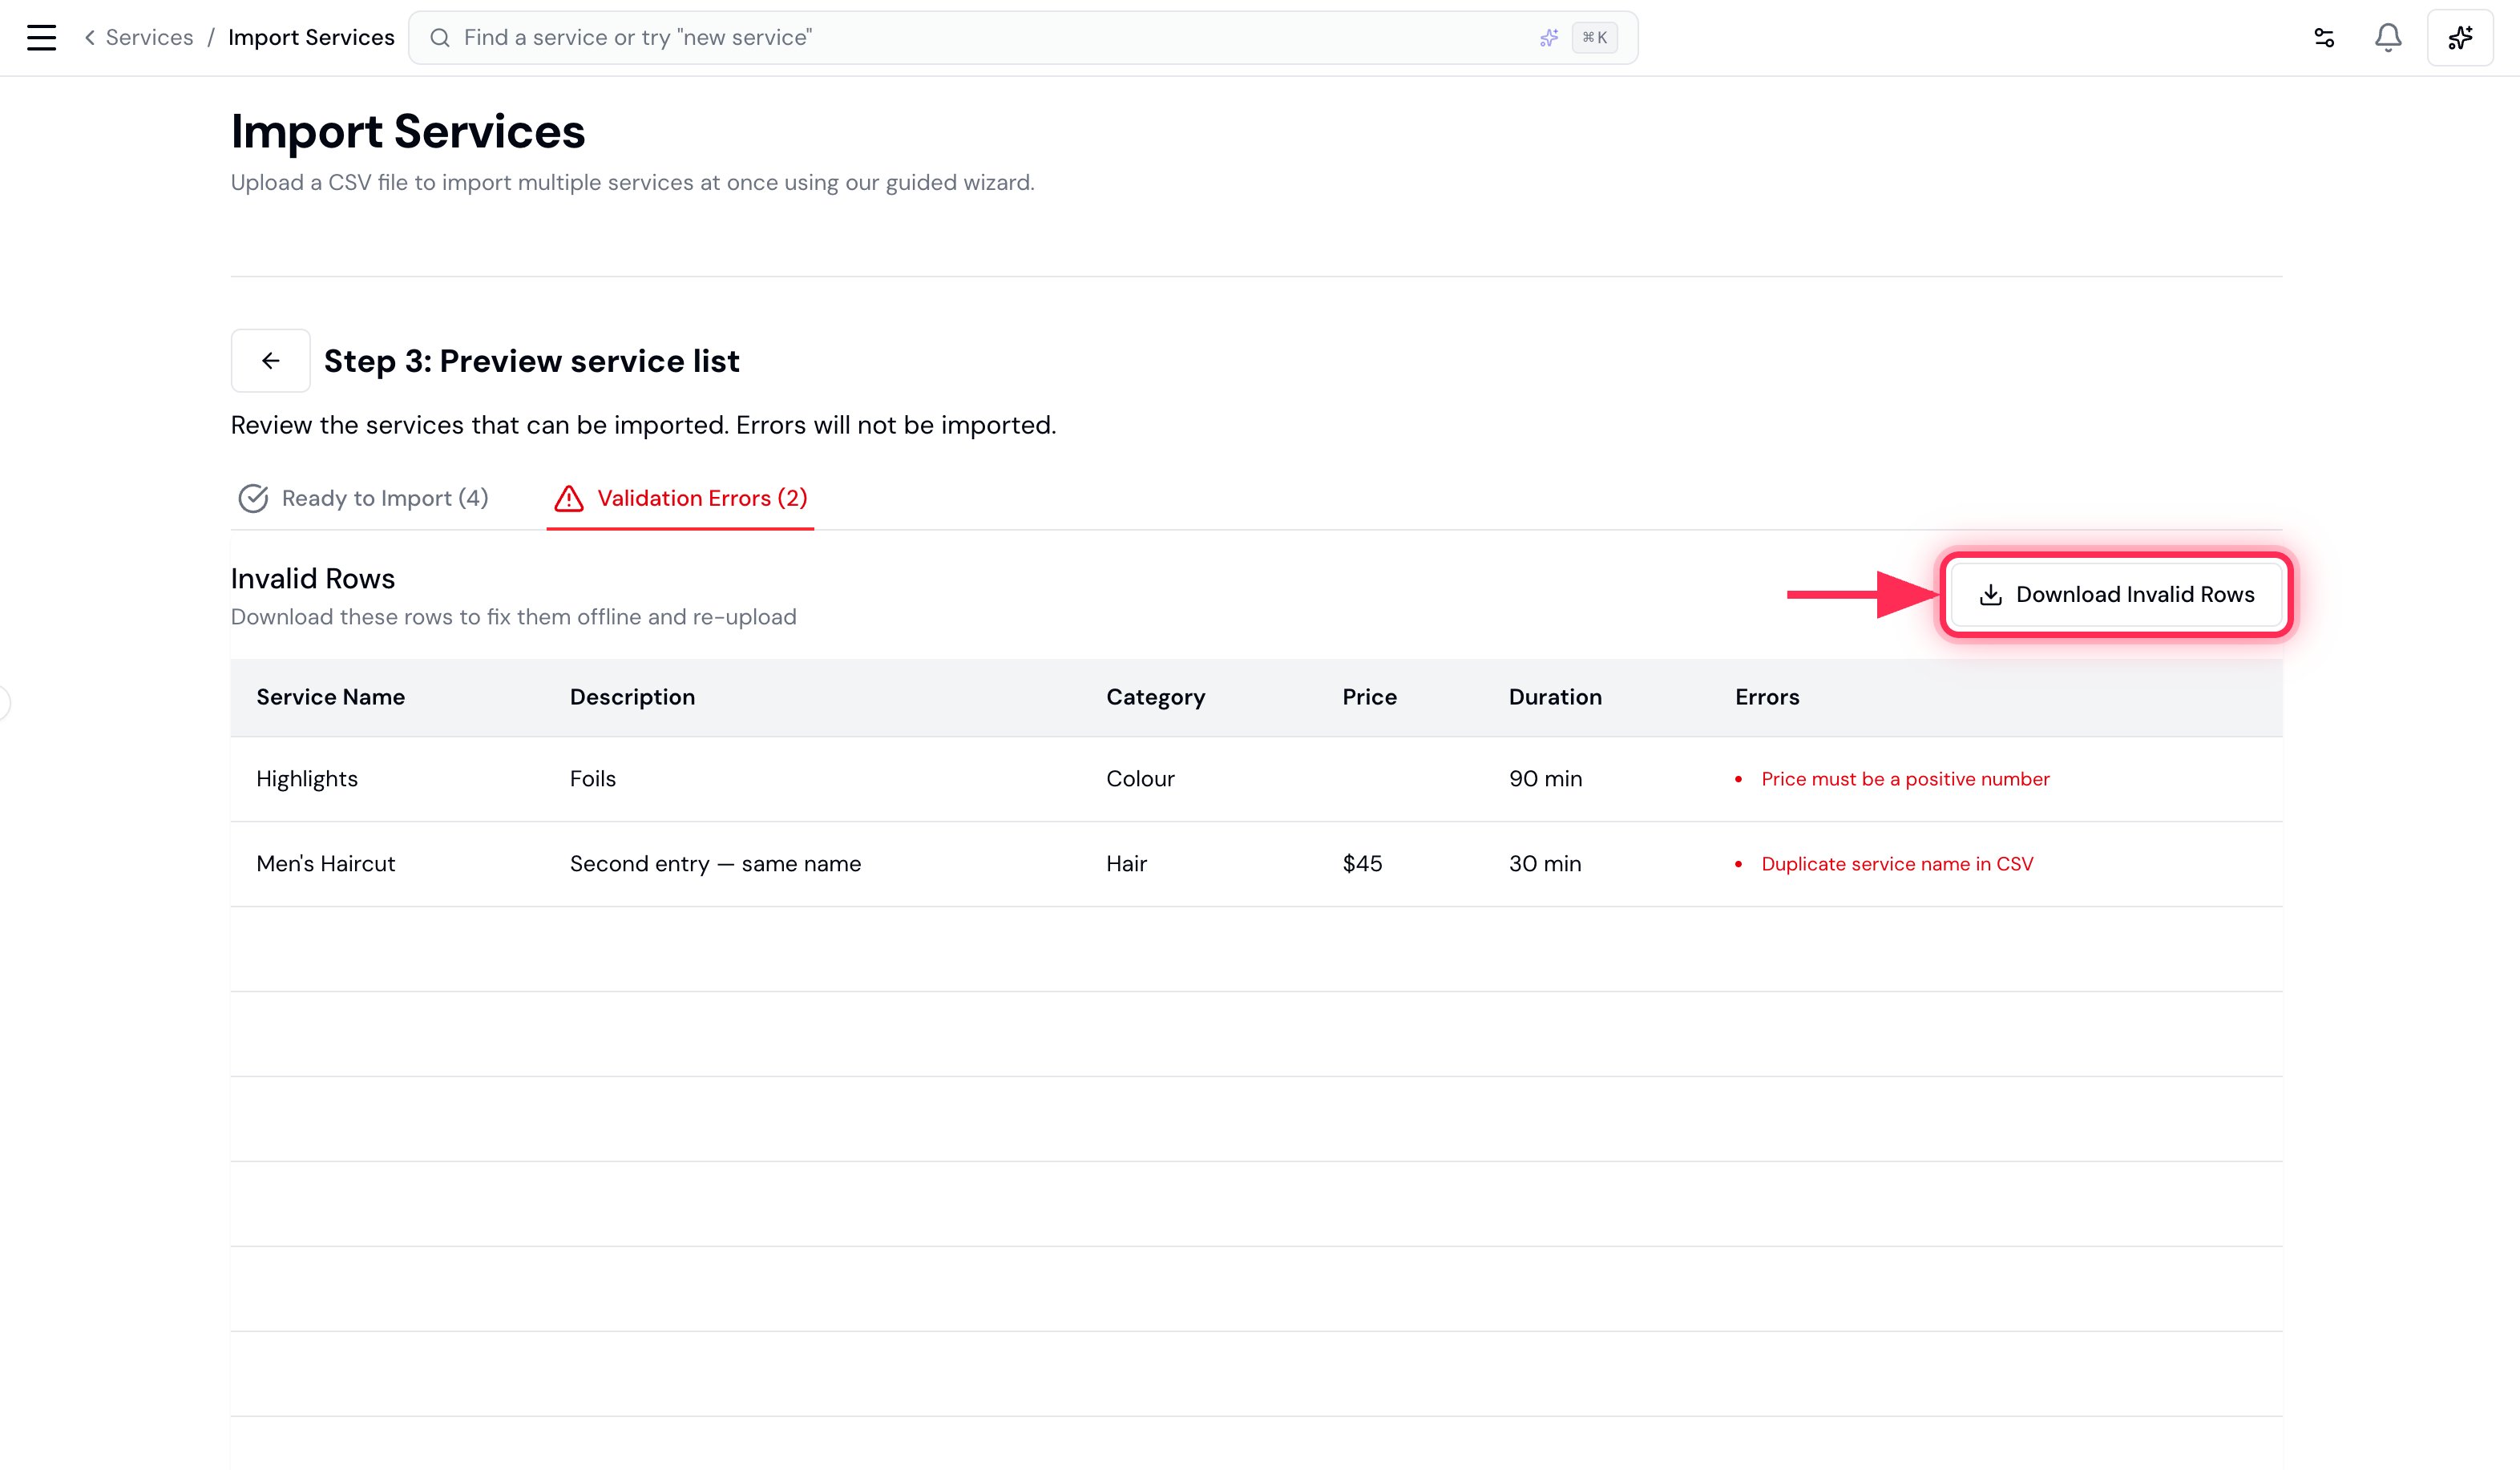
A service whose name already exists in your catalogue is also flagged here, so re-running an import never creates duplicate services.
5. Import
Click Import. Your services are added, and any new categories are created for you.
Part 4 — Import your products into Bella Booking
Finally, bring your products CSV into Bella.What Bella recognises
Bella matches common header names automatically. The required fields are Product name and Unit price — everything else is optional.| Column | What it’s for |
|---|---|
| Product name (required) | The name of the product. |
| Unit price (required) | The retail price per unit (e.g. 24.00). |
| Brand name | The brand or manufacturer. |
| Purchase cost | What you pay per unit — used for stock and margin reporting. |
| SKU | Your stock-keeping-unit identifier. |
| Barcode | The product barcode. |
| Description | An optional description. |
1. Open the importer
On the Products page (Catalogue → Products), click Import (top right, next to Add product). You’ll need the Manage products permission.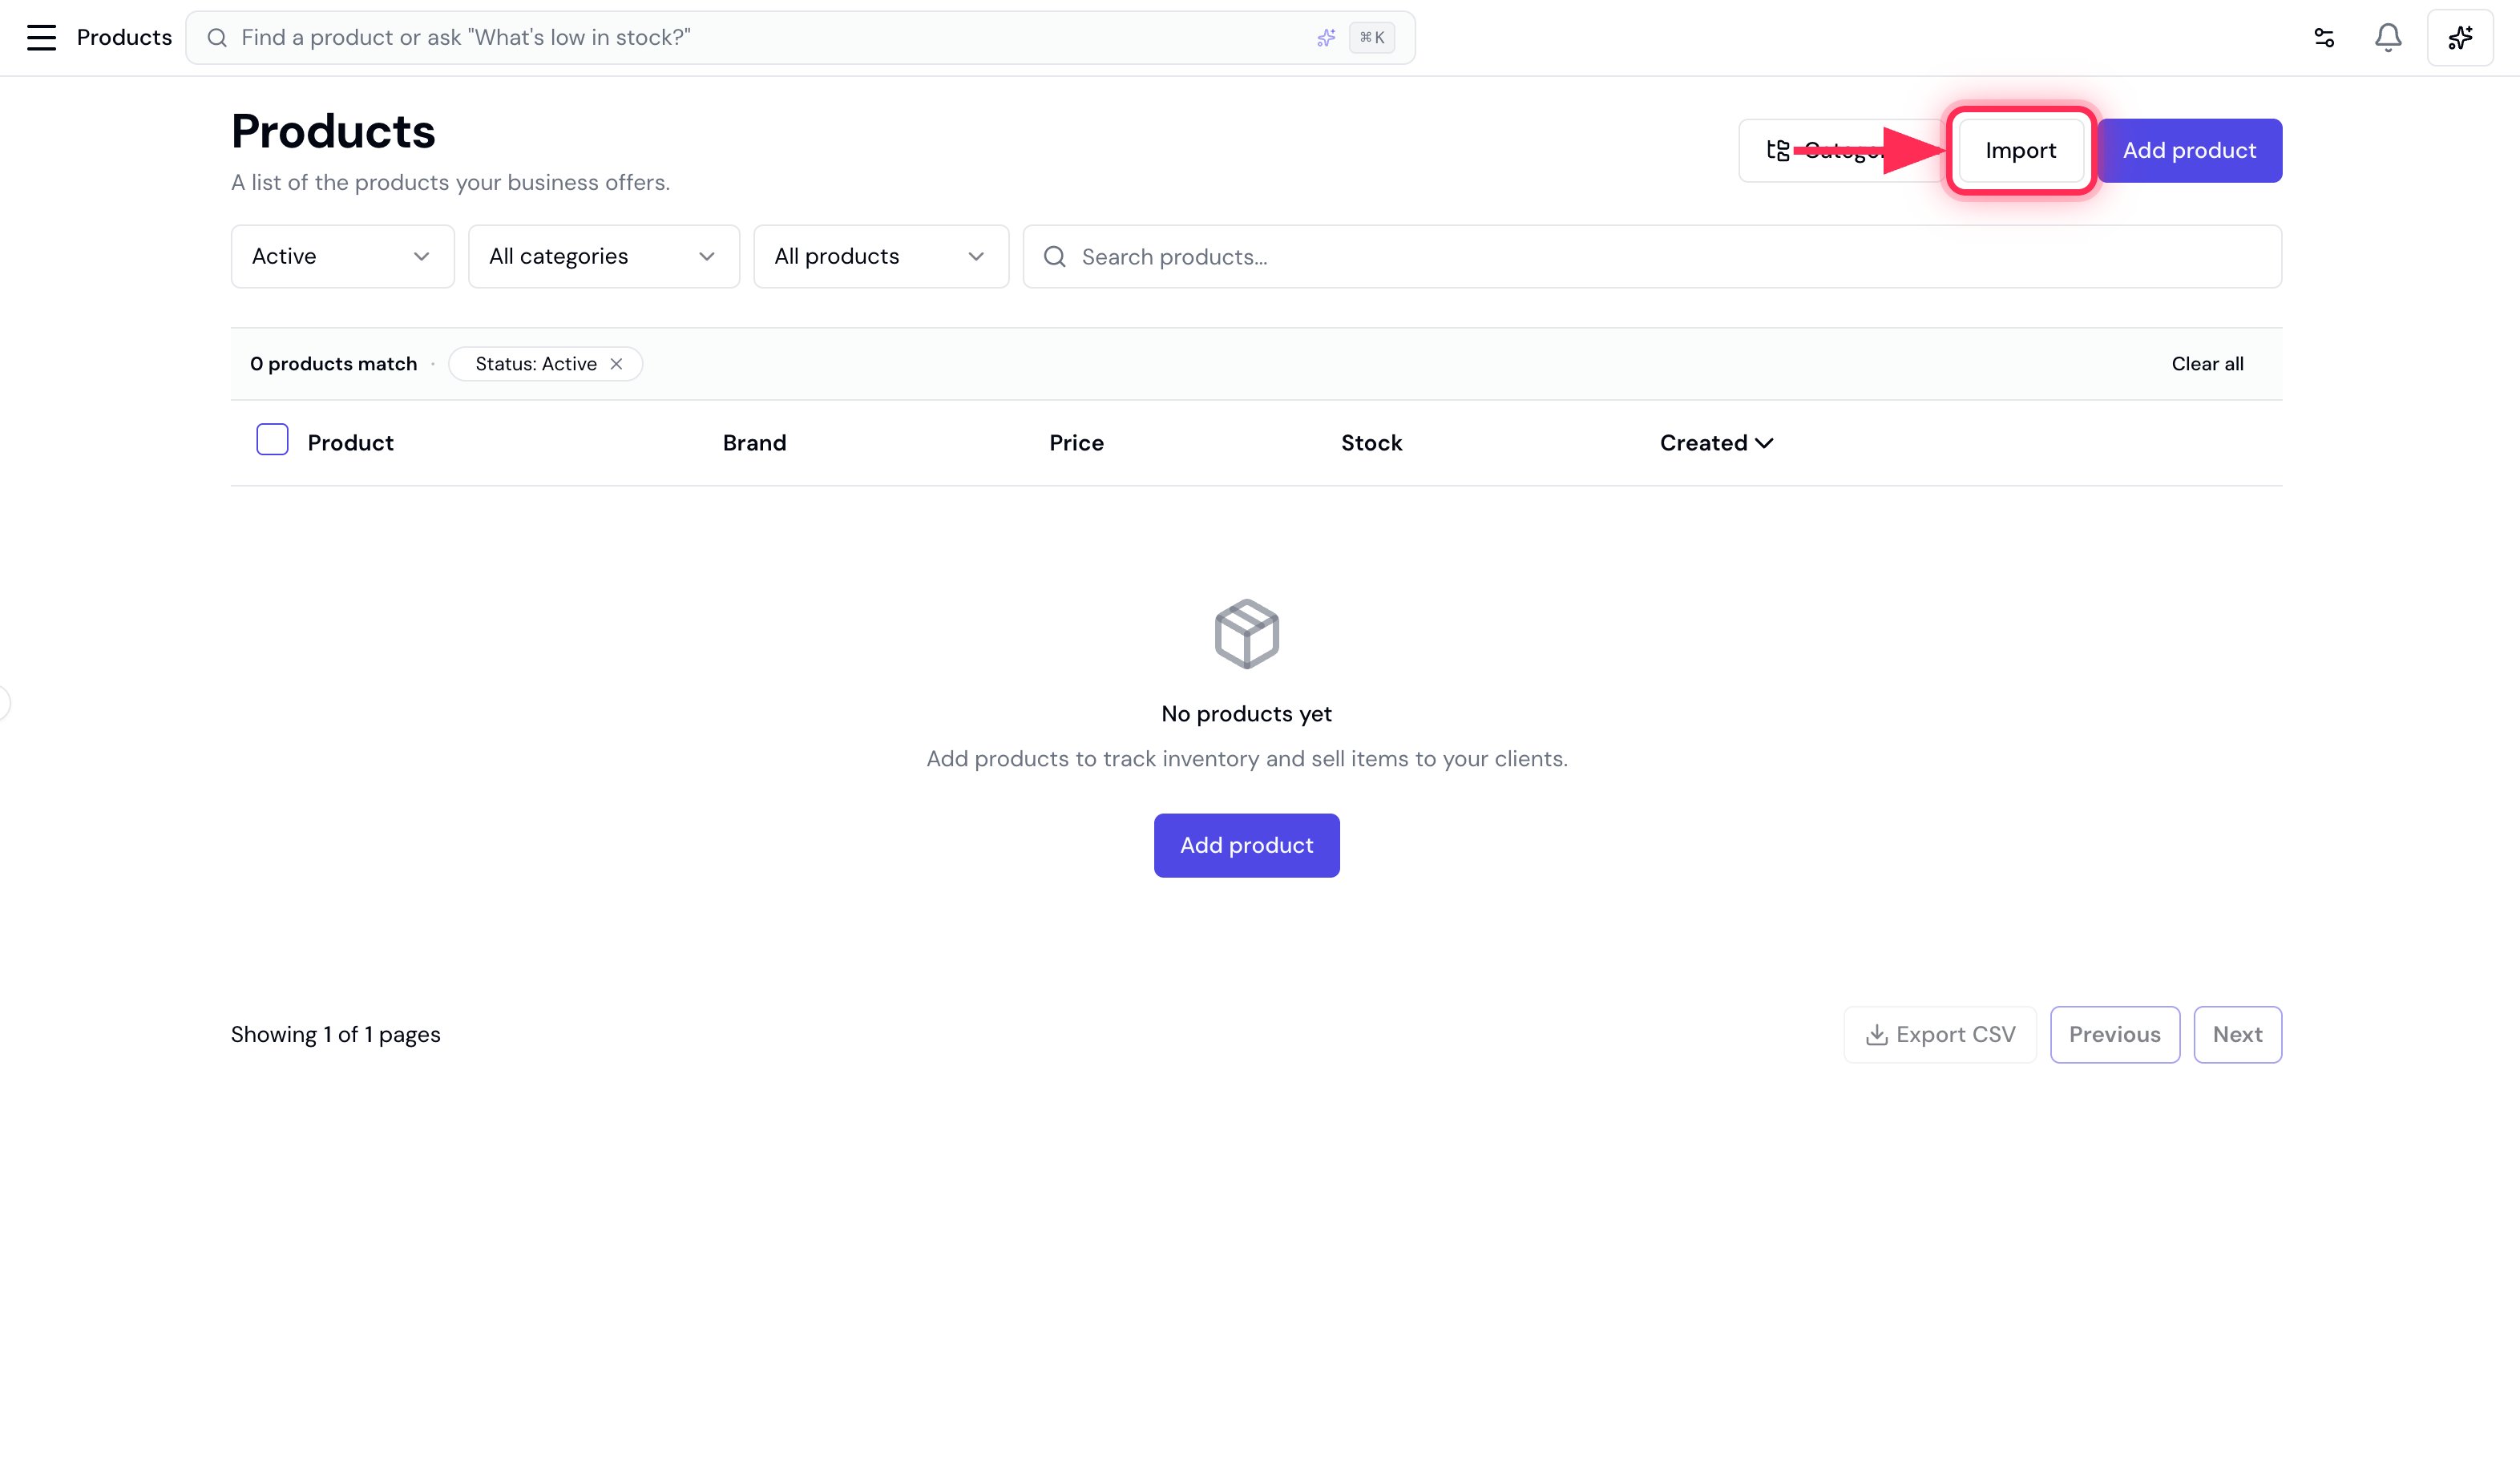
2. Upload your file
Drag your CSV onto the upload area, or click Choose a CSV file. No file yet? Click Download template for a ready-made CSV with the right headers.3. Match your columns
Bella auto-matches each of its fields to a column in your file. Check the matches (Product name and Unit price are required), then click Next.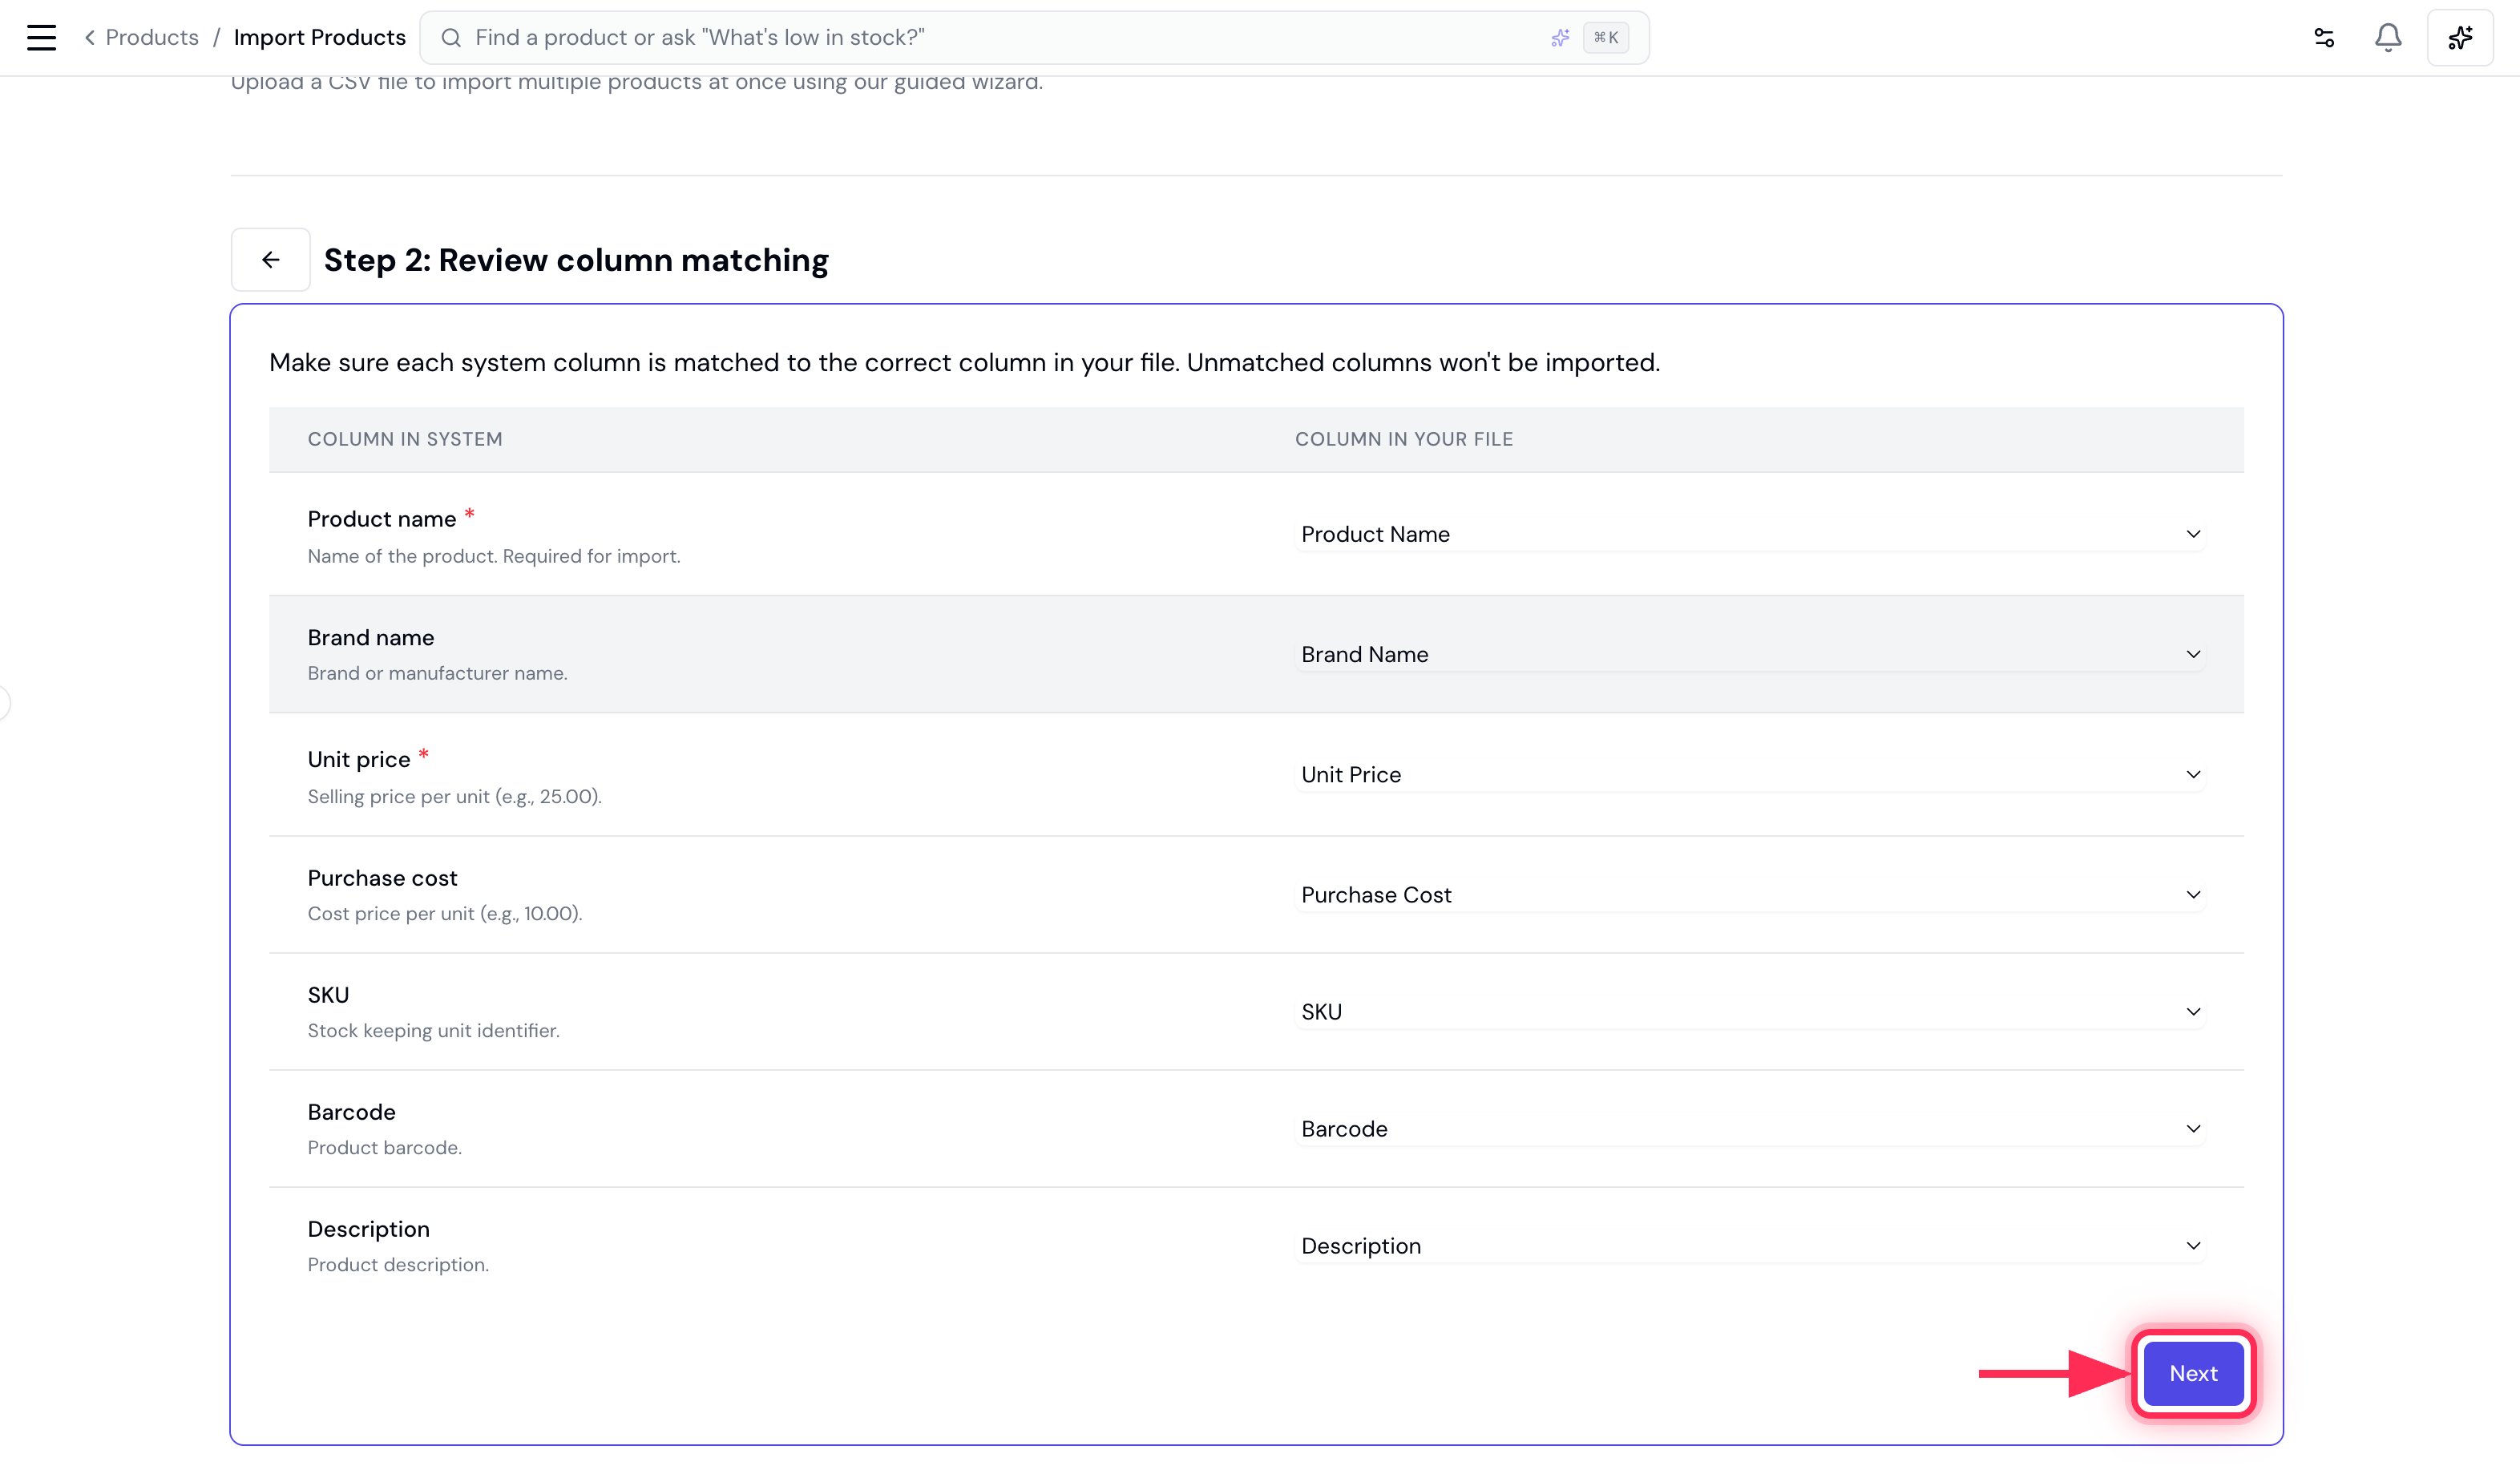
4. Review and fix errors
Bella validates every row and splits the results into two tabs:- Ready to Import — rows that will be added, with their brand, price, cost, SKU and barcode.
- Validation Errors — rows that can’t be imported yet.
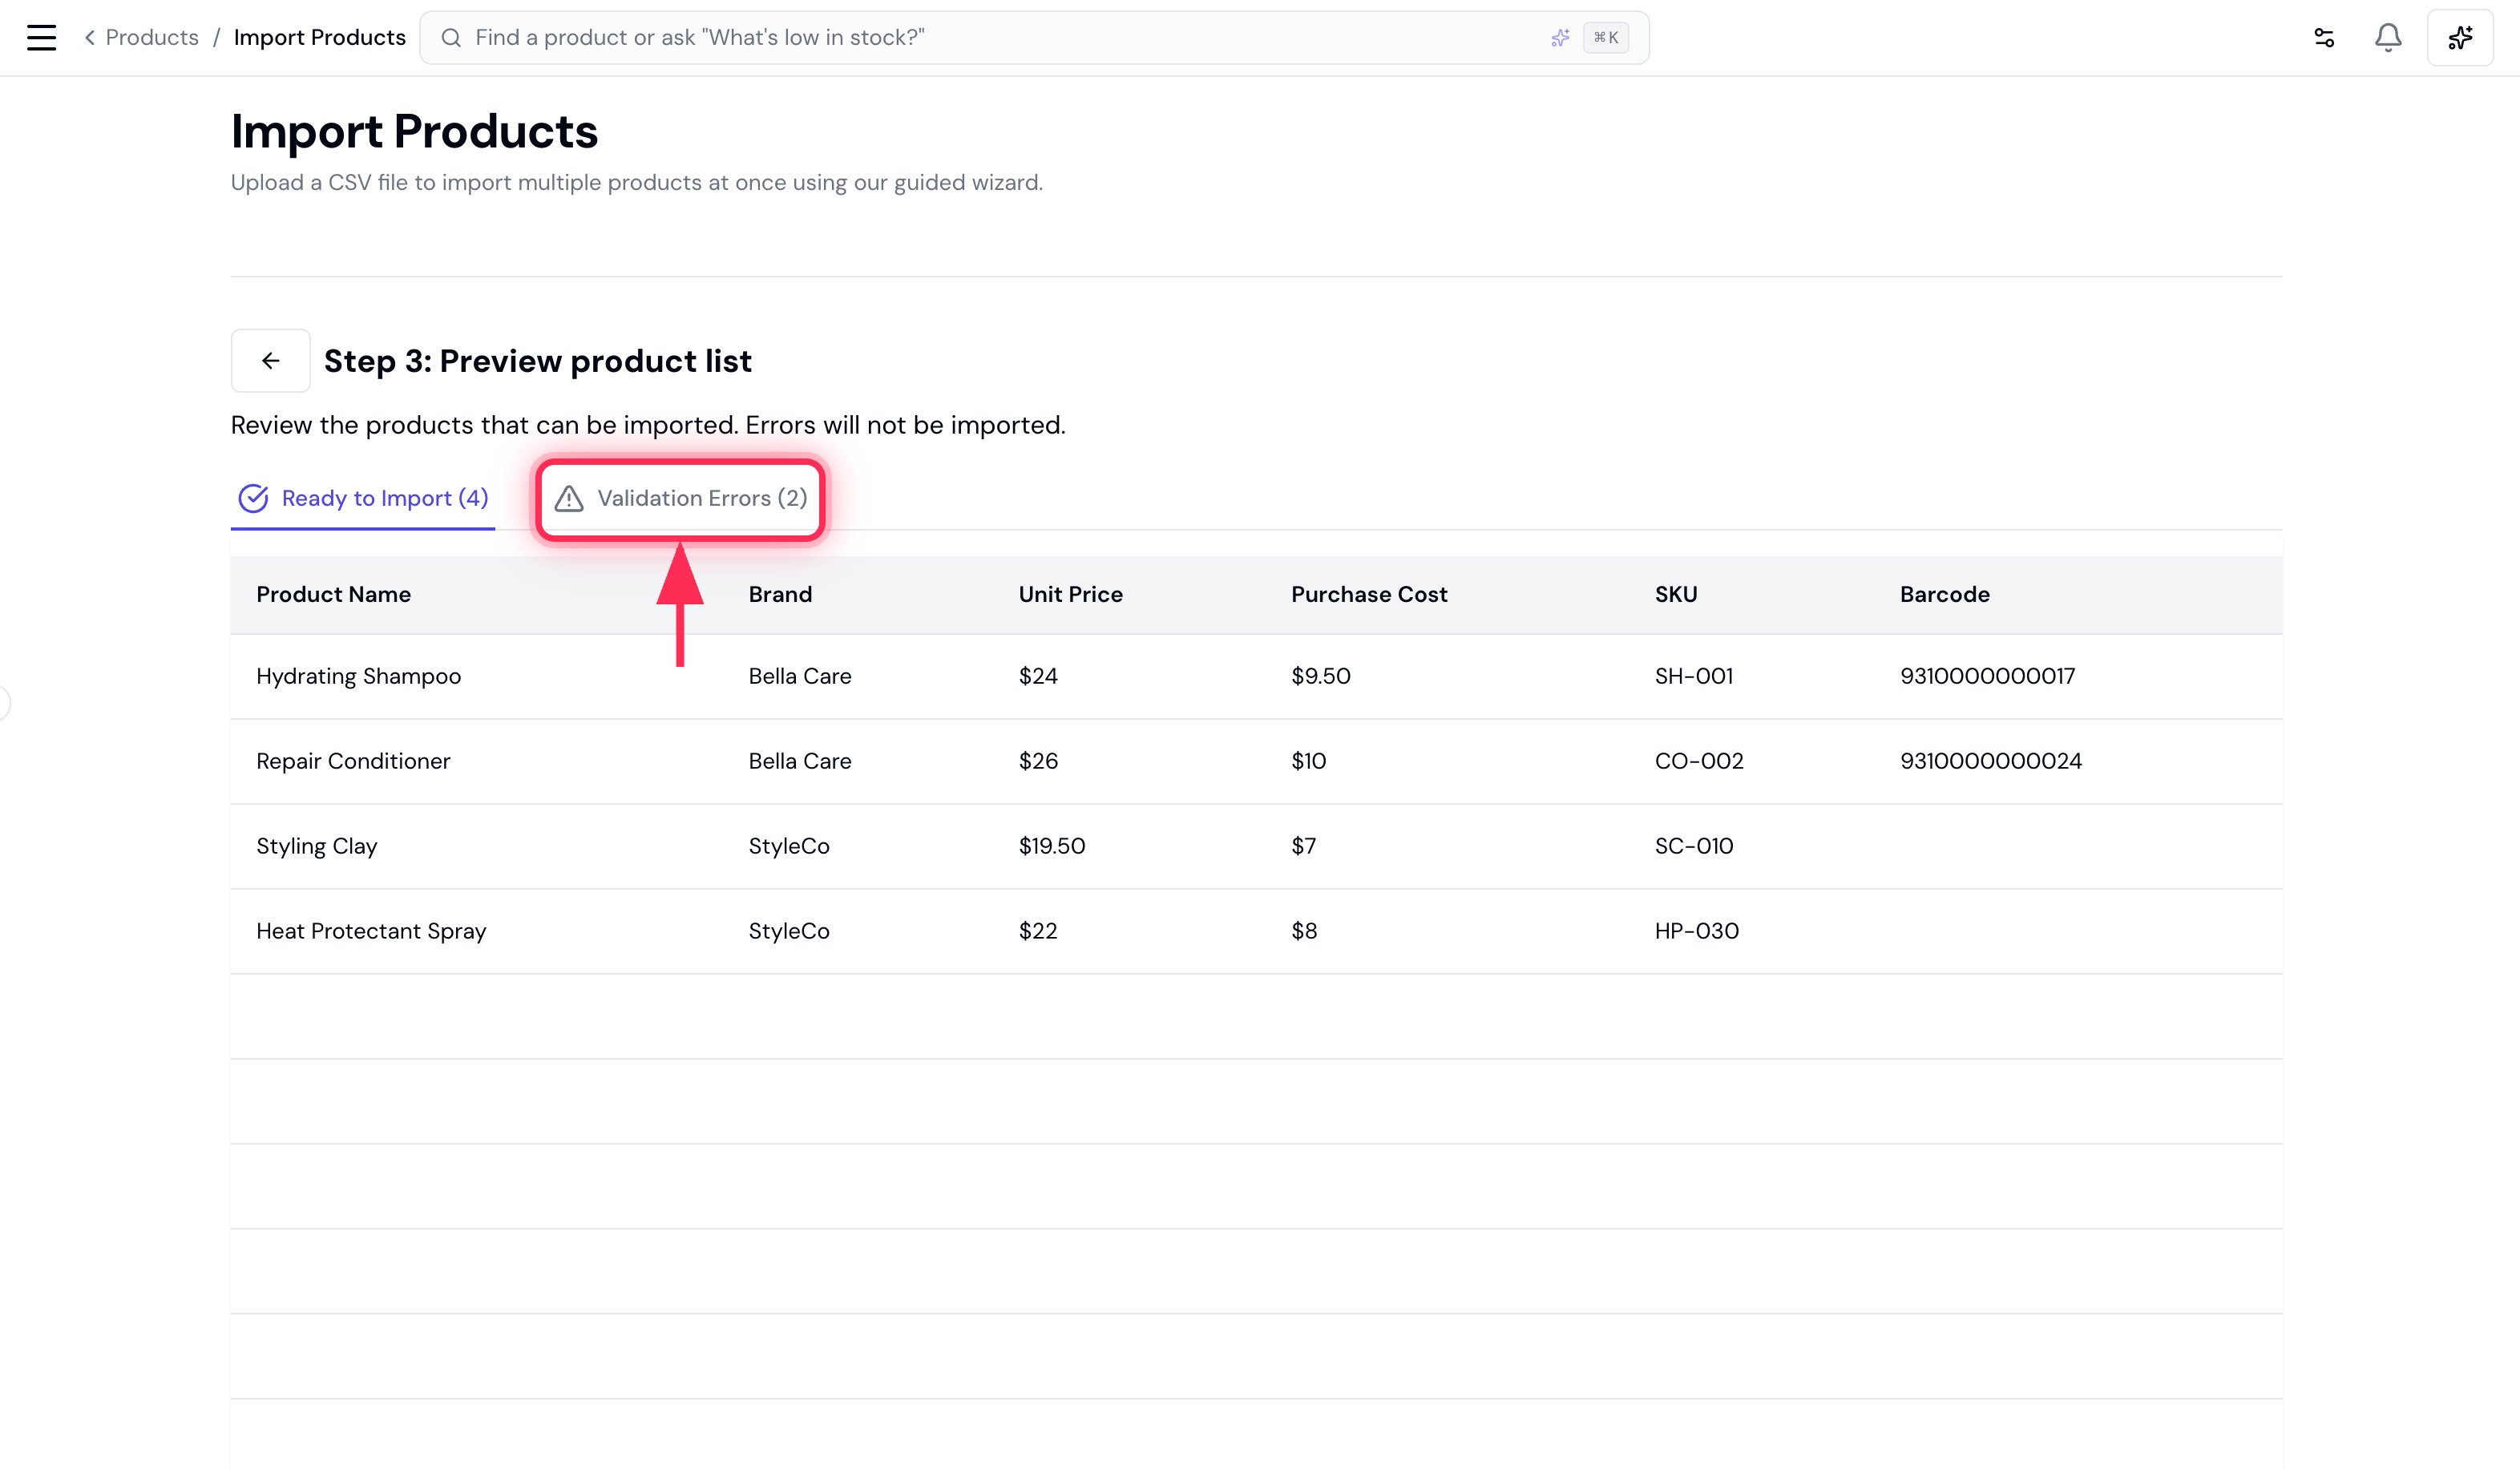

A product whose name already exists in your catalogue is also flagged here, so re-running an import never creates duplicate products.
5. Import
Click Import and your products are added to your catalogue.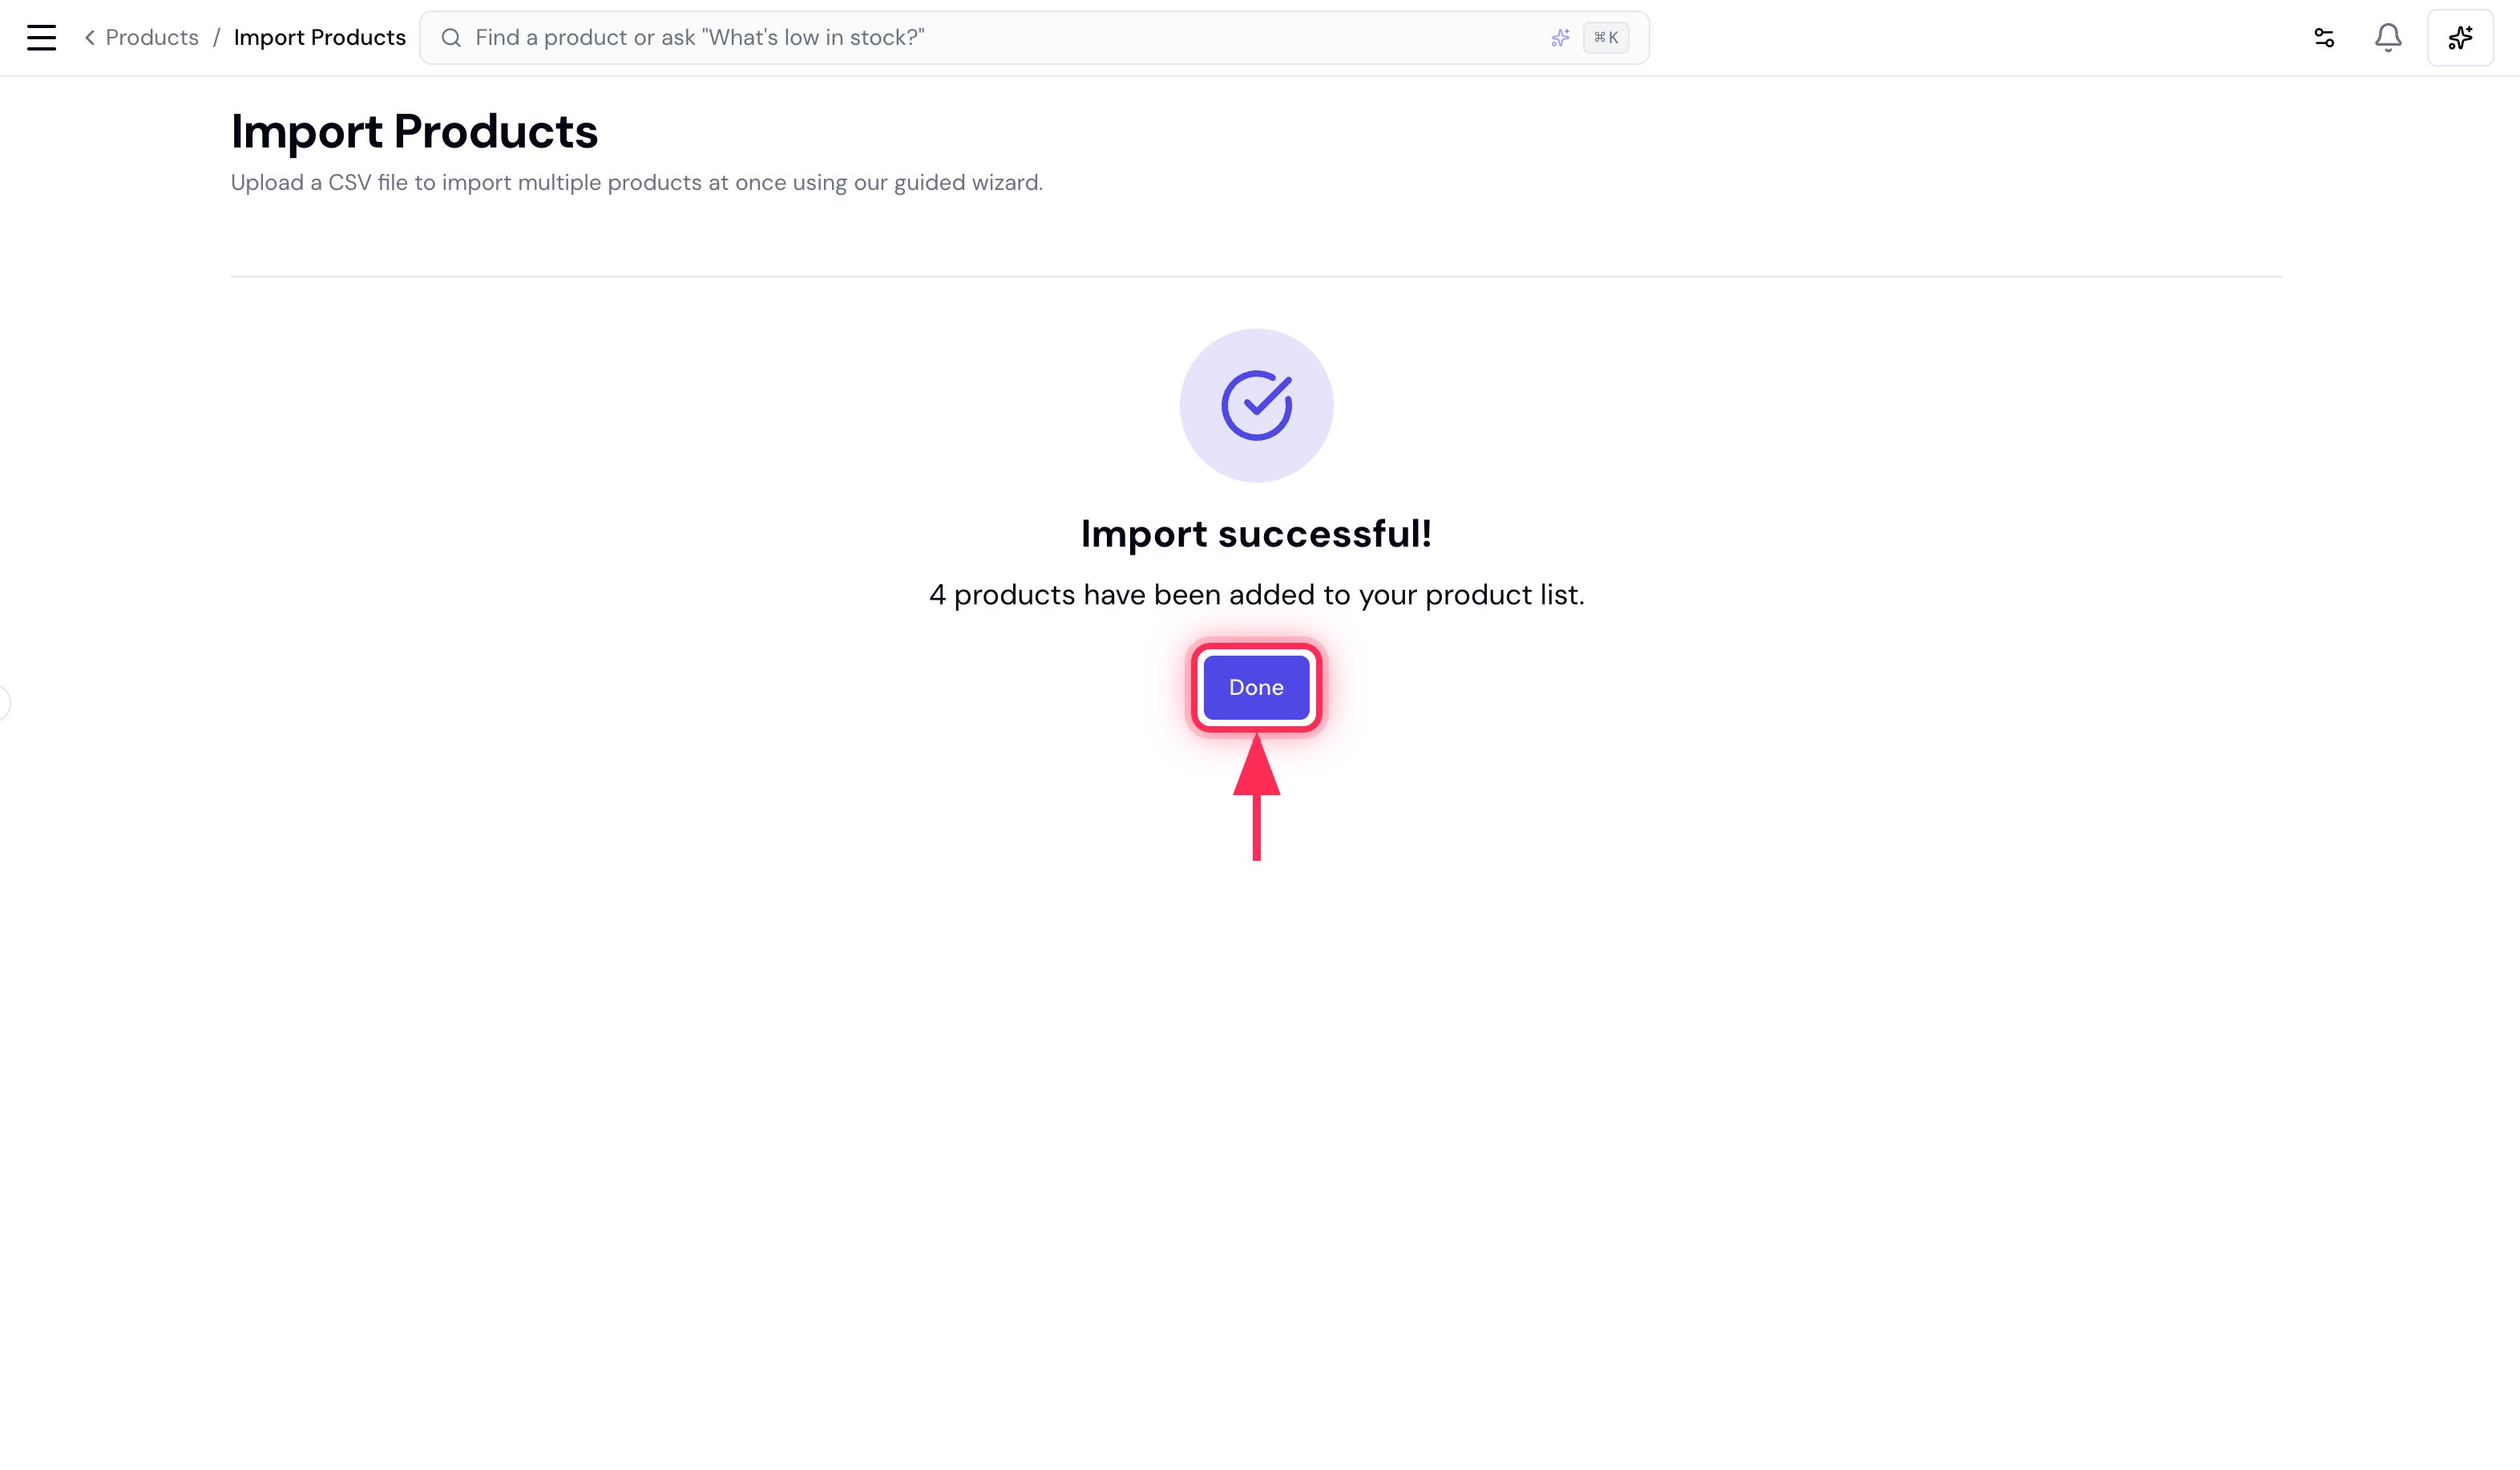
Switching from a different platform too? The Bella import steps above are identical for any system — see Switching from Other Software for export steps for Vagaro, Phorest, Mindbody, Square and more.